How to Add Wall Sconces to a Basement Stairway
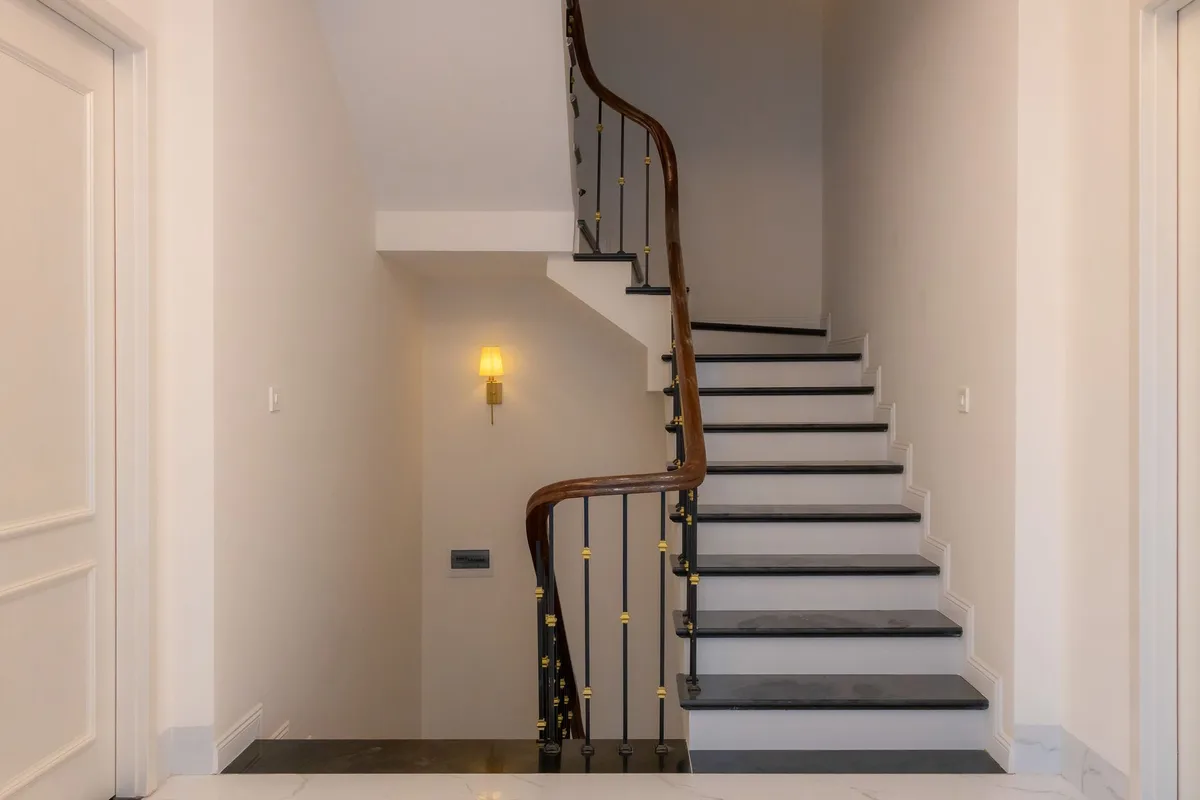
Basement stairways can often feel like utilitarian tunnels, dark, a bit dingy, and certainly not a space you’d want to linger in. But what if they could be more? What if they could be a welcoming, well-lit transition into the rest of your home, adding both functionality and a touch of style?
That’s precisely where wall sconces come in. Installing wall sconces on your basement stairway isn’t just about shedding light; it’s about enhancing safety, improving accessibility, and completely transforming the aesthetic of a frequently overlooked area.
Many homeowners shy away from DIY electrical projects, and I get it. The thought of working with wires can be intimidating, bringing up all sorts of concerns about safety and potential damage. But here’s the thing: installing wall sconces on a basement stairway, when approached methodically and with the right knowledge, is entirely achievable for the determined DIYer.
It’s a rewarding project that pays dividends in both utility and beauty.
This guide isn’t about slapping any old light fixture on the wall. We’re talking about strategically placing sconces to illuminate every step, eliminate shadows, and create a warm, inviting atmosphere. We’ll cover everything from choosing the right sconces for your space and style, to understanding the electrical nitty-gritty, to the actual hands-on installation process.
Forget those harsh overhead bulbs that cast unsettling shadows or the single dim light at the top and bottom. We’re going for thoughtful, consistent illumination that makes your basement stairs not just safe, but genuinely inviting. Let’s light up those steps and bring your basement to life.
Why Wall Sconces Are the Perfect Solution for Basement Stairways
Before we dive into the “how,” let’s really nail down the “why.” Basement stairwells present a unique set of challenges that traditional lighting often struggles to address effectively. Think about it: they’re usually narrow, they have vertical wall space that can be utilized, and they demand a high level of safety due to the potential for falls.
Enhanced Safety and Visibility
This is paramount. A dimly lit stairway is a tripping hazard waiting to happen. Wall sconces, strategically placed at regular intervals along the stair’s ascent, ensure that every single step is clearly illuminated.
This eliminates those dreaded dark patches where a foot could misstep. Unlike a single overhead fixture that might cast shadows or not reach certain steps effectively, multiple sconces provide uniform, consistent light. This is especially crucial for an area that might see a lot of use, especially in a busy household.
Good lighting here means fewer stumbles, particularly when carrying laundry baskets, boxes, or with little ones descending.
Aesthetic Appeal and Ambiance
Beyond safety, let’s talk about looks. Basement stairways are often seen as purely functional spaces, but they don’t have to be. Wall sconces offer an incredible opportunity to inject style and personality.
They can serve as decorative elements in themselves, reflecting your home’s decor. From modern and minimalist to rustic farmhouse or classic and elegant, there’s a sconce design to match virtually any aesthetic. They cast a softer, more ambient light than a harsh ceiling fixture, creating a warmer, more welcoming feel as you move between floors.
This can make your basement feel less like a stark, utilitarian space and more like an integrated part of your living area.
Maximizing Space and Design Flexibility
Basement stairways are often constrained by space. Running wires for ceiling lights can be complex and may require drywall work. Wall sconces, however, utilize vertical wall space that’s often underutilized.
This means you can achieve excellent lighting without encroaching on headroom or making the stairwell feel more cramped. Their relatively compact size also means you can group them or space them out as needed, offering flexibility in design and illumination levels. You’re not confined to a central ceiling point; you can tailor the lighting precisely to the shape and needs of your specific stairway.
Energy Efficiency and Bulb Options
Modern sconces, especially when paired with LED bulbs, are incredibly energy-efficient. This means lower electricity bills, which is always a win. LED bulbs also last a very long time, reducing the frequency of bulb changes, a welcome convenience for lights that might be hard to reach.
You also have a wide range of color temperatures to choose from with LEDs, allowing you to fine-tune the ambiance from a crisp, bright light to a warm, cozy glow.
Planning Your Basement Stairway Sconce Installation
Before you even think about touching a wire, a solid plan is your best friend. This isn’t the part you want to rush. Good planning saves you time, prevents mistakes, and ensures the final result is exactly what you envisioned, safe, functional, and beautiful.
Assessing Your Stairway and Power Needs
First, take a good, hard look at your stairway.
- Dimensions: Measure the length of the stairway, the height of the walls, and the width of the steps. This will help you determine how many sconces you’ll need and how to space them effectively.
- Existing Electrical: Crucially, identify your existing power source. Will you be tapping into an existing circuit? Is it a dedicated circuit? This is a critical safety and code compliance consideration. For basement stairs, you might be able to tap into a nearby outlet’s circuit or a hallway light fixture’s circuit. You’ll need to know if the circuit can handle the added load of your new sconces. A good rule of thumb is that most standard 15-amp circuits can handle around 1800 watts, and 20-amp circuits can handle around 2400 watts. Most sconces use minimal wattage, but it’s wise to check your breaker box and potentially consult an electrician if you’re unsure.
- Wall Material: What are your walls made of? Drywall? Plaster? Wood paneling? This will affect how you mount the sconces and run wires. Drywall is generally the easiest to work with for running new wiring.
Determining Sconce Placement and Spacing
This is where functionality meets aesthetics. The goal is to provide even illumination without creating glare or dark spots.
- Height: For safety, aim for the bottom of the sconce shade to be at least eye level or slightly above when you’re standing on the steps. A common recommendation is to mount them between 60 and 72 inches from the floor (or tread level). This ensures they don’t obstruct headroom and that the light is directed downwards onto the steps. However, this can vary based on ceiling height and sconce design; always test for glare.
- Spacing: The general principle is to have a sconce illuminate roughly two steps. If you have 12 steps, you’ll likely need around 5-6 sconces (including at the top and bottom landings, if applicable). Space them evenly along the wall. Use a tape measure and a level to ensure consistent positioning. You want the light spill from one sconce to meet or slightly overlap the spill from the next.
- On-Center vs. Offset: Some people prefer to center sconces on a particular step’s risers. Others prefer to offset them slightly for a more dynamic look. Consider how the light will fall on the treads from each position.
Choosing the Right Sconces
The market is flooded with options, but for a basement stairway, here are key features to consider:
- Light Direction: Look for sconces that direct light downwards onto the steps, as this is crucial for visibility. “Uplighters” are generally not suitable for this primary function, though some fixtures offer both up and down lighting.
- Shade Material and Opacity: Frosted or diffused glass shades will provide a softer, more even light, minimizing glare. Clear glass shades can be beautiful but may create harsh glares without the right bulb.
- Style: Pick a style that complements your home’s overall decor. Whether it’s modern, industrial, traditional, or something in between, the sconces are a chance to add a design element.
- Size: Ensure the scale of the sconce is appropriate for the size of your stairway. Overly large sconces can look out of place in a narrow stairwell, and tiny ones can get lost.
- Bulb Type: Opt for LED-compatible sconces. As mentioned, LEDs are energy-efficient, long-lasting, and come in various color temperatures. Consider the maximum wattage the sconce is rated for.
Wiring Considerations: New vs. Existing Circuits
This is a critical decision point.
- Tapping into Existing Circuits: This is often the most straightforward and cost-effective method. You’ll need to identify a nearby junction box (e.g., from a ceiling light or an outlet) that’s on a circuit with sufficient capacity. The key is to ensure you’re not overloading the existing circuit. If you’re unsure, consult an electrician.
- Running a New Circuit: If your existing circuits are maxed out or you prefer the peace of mind of a dedicated lighting circuit, you can run a new wire from your main electrical panel. This is a more involved project and usually requires an electrician, particularly concerning breaker installation and code compliance.
- Wire Type: For most interior lighting applications, 14/2 or 12/2 NM-B (Non-Metallic Sheathed Cable) wire is used, depending on the amperage of the circuit. Consult local electrical codes.
Tools and Materials You’ll Need
Gathering everything before you start is key to a smooth installation. Don’t underestimate the value of having the right tools.
Essential Tools for the Job
- Safety Gear: Non-contact voltage tester, safety glasses, work gloves.
- Measuring & Marking: Tape measure, pencil, stud finder, level.
- Cutting & Stripping: Wire strippers, utility knife, drywall saw or oscillating multi-tool (for cutting holes for boxes).
- Fastening & Assembling: Screwdriver set (Phillips and flathead), drill with various bits, pliers (needle-nose and standard).
- Electrical Specific: Fish tape (if running wires through walls), voltage meter (for confirming power is off).
- Other: Ladder or sturdy step stool, drop cloths to protect the stairs.
Necessary Materials
- Wall Sconces: Your chosen fixtures, complete with mounting hardware.
- Electrical Boxes: UL-listed ceiling or pancake boxes rated for fixture support. You may need “old work” or “cut-in” boxes if you’re not working with studs.
- Electrical Wire: Appropriate gauge NM-B wire (e.g., 14/2 or 12/2) long enough to connect your power source to each sconce location.
- Wire Connectors (Wire Nuts): Assorted sizes to make secure connections.
- Cable Staples or Clamps: To secure the electrical cable to studs or joists if running new wire within walls.
- Extension Rings (if needed): To bring the electrical box flush with the finished wall surface.
- Light Bulbs: Appropriate type and wattage for your sconces (preferably LED).
- Caulk or Spackle: For finishing the wall around the electrical boxes.
Step-by-Step Installation Guide
Here it is, the main event. Take your time, work methodically, and always prioritize safety.
Step 1: Turn Off the Power!
This is non-negotiable.
- Go to your main electrical panel (breaker box).
- Identify the breaker that controls the circuit you’ll be working with. If you’re unsure, throw the main breaker that shuts off all power to your house.
- Flip the identified breaker to the “OFF” position.
- Crucially: Use your non-contact voltage tester at the intended power source (e.g., the junction box you’ll tap into) to confirm that the power is indeed off. Test it on a known live circuit first to ensure the tester is working, then test your target circuit. Never assume!
Step 2: Plan and Mark Your Sconce Locations
Using your measurements from the planning phase:
- Use your level and pencil to mark the exact center point for each electrical box on the wall. Ensure they are at the planned height and evenly spaced.
- If you’re using a stud finder, try to locate studs behind these marks. Mounting directly to studs is ideal for secure fixture support. If you can’t hit a stud, you’ll need to use special heavy-duty drywall anchors or old-work electrical boxes designed for load-bearing.
Step 3: Cut Holes for Electrical Boxes
- If mounting to a stud: Hold your electrical box against the wall at your marked location, aligning it with the stud. Trace around the box. Carefully cut along the traced line with a drywall saw or oscillating multi-tool.
- If using “old work” boxes: Trace the designated cutout area for the box onto the wall. These boxes often have a template. Cut out the hole.
- Ensure a snug fit. The box should sit flush in the opening once installed, with its mounting bracket or tabs securing it.
Step 4: Install the Electrical Boxes
- If mounting to a stud: Position the electrical box so it’s flush with the wall surface. Secure it to the stud using screws or nails provided with the box.
- If using “old work” boxes: Feed the box into the cutout. The tabs or “wings” on the box will swivel and clamp onto the back of the drywall as you tighten the mounting screws. Ensure it’s secure.
- If needed, install an extension ring to bring the box flush with the finished wall surface if it’s recessed.
Step 5: Run the Electrical Wire
This is often the trickiest part.
- From the Power Source: If tapping into an existing junction box, open it and carefully feed your new NM-B cable into the box, leaving enough slack for connections. Secure the cable to the box with a cable clamp.
- Through Walls: If running wire from a distant source, you’ll need to carefully fish the wire through the wall cavities. This might involve cutting small access holes (which you’ll patch later) or using fishing tools. Always follow the path of least resistance and avoid electrical or plumbing lines. Secure the cable to studs or joists every few feet with cable staples or clamps, as per code, to prevent it from sagging. Ensure the wires are not pinched or damaged.
- To Each Sconce Box: Run the cable from the power source to the first sconce box, and then from the first box to the second, and so on, creating a “daisy-chain” effect (unless you’re running individual wires from a central point, which is more complex). Leave about 8-10 inches of wire extending from each box.
Step 6: Make the Electrical Connections
This is where you connect your wires. DOUBLE-CHECK THAT THE POWER IS STILL OFF.
- In the Power Source Box: If tapping into an existing box, connect the new wire. Typically, this involves connecting the black (hot) wire from your new cable to the existing hot wire (usually black or red) with a wire nut. Same for the white (neutral) wires and the bare copper or green (ground) wires. If you’re adding to an existing circuit that’s already wired, consult an electrician to ensure proper connection methods for that specific setup apply.
- In Each Sconce Box:
- Feed the NM-B cable into the electrical box through a cable clamp.
- Separate the wires, strip about 1/2 inch of insulation from the end of each wire (black, white, and ground).
- Connect the wires from the cable to the wires extending from the sconce fixture and to any wires in the box that will carry power to the next sconce (if daisy-chaining).
- Standard Connection:
- Black wire from cable + Black wire from sconce + Black wire to the next box (if applicable) = Connect with a wire nut.
- White wire from cable + White wire from sconce + White wire to the next box (if applicable) = Connect with a wire nut.
- Ground wire from cable + Ground wire from sconce + Ground wire to the next box (if applicable) = Connect with a wire nut.
- Important: Ensure all connections are tight and secure. Tug gently on each wire to confirm the connection. Wrap electrical tape around the wire nuts for added security, if desired.
Step 7: Mount the Sconces
- Install the Mounting Bracket: Each sconce will come with a mounting bracket that attaches to the electrical box. Screw this bracket securely into the electrical box. Ensure it’s level.
- Connect the Fixture: Carefully tuck the connected wires back into the electrical box, ensuring no bare wire is exposed.
- Attach the Sconce: Align the sconce fixture with the mounting bracket and secure it according to the manufacturer’s instructions. This usually involves screws or a decorative nut.
- Install Light Bulbs: Screw in the appropriate light bulbs.
Step 8: Restore Power and Test
- Go back to your electrical panel.
- Flip the breaker for your sconce circuit back to the “ON” position.
- Test each sconce. Do they all light up? Are they all working correctly?
- Walk up and down the stairs to check the illumination. Are there any dark spots? Is there any glare? You can adjust bulb wattage or type if needed.
Step 9: Finishing Touches
- Once you’re satisfied with the lighting and everything is working, use spackle or caulk to fill any small gaps around the electrical boxes or where the sconce meets the wall for a clean finish. Touch up any paintwork.
Advanced Considerations and Troubleshooting
Even with careful planning, you might encounter a few hiccups. Here’s how to address them.
Dealing with Low Ceilings or Awkward Angles
Basement stairways can be notoriously height-challenged.
- Shorter Fixtures: Opt for sconces with a lower profile. Look for shallow designs that don’t protrude too far from the wall.
- Adjustable Arms: Some sconces feature adjustable arms, allowing you to direct light more precisely or angle the fixture away from potential head-bumping areas.
- Mounting Height: If your ceiling is extremely low, you might need to mount sconces slightly lower than the typical 60-72 inches. The key here is to test for glare and ensure the bulb isn’t directly in your line of sight when ascending or descending. You can use a light bulb shield or a dimmer to manage light intensity.
Running Wires Through Finished Walls
This is where things can get trickier.
- Access Holes: Sometimes, the only way to get a wire where it needs to go is by cutting small, strategic access holes in the drywall. These can then be patched and painted to blend seamlessly.
- New Work vs. Old Work Boxes: Always use “old work” or “cut-in” electrical boxes when working in existing finished walls. These are designed to be installed without needing to access the framing from the other side.
- Finding a Path: Use a stud finder with AC wire detection to help locate existing wiring, pipes, or studs and plan your wire route. Fishing wires often involves a combination of tools like fish tape and a small drill bit to create pilot holes.
What If a Sconce Doesn’t Turn On?
Don’t panic!
- Double-Check Power: First, ensure the breaker is on and that you tested the circuit to confirm power is present.
- Wire Connections: Carefully re-check all wire connections within the sconce box and at the power source. Are the wire nuts snug? Are all wires making good contact? Are the correct colors connected (black to black, white to white, ground to ground)?
- Bulb: Try a different, known-working bulb.
- Fixture Switch (if applicable): Some sconces have their own on/off switch. Ensure it’s in the “on” position.
- Defective Fixture: In rare cases, the sconce itself might be faulty. If you’ve exhausted other possibilities, consider contacting the manufacturer or replacing the fixture.
Dealing with Flickering Lights
Flickering can indicate a loose connection.
- Check Connections: Again, the most likely culprit is a loose wire nut or a connection that’s not fully seated.
- Bulb Compatibility: Ensure your bulb type is compatible with the fixture and the dimmer switch (if you have one).
- Voltage Fluctuations: If the flickering is widespread and affects other lights, it might point to a larger electrical issue in your home. In this case, call a qualified electrician immediately.
Code Compliance and Safety Standards
Electrical work is governed by strict codes for a reason: safety. Ignoring them can lead to hazards like fires, shocks, and code violations.
- National Electrical Code (NEC): In the United States, the NEC is the standard for safe electrical design and installation. Local jurisdictions often adopt and may amend the NEC.
- Local Codes: Always check with your local building department for specific requirements. They may have nuances about wiring methods, box types, or permits needed for your project.
- Permits: Depending on your location and the scope of the work (especially if running new circuits), you might need an electrical permit and inspection.
- Qualified Electrician: If at any point you feel uncomfortable, are unsure about local codes, or are dealing with complex wiring, do not hesitate to hire a licensed and insured electrician. It’s a small price to pay for safety and peace of mind.
Maintaining Your New Sconce Lighting
Once your beautiful new sconces are installed, you’ll want to keep them looking and functioning their best.
- Cleaning: Dust the sconce fixtures regularly with a soft, dry cloth. For glass shades, you can use a mild glass cleaner sprayed onto a cloth (not directly onto the fixture) and wipe them clean. Ensure any cleaners are safe for the finish of your sconces.
- Bulb Replacement: As mentioned, LEDs last a very long time, so you won’t be changing bulbs often. When you do, ensure you use the correct wattage and type specified for your fixture.
- Checking Connections: Periodically (perhaps once a year), and always with the power off, briefly check your wire connections to ensure they haven’t loosened over time due to vibrations or expansion/contraction.
- Inspect Wiring: If you notice any signs of wear, damage, or fraying on the electrical cable, address it immediately by turning off the power and consulting an electrician.
Frequently Asked Questions About Basement Stairway Sconces
Q1: Do I need a permit to install wall sconces in my basement stairway?
A: This varies by location. Many minor electrical additions, like installing a few sconces by tapping into an existing circuit, may not require a permit. However, if you’re running new circuits, altering existing wiring significantly, or your local code mandates it, you will likely need a permit and subsequent inspection.
Always check with your local building department.
Q2: Can I use dimmer switches with my sconces?
A: Yes, most wall sconces are compatible with dimmer switches, provided you use a dimmer switch that is rated for the type of bulbs you are using (e.g., an LED-compatible dimmer for LED bulbs). Dimmer switches allow you to adjust the ambiance and further conserve energy.
Q3: How do I choose the right color temperature for my bulbs?
A: For general use and safety on stairs, a neutral white (around 3000K to 4000K) is often ideal as it provides good visibility without being too harsh or too warm. If you prefer a cozier feel, a warm white (2700K to 3000K) can also work, but ensure it’s bright enough for safe passage.
Q4: What is the best way to hide wires in finished walls?
A: The best way is to run wires within the wall cavities, concealed by drywall. For exposed surfaces or when running wires to a new location, consider using approved raceways or cove molding, though these are typically more for surface wiring and not ideal for stairways where they might be a tripping hazard. For standard installations, the goal is to get wires inside the wall from box to box.
Q5: How far apart should I space the sconces?
A: A common guideline is to place a sconce every roughly two steps. Ensure the light from each fixture overlaps with the next to eliminate dark spots. Measure your stairs and do a mock-up with tape to visualize the light spread.
Q6: Can I install sconces on a plaster wall?
A: Yes, but it can be more challenging than drywall. Plaster can be brittle and prone to cracking. You’ll need to cut more carefully and may require specialized tools or techniques.
Using “old work” boxes designed for plaster is essential, and you might need to reinforce the opening.
Conclusion
Adding wall sconces to your basement stairway is a game-changer. It’s a project that elevates a purely functional space into something that is not only safe and accessible but also stylish and welcoming. By taking the time to plan your layout, choose appropriate fixtures, and follow safe installation practices, you can significantly enhance the appeal and usability of your home’s basement.
Whether you’re tackling this as a weekend DIY warrior or working with a professional, the return on investment in terms of safety, ambiance, and overall home improvement is truly substantial. So, if you’ve been looking to brighten up those stairs and add a touch of elegance, installing wall sconces is a brilliant, achievable solution.


Similar Posts



















