How To Choose Air Purifier Size Room
I’ve installed dozens of smart air purifier systems over the years. Some were dead simple. Others made me want to throw the manual across the room.
The good news? Getting it right isn’t complicated, but you do need to follow a specific order of operations.
Smart air purifiers have evolved far beyond the box-fan-with-a-filter hack our parents used. Today’s systems connect to your WiFi, talk to your phone, and automatically adjust based on real-time air quality readings. But the install part still trips people up.
Let me walk you through exactly how to do this. No fluff. No guesswork.
Just what works.
Why Install a Smart Air Purifier System in the First Place?
Before we get into the nuts and bolts, let me address the elephant in the room. You’re probably here because the air in your home feels off. Maybe you’ve got seasonal allergies that won’t quit.
Maybe you moved into an older home with dust you can’t control. Or maybe you just want to sleep better.
Indoor air can be two to five times more polluted than outdoor air, according to EPA studies. That’s a staggering number when you think about how much time we spend inside. A smart air purifier system doesn’t just filter particles, it monitors them, reports them, and adjusts itself without you lifting a finger.
That’s the “smart” part. And it changes everything.
What You Need Before You Start
Let’s get the shopping list straight. You can’t install a system you don’t have, and you can’t manage one you haven’t set up properly.
Hardware essentials:
- Smart air purifier unit (obviously, but make sure it’s rated for your room size)
- Replacement filters (HEPA and carbon pre-filters)
- Smartphone or tablet for the companion app
- Stable 2.4GHz WiFi connection (most smart purifiers don’t support 5GHz)
- Power outlet within cord length of your chosen location
- Optional: additional air quality sensors for multi-room monitoring
Don’t skip the room size calculation. A unit rated for 200 square feet won’t do squat in an open-plan living area. Check the CADR rating, that’s Clean Air Delivery Rate, and match it to your space.
Step 1: Unbox and Inspect Carefully
I know, I know. You want to rip the box open and plug it in. Slow down.
Every smart air purifier system I’ve worked with ships with protective plastic over the filters and sensors. If you miss removing this, the unit will run but it won’t actually clean anything. The sensors will read garbage data, and you’ll spend an hour on support chat wondering why your “perfect” air reads as hazardous.
Check for:
- All included filters (some ship with pre-installed filters, others have them separate)
- Power cord and adapter
- Mounting brackets if it’s a wall-mount model
- Quick-start guide (keep the full manual for later)
- Any protective film or foam inserts
Once you’ve confirmed everything is present and undamaged, remove all packaging materials. Then, and this matters, pull the plastic bag off the HEPA filter if there is one. You’d be amazed how many people miss that step.
Step 2: Choose the Right Location
Image source: Pexels / Tim Witzdam (Pexels License)
Placement is the single most common mistake people make. And it kills performance.
Your smart air purifier system needs breathing room, literally. The intake vents need clear airflow on at least three sides. Here’s what I’ve learned from trial and error:
Do place it:
- At least 18 inches from walls and furniture
- In the room where you spend the most time (usually the bedroom or living room)
- Away from doors and windows that get opened frequently
- On a flat, stable surface
Don’t place it:
- In a corner (dead air zones prevent proper circulation)
- Behind curtains or furniture
- Near heat sources or humidifiers
- Directly on carpet (elevate it slightly if you can)
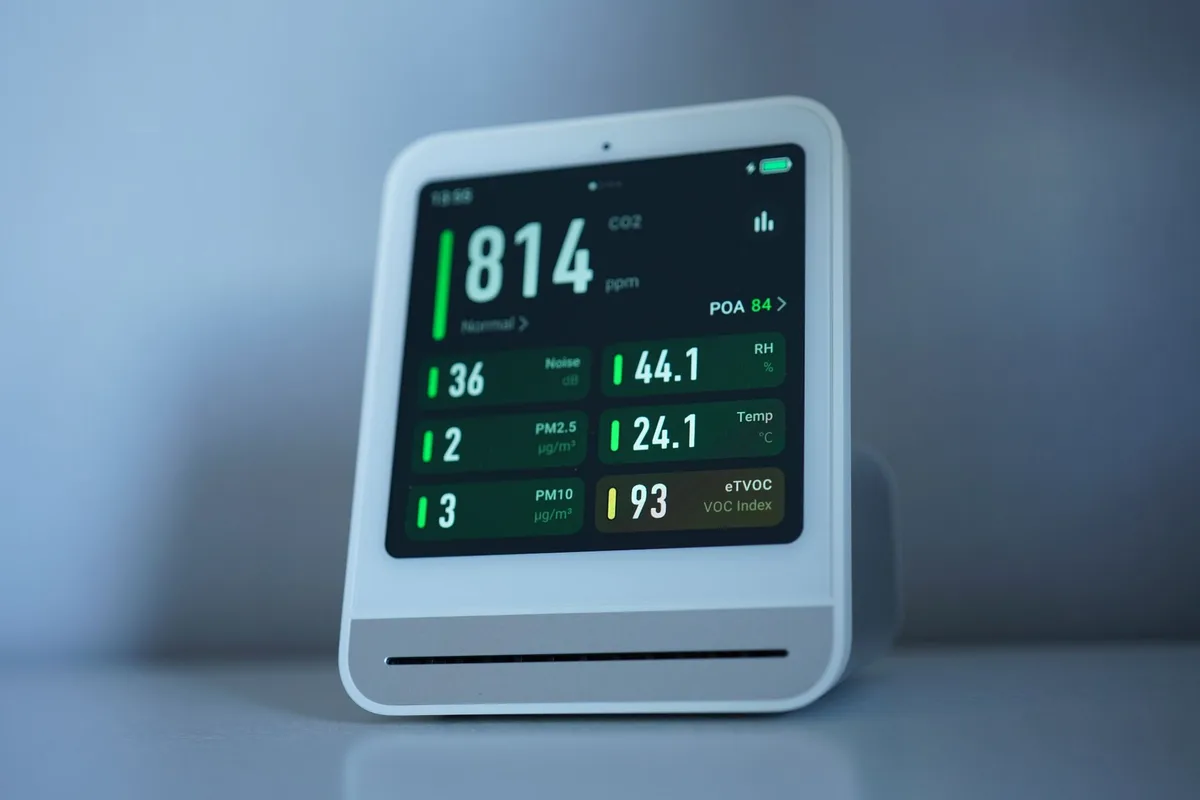
The air quality sensor on most smart purifiers is on the unit itself. That means it only reads the air immediately around it. Put the unit in a spot where that air represents the whole room, not a corner that never gets circulation.
Step 3: Install Filters the Right Way
This sounds bonehead simple, but I’ve seen people force filters in backwards more times than I can count. Every smart air purifier system has a specific filter orientation. Usually there’s an arrow or a “this side up” label.
Follow it.
The typical order from outside in:
- Pre-filter, catches dust and pet hair (washable on many models)
- Carbon filter, absorbs odors and VOCs
- HEPA filter, captures microscopic particles like pollen, mold spores, and bacteria
Some systems combine the carbon and HEPA layers. Others keep them separate. Either way, make sure they seat fully.
A gap means unfiltered air bypassing the filtration media.
Press firmly around the edges to create a good seal. You should feel a solid click or resistance when the filter housing closes. If it feels loose, double-check the fit.
Step 4: Power On and Let It Initialize
Plug the unit into a grounded outlet. Don’t use an extension cord if you can avoid it, smart purifiers can pull decent wattage, especially on high fan speeds. A surge protector is fine.
Hit the power button. Most units will run a self-diagnostic cycle for 30 to 60 seconds. You’ll hear the fan ramp up and down.
The display will flash through various modes.
During this initialization:
- Leave the unit running for at least 10 minutes before judging anything
- Don’t adjust settings yet
- Let the sensors stabilize and take their first baseline reading
This is also the perfect time to check that the control panel works. Touch the buttons (or twist the dial if your model has one). Make sure the display shows basic info like fan speed and air quality index.
Step 5: Connect to WiFi and Set Up the App
Now we get to the “smart” part. Grab your phone and download the manufacturer’s companion app. This is where you’ll control everything going forward.
Connection checklist:
- Make sure Bluetooth is on (many systems use Bluetooth for initial pairing)
- Put the purifier in pairing mode, usually holding the WiFi button for 3-5 seconds
- Select your home network from the app
- Enter your WiFi password
Here’s a frustration I want to save you from: most smart air purifier systems only work on 2.4GHz WiFi bands. If you have a dual-band router broadcasting both 2.4GHz and 5GHz under the same SSID, the purifier may fail to connect. If that happens, temporarily disable the 5GHz band in your router settings, complete the setup, then re-enable it.
Once connected, name your device something you’ll recognize. “Living Room Purifier” beats “Air Cleaner 3B7A” when you’re trying to set a schedule from bed.
Step 6: Configure Automation and Schedules
This is where a smart air purifier system earns its keep. Manual control is fine, but automation is the point.
Set up these basics in the app:
- Schedule, When do you want it running? Bedroom units should ramp up an hour before sleep. Living room units can run during work hours.
- Auto mode, Lets the unit adjust fan speed based on real-time sensor data. This saves energy and filter life.
- Away mode, Runs intermittently when nobody’s home to maintain baseline air quality.
- Night mode, Quieter fan speeds and dimmed displays so you can actually sleep.
Most apps also let you set geofencing. When you leave home, the purifier drops to low power. When you return, it kicks back to your preferred settings.
It’s a small thing, but it adds up over months of use.
Filter Maintenance and Replacement Schedule
Image source: Pexels / Multitech Institute (Pexels License)
Filters are the consumable heart of your smart air purifier system. Neglect them, and you’re basically running a noisy fan that moves dirty air around.
How often should you replace each filter?
| Filter Type | Typical Lifespan | Replacement Indicator |
|---|---|---|
| Pre-filter | 3-6 months | Visible dust buildup, washable on many models |
| Carbon filter | 6-12 months | Odors returning, reduced VOC capture |
| HEPA filter | 12-24 months | Reduced airflow, increased noise, app notification |
The app will track filter life and send you reminders. Don’t ignore these. A clogged HEPA filter forces the fan motor to work harder, which burns more electricity and shortens the unit’s lifespan.
Quick maintenance tips:
- Vacuum the pre-filter monthly if it’s washable
- Wipe down the exterior and vent grilles with a damp cloth
- Check the sensor window for dust buildup, a dirty sensor reads wrong data
- Always turn off and unplug the unit before changing filters
I replace my carbon filters every 8 months and my HEPA filters every 18. That’s a little aggressive, but I’d rather overshoot than breathe through a clogged media.
Optimizing Sensor Accuracy and Placement
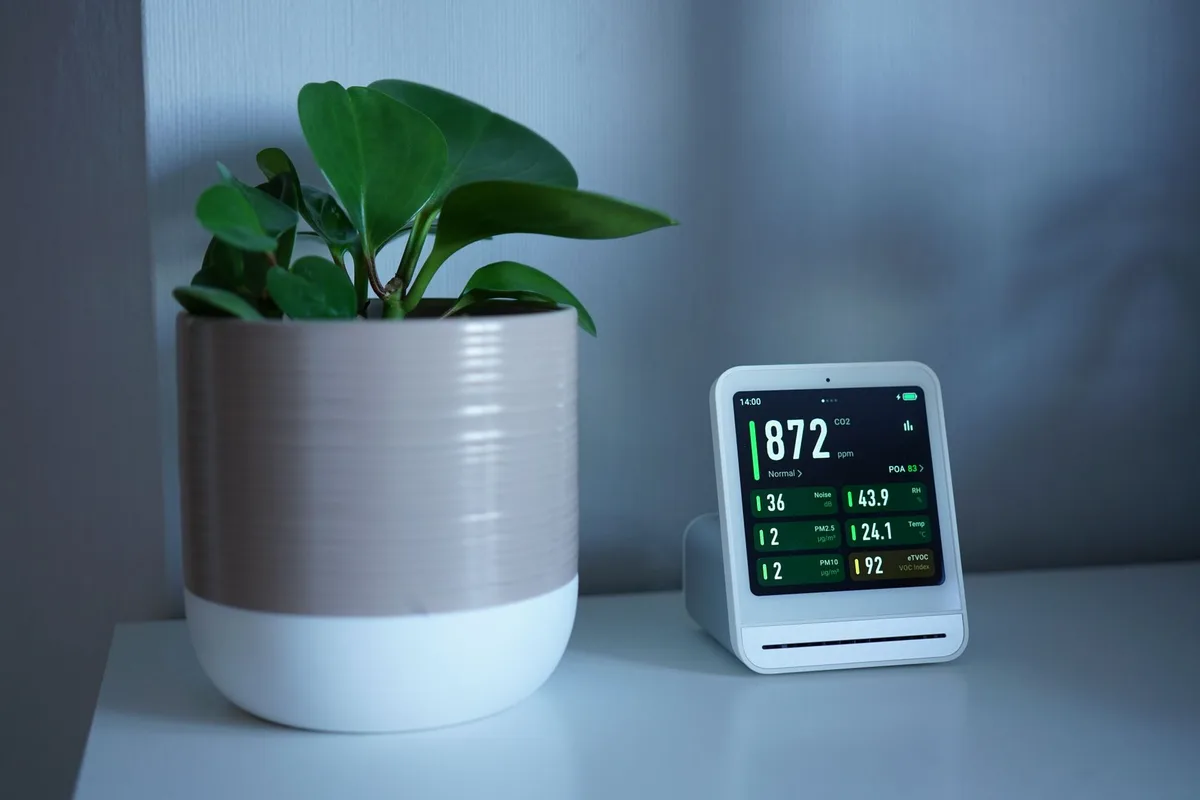
Image source: Pexels / Tim Witzdam (Pexels License)
The smart in your smart air purifier system relies on accurate sensors. If those sensors give bad data, everything downstream, auto mode, schedule adjustments, air quality reports, becomes useless.
Common sensor accuracy killers:
- Direct sunlight hitting the unit (heats the internal components)
- Placing the unit near a kitchen or bathroom with high humidity
- Blocking the sensor intake vent with furniture
- Accumulated dust inside the sensor chamber
If your app keeps showing poor air quality when everything seems fine, check the sensor first. Many units have a small access door for the sensor module. A gentle puff of compressed air clears most dust obstructions.
Also, give the sensors time to recalibrate after you move the unit. PM2.5 and VOC sensors need about 20 minutes to stabilize after a location change.
Managing Multi-Room Systems
One smart air purifier can handle a single room. But if you want whole-home coverage, you need multiple units working together. Many modern systems support multi-device management from a single app.
Best practices for multi-room setups:
- Place purifiers in bedrooms, living areas, and home offices
- Don’t put a purifier in a hallway and expect it to clean adjacent rooms (air doesn’t flow that way)
- Use the app to create zones or groups
- Set different schedules for different rooms (bedrooms need night mode, living rooms don’t)
Some ecosystems let you link purifiers to other smart home devices. I’ve set mine to trigger when the smart thermostat runs the HVAC fan. The logic: if the furnace is circulating air, the purifiers should be running full speed to catch whatever the ducts kick up.
Troubleshooting Common Problems
You’ll hit snags. Everyone does. Here’s the short list of what goes wrong and how to fix it.
Purifier won’t connect to WiFi
Reset the WiFi module by holding the reset button for 10 seconds. Then restart the setup process. Also verify you’re on 2.4GHz, not 5GHz.
Air quality reading seems wrong
Clean the sensor window. Check if the unit is near a kitchen, bathroom, or open window. Give it 20 minutes to stabilize after cleaning.
Odd smells from the unit
This usually means the carbon filter is saturated. Replace it. If the smell persists, check for mold or mildew on the filter media.
App notifications not working
Check notification permissions in your phone settings. Also ensure the purifier is connected to WiFi, if it loses connection, it can’t push notifications.
Unit is louder than expected
Check if the pre-filter is clogged. Clean or replace it. Also, high fan speed is normal during auto mode if air quality is poor.
Manually lower the speed if the noise bothers you.
Final Setup Verification
Before you walk away and let the system run, run through this quick checklist:
- Filters installed correctly and seated firmly
- All protective plastic removed
- Unit placed in open space with 18-inch clearance
- WiFi connected and app configured
- Schedule set for your daily routine
- Auto mode enabled
- Filter replacement reminders activated in the app
Do a final walk-through. Open the app and verify the current air quality reading matches what you’d expect. If it says “good” and you just cooked bacon, check the sensor placement, it should have caught that.
The Bottom Line
Installing and managing a smart air purifier system isn’t hard, but it rewards attention to detail. Get the placement right. Keep the filters fresh.
Let the automation do the heavy lifting.
Most people set these up, forget about them, and only notice the filters need changing when the app nags them. That’s exactly how it should work. Put in the effort upfront, and the system takes care of the rest.
Your lungs will thank you.


Similar Posts