How to Install Wall Sconces on Sloped Ceilings
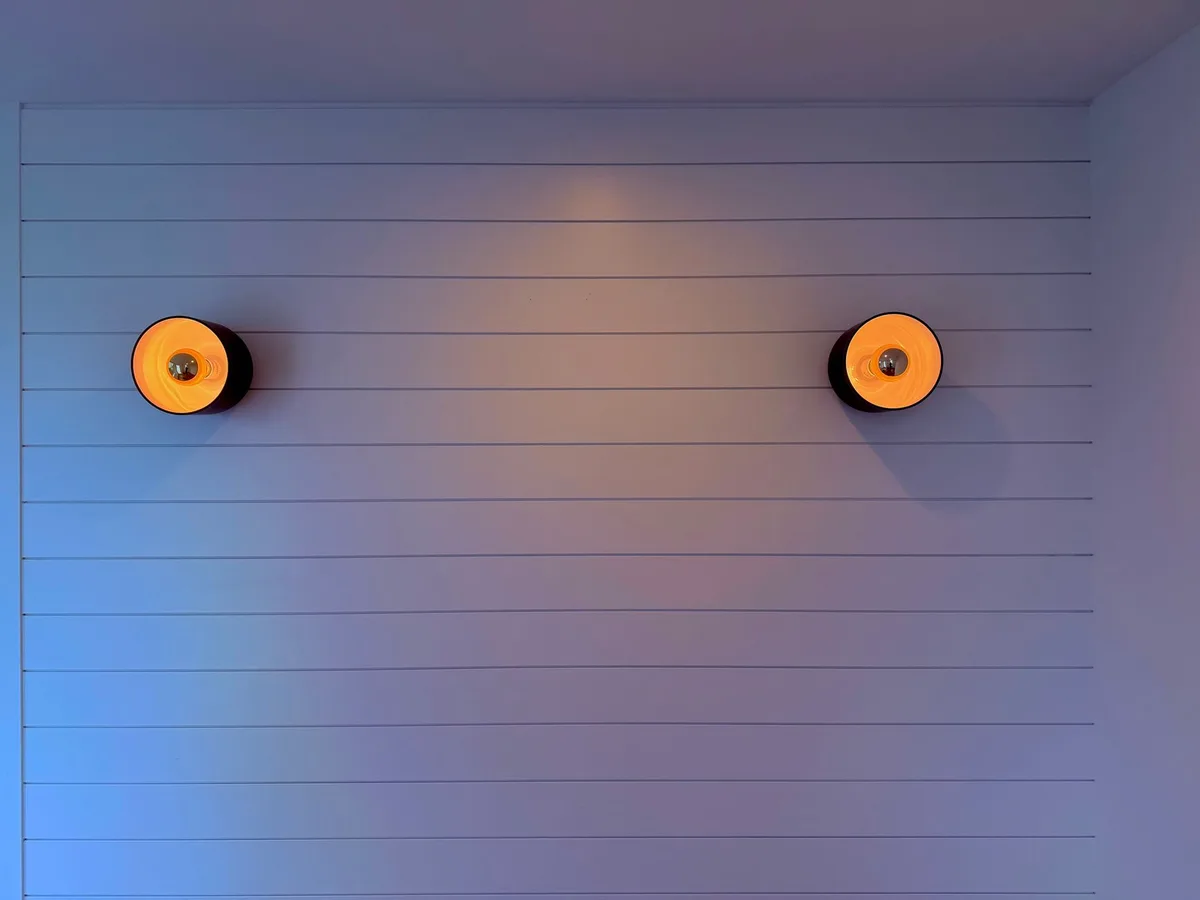
Image source: Pexels / Dar ius (Pexels License)
Let’s face it, a sloped ceiling can be a beautifully dramatic architectural feature, adding character and warmth to any room. But when it comes to decorating, those angles can present a unique challenge, especially when you’re looking to add functional and stylish lighting like wall sconces. You might think that installing wall sconces on a sloped ceiling is a job best left to the professionals, or perhaps even impossible.
I’m here to tell you that’s absolutely not the case.
With the right approach, a bit of preparation, and a few key adjustments, you can absolutely install wall sconces on sloped ceilings, transforming those angled walls into illuminated statements. This isn’t a one-size-fits-all situation, and the specifics will depend on your ceiling’s angle, the type of sconce you choose, and your own DIY comfort level. But by understanding the principles and techniques involved, you’ll breeze through this project.
This in-depth guide will walk you through everything you need to know, from assessing your ceiling and choosing the right fixtures to the nitty-gritty of installation. We’ll cover the necessary tools, potential pitfalls to avoid, and crucial safety considerations. You’ll learn how to make those tricky angles work for you, creating a beautifully lit space that feels cohesive and polished, no matter the pitch of your ceiling.
Forget about skipping the sconce on your angled walls, let’s get them installed!
Understanding Your Sloped Ceiling and Sconce Options
Before you even think about touching a drill, it’s paramount to understand the unique characteristics of your sloped ceiling and how they’ll influence your sconce installation. Not all slopes are created equal, and neither are all wall sconces. A little upfront assessment can save you a world of frustration later.
Measuring the Slope: The Degree of Difficulty
The first step is to determine the exact angle of your ceiling. This isn’t just for curiosity’s sake; it dictates the type of mounting hardware you might need and how the sconce will ultimately sit against the wall.
- The Protractor Method: For a precise measurement, a large protractor or a digital angle finder is your best friend. Place the base of the tool against the horizontal plane (or a level line you’ve drawn on the wall) and measure the angle the ceiling makes.
- The Trigonometry Cheat Sheet: If you have a level and a tape measure, you can approximate the angle. Measure the vertical rise over a specific horizontal run (e.g., 12 inches). You can then use a scientific calculator or an online trigonometry tool to find the angle using the arctangent (atan) function:
angle = atan(rise/run). For instance, a 6-inch rise over a 12-inch run isatan(6/12) = 26.57 degrees. - Visual Estimation: While not precise, a quick visual assessment can help. Do you have a gentle loft-style slope, or a steeper A-frame pitch? This gives you a general idea of how much tilt you’re dealing with.
Why is this measurement so crucial? Sconces are designed with a flat mounting plate meant to sit flush against a perpendicular wall. On a slope, this plate will be at an angle relative to the wall surface.
The steeper the slope, the more pronounced this angle will be, potentially leading to a gap between the sconce and the wall, or an awkward tilt.
Types of Wall Sconces and Their Suitability for Sloped Ceilings
Not all sconces are created equal when it comes to adapting to angled surfaces. Some are inherently more forgiving than others.
- Adjustable Arm Sconces: These are often the easiest to work with on a sloped ceiling. Their articulated arms allow you to position the light source more freely, compensating for the ceiling angle. The base still needs to be mounted securely, but the outward projection can be adjusted.
- Downlights and Up-lights with Minimal Projection: Sconces that primarily direct light upwards or downwards, with a simple, straight arm, can also work well. The key here is that the shade or diffuser is often the main visual element, and a slight tilt of the entire fixture might be less noticeable than with a sconce that has a prominent, horizontal shade.
- Sconces with Swiveling or Pivoting Heads: Similar to adjustable arm sconces, those with heads that can be angled independently of the main arm offer flexibility. You can mount the base as level as possible against the slope and then adjust the head to direct light where you need it.
- Flush Mount or Semi-Flush Mount Sconces: These are generally not ideal for sloped ceilings. Their design relies on the fixture sitting snugly against a flat surface. Attempting to mount them on an angle will likely result in significant gaps and an unprofessional look.
- Candle-Style or Lantern Sconces: These can be tricky. If the candle holder or lantern protrudes straight out, the angle might be problematic. However, some designs have a slight downward angle built-in, or a mounting bracket that can accommodate a bit of tilt.
Key Consideration: Always check the manufacturer’s specifications or inquire directly if a sconce is suitable for installation on a sloped ceiling. Many modern fixtures are designed with this possibility in mind, offering adjustable mounting brackets.
The Role of the Mounting Bracket
The mounting bracket is the unsung hero of sconce installation, and on a sloped ceiling, it becomes even more critical.
- Standard Brackets: Most sconces come with a U-shaped or rectangular metal bracket. This is designed to attach to a standard junction box and provide a flush surface for the sconce’s backplate. On a slope, this bracket will naturally sit at an angle.
- Adjustable Brackets: Some specialized brackets, or extension arms (often called “goosenecks” or “offset brackets”), are designed to create a perpendicular mounting surface even on an angled wall. These effectively push the sconce base out from the wall and allow you to correct for the slope, ensuring the sconce hangs straight and the backplate sits flush. You might purchase these separately.
- Cleats and Wedges: For very steep slopes or specific sconce designs, you might need to fabricate or purchase a mounting cleat or wedge that fits the angle of your ceiling. This would then serve as a flat surface to mount the standard bracket onto. This is a more advanced technique and requires careful measurement and construction.
Electrical Junction Box Considerations
This is where we overlap with standard electrical work, but it’s crucial for success.
- Location, Location, Location: Where is your existing junction box? Is it positioned directly on the sloped plane, or is it behind drywall where you’ll need to cut a new opening?
- Junction Box Type: Standard round or octagonal junction boxes are common. For a sloped ceiling, you might need a specific type of “sloped ceiling box” or “pancake box” if the box itself is mounted directly to a joist at an angle. However, more often, you’ll be mounting a standard box to a joist or a brace, and then using an accessible faceplate or mounting plate to bring the connection point out to the surface of your sloped wall.
- Accessibility: Ensure the junction box will be accessible after the sconce is installed. You don’t want to have to remove the entire fixture just to reset a breaker or make a minor wiring adjustment.
Making these initial assessments will give you a clear picture of what you’re up against and what solutions will be most effective for your specific situation. It’s about planning ahead to ensure a smooth and successful installation.
Tools and Materials: Gearing Up for Sconce Installation
Having the right tools and materials on hand is non-negotiable for a safe and effective wall sconce installation on a sloped ceiling. Skipping this step can lead to frustration, damaged materials, and potentially dangerous situations. We’re aiming for a professional finish here, so let’s make sure we’re properly equipped.
Essential Tools for the Job
- Safety Gear:
- Safety Glasses: Protect your eyes from dust, debris, and accidental wire snips.
- Work Gloves: For better grip and to protect your hands.
- Stepladder or Extension Ladder: Ensure it’s stable and rated for your weight. Keep it on a level surface.
- Measuring and Marking Tools:
- Measuring Tape: Essential for accurate placement.
- Pencil or Marker: For marking drilling points and lines.
- Level: Crucial for ensuring the sconce isn’t crooked, even on a slope. You might use this in conjunction with your angle finder.
- Stud Finder: To locate wall studs for secure mounting.
- Protractor or Digital Angle Finder: To accurately measure your ceiling slope.
- Drilling and Fastening Tools:
- Cordless Drill/Driver: For drilling pilot holes and driving screws.
- Drill Bits: A set of assorted sizes, including bits for wood and potentially masonry if you encounter brick or concrete.
- Screwdriver Set: Both Phillips and flathead, to match screw types.
- Adjustable Wrench or Pliers: For tightening wire nuts and other connections.
- Wire Strippers/Cutters: Essential for preparing electrical wires.
- Cutting and Electrical Tools:
- Drywall Saw or Utility Knife: If you need to cut an opening for a junction box.
- Voltage Tester (Non-Contact):ABSOLUTELY MANDATORY for ensuring power is off before you touch any wires.
- Wire Nuts: For safely connecting electrical wires.
- Other Useful Items:
- Painter’s Tape: For marking and masking.
- Drop Cloth: To protect your flooring from dust and debris.
- Dust Mask: Especially if you’re drilling into plaster or old drywall.
- Flashlight or Headlamp: For illuminating dark work areas.
Crucial Materials You’ll Need
- Your Chosen Wall Sconces: Naturally, ensure they are suitable for sloped ceiling installation or that you have a plan to adapt them.
- Electrical Junction Box (if needed): If you don’t have an existing box or need to relocate it, you’ll need an appropriate electrical box. For sloped ceilings, you might look for boxes designed for angled mounting or those that can be secured to framing members and have an accessible face.
- Mounting Hardware:
- Sconce Mounting Bracket: The one that came with your sconce, or a specialized adjustable bracket designed for sloped ceilings.
- Screws: For attaching the bracket to the junction box and the junction box to the wall framing/support. Use appropriate lengths and types for your wall material.
- Wall Anchors (if not mounting to studs): For drywall or plaster, if you can’t hit a stud, use heavy-duty anchors rated for the weight of the sconce.
- Wire Connectors: You’ll likely need wire nuts to connect the fixture’s wires to the house wiring.
- A Specialized “Slope Adapter” or Mounting Plate (potentially): For steeper slopes, you might need an L-shaped bracket or a purpose-built adapter plate that allows the standard mounting bracket to sit flush. Some manufacturers offer these as optional accessories.
- Electrical Wire (if extending wiring): If you need to move your junction box location, you’ll need appropriately gauged electrical wire.
- Caulk or Sealant (optional): For filling any small gaps between the sconce backplate and the wall, if necessary, for aesthetic reasons.
Pro-Tip: Always purchase a little extra wire, screws, and consumables than you think you’ll need. It’s far better to have some left over than to be halfway through the job and realize you’re short on a critical item.
Step-by-Step Installation Guide: Mastering the Sloped Surface
Alright, you’ve got your tools, your materials, and a clear understanding of your ceiling’s angle. Now, let’s get to the practical part: installing those wall sconces on your sloped ceiling. We’ll break this down into manageable steps, focusing on making those angles work in your favor.
Step 1: Safety First – Turn Off the Power!
This cannot be stressed enough. Before you do anything involving electrical wiring, you MUST turn off the power to the circuit you’ll be working on.
- Go to your home’s main electrical panel or breaker box.
- Identify the breaker that controls the lighting circuit where you’ll be installing the sconce. If you’re unsure, you can use a non-contact voltage tester on the existing wires in the junction box (if you have one).
- Flip the breaker to the “OFF” position.
- To be absolutely certain, use your non-contact voltage tester on the wires inside the junction box (if you’re working with an existing outlet). It should indicate no voltage. If you’re unsure about any part of this, call a qualified electrician.
Step 2: Locating and Preparing the Junction Box
This is arguably the most critical step for a sloped ceiling. Your goal is to have a securely mounted junction box that presents a flat plane for your sconce’s mounting bracket, even if that plane is angled relative to the wall stud.
- If you have an existing junction box on the slope:
- Assess its mounting: Is the box itself mounted securely to the ceiling joist or blocking? Is the faceplate flush with the finished ceiling surface at that angle?
- Clean it out: Remove any old fixtures, debris, or excess wire.
- Check the wiring: Ensure the house wires are in good condition and accessible.
- If you need to install a new junction box:
- Determine the ideal location: Consider the desired placement of your sconce, ensuring it’s at a comfortable height and proportion for your room and the slope. Keep in mind any existing electrical wiring runs in the wall.
- Locate a stud or blocking: Use your stud finder to find a solid structural member behind the drywall or plaster. You must mount the junction box directly to framing for safety and support.
- Cut the opening: Trace the outline of your junction box onto the ceiling surface. Use a drywall saw or utility knife to carefully cut out the opening. Be mindful of any wiring or pipes that might be present in the wall cavity.
- Mount the junction box: Securely attach the junction box to the stud or blocking using appropriate screws. Ensure the face of the box sits at the angle of your ceiling. If you’re mounting to a joist that runs perpendicular to the slope, you might need a special offset mounting bracket for the box.
- Feed wiring (if applicable): If you’re extending electrical from another point, carefully feed the new wire into the junction box.
Special Consideration for Sloped Ceilings: If the slope is significant, the standard mounting bracket of the sconce will sit at an angle relative to that junction box. This is where specialized solutions come in. You might need:
- An offset mounting plate: This metal plate attaches to the junction box, and the sconce bracket attaches to the plate. The offset creates a level surface.
- A custom-made wedge or angle adapter: For very steep slopes, you might need to fashion a small wedge from wood that fits the angle of your ceiling. The junction box screws into the framing, and the wedge is attached to the box’s face. Then, the sconce bracket screws into the wedge.
Step 3: Installing the Mounting Bracket (and Adapter, if needed)
Once your junction box is securely in place and the face presents a viable surface, it’s time to attach the sconce’s mounting bracket.
- Attach the adapter (if using): If you’re using an offset plate or a custom wedge, attach it to the junction box first, following its specific instructions.
- Position the sconce’s mounting bracket: Align the bracket over the junction box (or adapter plate). The bracket should be oriented so that the sconce body will hang straight down once installed. This is where your level becomes essential. Even though the ceiling is sloped, you want the sconce arm to be as perpendicular to the floor as possible, or at least visually straight. You may need to rotate the bracket slightly on the box to achieve this.
- Mark screw holes: Use your pencil to mark through the holes in the mounting bracket onto the junction box/adapter.
- Drill pilot holes: Remove the bracket and drill pilot holes at your marked points. These should be slightly smaller than the screws you’ll be using.
- Secure the bracket: Realign the mounting bracket. Use the screws provided with the sconce (or appropriate screws if you’re using a different mounting system) to firmly attach the bracket to the junction box/adapter. Ensure it’s snug and doesn’t wiggle.
Step 4: Wiring the Sconce
Now for the electrical connections. Remember, the power is still OFF.
- Identify the wires: Your sconce will have wires (usually black for hot, white for neutral, and a green or bare copper for ground). The house wiring from the junction box will also have these colors.
- Prepare the wires: If the ends aren’t pre-stripped, use your wire strippers to remove about ½ to ¾ inch of insulation from the end of each wire (both from the sconce and the house wiring).
- Make the connections: This is where wire nuts come in. Connect like colors together:
- Ground: Connect the green or bare copper ground wire from the sconce to the ground wire from the house.
- Neutral: Connect the white wire from the sconce to the white wire from the house.
- Hot: Connect the black wire from the sconce to the black wire from the house.
- Twist the wire nut clockwise onto the connected wires until it’s snug. Give each wire a gentle tug to ensure it’s secure within the wire nut.
- Tuck the wires: Carefully push the connected wires and wire nuts back into the junction box. Try to arrange them neatly so they don’t get pinched.
Step 5: Attaching the Sconce Fixture
With the wiring complete and tucked away, you can now attach the sconce body.
- Align the backplate: Carefully bring the sconce fixture up to the wall. Align the openings in the sconce’s backplate with the mounting screws protruding from the mounting bracket.
- Secure the sconce: Depending on your fixture, you might have decorative nuts or screws that thread onto the mounting screws. Tighten these by hand or with a screwdriver until the sconce is held securely against the wall. Do not overtighten, as this can strip the screws or damage the fixture.
- Adjust for straightness: Even with a well-aligned bracket, you might need to make minor adjustments. Some sconces have a slight amount of play where the backplate meets the bracket. Gently adjust the sconce so it appears as straight as possible relative to the floor, which might mean it’s not perfectly perpendicular to the angled wall.
Step 6: Installing Bulbs and Shade
The final aesthetic touches.
- Install the light bulbs: Make sure you’re using bulbs that are the correct wattage and type as specified by the sconce manufacturer.
- Attach the shade or diffuser: Secure any glass shades, fabric diffusers, or decorative elements. Ensure they are firmly in place and align correctly.
Step 7: Restore Power and Test
The moment of truth!
- Go back to your breaker box and flip the breaker to the “ON” position.
- Test the sconce by turning on its switch.
Troubleshooting:
- No power: Double-check the breaker, ensure all wire nuts are secure, and verify you have the correct voltage at the junction box using your tester (with power on). If it still doesn’t work, consult an electrician.
- Sconce is crooked: If it’s significantly off, you might need to loosen the mounting screws, adjust the bracket or adapter, and re-tighten. This is why taking your time and using a level during bracket installation is so important. For minor aesthetic tilts, some people opt to leave it for a more “organic” look on a sloped ceiling.
Advanced Techniques and Problem Solving
While the basic installation process covers most scenarios, sloped ceilings can present unique challenges that require a little more ingenuity. Don’t shy away from these if your situation demands it; they’re often the key to a truly polished result.
Dealing with Steep Pitches: Beyond Standard Brackets
For ceiling slopes exceeding 30-45 degrees, simply relying on an offset bracket might not be enough to make the sconce hang truly vertically. The angle of the wall relative to the fixture becomes very pronounced.
Custom Mounting Plates/Cleats: This involves creating a flat, stable mounting surface that is perfectly perpendicular to gravity, and then attaching your standard sconce bracket to that.
- Measure the angle precisely: Use your protractor or angle finder to get the exact slope.
- Fabricate a wedge: Cut a piece of solid wood (like a 2×4 or a thicker piece of plywood) to match the angle of your ceiling slope. The depth of this wedge will depend on how much you need to “correct” the angle. You might need a substantial piece for a steep pitch.
- Secure the wedge: Attach the wedge securely to the wall framing (studs) behind the drywall. Use long, sturdy screws. The flat side of the wedge should now be perpendicular to the floor.
- Mount the junction box to the wedge: Attach your electrical junction box to the flat side of the wooden wedge.
- Proceed with standard bracket installation: Now you can install the sconce’s mounting bracket onto the surface of the junction box as you normally would, knowing it’s sitting on a level plane.
Specialized Architectual Sconce Designs: Some manufacturers offer sconces specifically designed for angled walls. These might have a long extension arm or a mounting canopy that inherently compensates for the slope. Always check product specifications carefully.
Achieving Visual Symmetry and Alignment
On a sloped ceiling, it’s not just about securing the fixture; it’s about how it looks.
- The “Plumb” vs. “Perpendicular to Wall” Dilemma: Your goal is typically for the sconce to hang plumb (vertically straight from gravity). However, on a steep slope, a plumb sconce might look slightly “off” to the untrained eye because it’s not perpendicular to the angled ceiling line.
- The Golden Rule: Always aim for plumb. A perfectly vertical fixture will always look more stable and professional than one that’s angled with the slope. You can achieve plumb using the custom wedge method or by carefully adjusting your mounting bracket.
- Symmetrical Placement: When installing multiple sconces on a sloped ceiling, aim for symmetry relative to the pitch of the ceiling, not just the horizontal distance. This means if you have two sconces, their highest points (where they meet the ceiling) should be at the same vertical distance from the peak of the roof or the highest point of the wall. This takes careful measuring and marking.
- The Illusion of Level: Sometimes, a sconce’s design itself can create an illusion. If a sconce has a shade that is naturally angled downwards, this can help mask slight imperfections in the mounting angle.
Dealing with Difficult Wall Materials
- Plaster and Lath: This traditional material can be brittle. When cutting openings for junction boxes, go slowly and consider scoring the plaster first to prevent large cracks. Use a fine-tooth drywall saw or even a roto-zip tool with a plaster bit. When mounting, ensure you’re hitting solid wood lath or studs where possible.
- Exposed Beams or Joists: If your sloped ceiling is part of an open-beam structure, you might be able to mount the junction box directly to the side of a beam. Ensure you use appropriate hardware (e.g., beam clamps or lag screws) and that wiring is properly secured and protected. You may need extension arms to bring the sconce out from the beam.
When to Call a Professional Electrician
There are several situations where you should absolutely stop and call in a qualified electrician:
- Unsure about electrical wiring: If you’re not comfortable identifying wires, making connections, or understanding electrical codes, it’s best to leave the wiring to a pro.
- No existing junction box and complex wiring needs: If you need to tap into existing wiring in a complicated way, extend wiring significantly, or your home’s wiring is very old or outdated, an electrician is essential.
- Persistent issues: If you follow these steps and the light still doesn’t work, or you suspect a deeper electrical problem, don’t hesitate to call for help.
- Building code requirements: Some local building codes may require electrical work to be performed by a licensed professional, especially for new installations. Always check your local regulations.
Frequently Asked Questions: Clarifying Sconce Installation on Slopes
Q1: Can I install any wall sconce on a sloped ceiling?
Not all sconces are created equal. While you can adapt many fixtures, those with adjustable arms, swiveling heads, or simpler designs that mount flush to a surface are generally easier. Sconces designed specifically for sloped installations are also available and simplify the process.
Flush-mount fixtures are typically NOT suitable for sloped ceilings.
Q2: How do I ensure the sconce hangs straight on a sloped ceiling?
The key is to mount the sconce’s bracket so it’s plumb (vertically straight) using a level, independent of the ceiling’s angle. This often involves using an offset mounting bracket, an adapter plate, or even a custom-cut wooden wedge attached to the junction box. The goal is to create a perpendicular surface for the sconce bracket.
Q3: What if my ceiling slope is very steep?
For steep slopes, a standard mounting bracket and even an offset bracket might not be enough. You may need to create a custom mounting solution, such as a wooden wedge securely attached to the wall framing. This provides a flat, plumb surface onto which the junction box and sconce bracket can be mounted.
Q4: Do I need special electrical boxes for sloped ceilings?
While you can often use standard junction boxes, you need to ensure they are mounted securely to framing and that their face allows for a plumb mounting bracket. Some specialized boxes are designed for angled mounting or can be adapted. In many cases, the focus is on using adapter plates or wedges to create the correct mounting plane for the sconce bracket, rather than a special box.
Q5: Can I just put caulk in the gap between the sconce and the wall if it doesn’t sit flush?
While a small bead of paintable caulk can hide minor imperfections for aesthetic purposes, it’s not a substitute for proper mounting. Relying on caulk to fill significant gaps is a sign that the mounting is not secure or plumb, or that you’ve chosen a fixture unsuitable for the slope. Always prioritize a secure and level mount first.
Q6: How high should I install a sconce on a sloped ceiling?
Similar to flat walls, measure from the floor up. The common recommendation is 60-66 inches from the floor to the center of the sconce or to the top of the fixture. However, on a sloped ceiling, you may want to adjust this slightly to ensure the sconce appears in proportion to the angle and the surrounding architecture.
Measure from the floor to the highest point of your sconce, aiming for that 60-66 inch range, but always consider how it looks visually.
Q7: Do I need an electrician to install sconces on a sloped ceiling?
If you are uncomfortable with electrical wiring, lack the proper tools, or if your home’s electrical system is old or complex, it is highly recommended to hire a licensed electrician. For those with basic electrical DIY skills and the correct tools, especially if dealing with an existing, properly wired junction box, it can be a manageable project. However, safety always comes first.
Ensuring Long-Term Performance and Safety
Installing wall sconces on sloped ceilings is a rewarding project, but like any electrical installation, it requires ongoing attention to ensure safety and continued functionality. A well-installed sconce should last for years, but a few simple practices will guarantee its longevity.
Regular Inspections: The Subtle Signs of Trouble
It’s easy to forget about your light fixtures once they’re up and running. However, making a habit of quick visual checks can prevent minor issues from becoming major problems.
- Check for Looseness: Periodically (every 6-12 months), gently wiggle each sconce. Does it feel secure, or is there any play in the mounting bracket or the fixture itself? If it feels loose, turn off the power and re-tighten the mounting screws. This is particularly important on sloped ceilings where vibrations or settling could affect the mounting.
- Inspect Wires and Connections: If you ever need to access the junction box (e.g., for a repair or to replace a fixture), always check the condition of the electrical wires and wire nuts. Look for any signs of fraying, discoloration, or loose connections. If you see anything concerning, it’s time to call an electrician.
- Examine Shades and Fixture Components: Ensure any glass shades are crack-free and securely attached, and that decorative elements haven’t come loose. These can pose a falling hazard.
Bulb Choice: More Than Just Brightness
The type of light bulb you use in your sconce can impact its performance and safety.
- Wattage Limits: Always adhere to the maximum wattage specified by the sconce manufacturer. Exceeding this can overheat the fixture, damage the wiring, and create a fire hazard.
- LED vs. Incandescent: While incandescent bulbs generate heat, LEDs are far more energy-efficient and run much cooler. This can be particularly beneficial for sconces, reducing the thermal stress on the fixture and its components. LEDs also last significantly longer, meaning fewer bulb changes in those sometimes hard-to-reach spots.
- Bulb Shape: Ensure the bulb shape fits correctly within the shade. A bulb that’s too wide might make contact with the shade, leading to overheating or stress on the glass.
Cleaning and Maintenance: Preserving the Aesthetic
Dust and grime can detract from the beauty of your sconces and, in some cases, can contribute to heat buildup.
- Dusting: For daily or weekly maintenance, a soft, dry cloth or a feather duster is usually sufficient.
- Deeper Cleaning: For more stubborn dust or grime, lightly dampen a soft cloth with water (or a very mild, non-abrasive cleaner if specified by the manufacturer). Ensure the fixture is cool and the power is off. Never spray cleaning solutions directly onto the fixture; spray onto the cloth. After cleaning, wipe dry thoroughly to prevent water spots.
- Cleaning Shades: Glass shades can usually be removed and washed gently in warm, soapy water. Fabric shades may require specific cleaning methods, often involving dusting or gentle vacuuming. Always consult the manufacturer’s care instructions.
Understanding Regional Electrical Codes and Standards
Electrical codes and installation practices can vary. While this guide offers general best practices, it’s wise to be aware of any local regulations.
- Local Building Codes: If you’re undertaking a major renovation or building a new space with sloped ceilings, consult your local building department. There may be specific requirements for how electrical fixtures are installed, especially on angled surfaces.
- National Electrical Code (NEC): In the United States, the NEC provides standards for safe electrical installations. Familiarizing yourself with relevant sections (particularly those concerning fixture mounting and wiring) can be beneficial. For instance, the NEC mandates that fixtures be supported by approved electrical boxes.
- Manufacturer Instructions: Always prioritize the instructions provided by the manufacturer of your specific sconce and any mounting hardware you use. These are tailored to that particular product.
By incorporating these simple maintenance and safety practices into your routine, you can ensure your newly installed wall sconces on sloped ceilings remain a beautiful and functional feature of your home for years to come, providing reliable illumination and adding to your home’s unique charm.
Conclusion: Illuminating Your Angled Spaces
Installing wall sconces on sloped ceilings might seem like a daunting task, but as we’ve explored, it’s a perfectly achievable DIY project with the right knowledge and approach. The key is a thorough understanding of your ceiling’s angle, a careful selection of suitable sconces and mounting hardware, and methodical execution.
We’ve covered everything from measuring your slope and choosing the right fixture types to gathering your tools and navigating the step-by-step installation process, including how to tackle those trickier, steeper angles. Crucially, we’ve emphasized the non-negotiable importance of electrical safety at every stage.
Remember, the goal is not just to get a light on the wall, but to have it hang securely, safely, and aesthetically pleasingly. By taking your time, using a level religiously, and planning for the unique challenges of angled surfaces, you can successfully transform your sloped walls from a decorating hurdle into a dynamic design feature.
Don’t let those beautiful architectural angles go unlit. With this comprehensive guide, you’re well-equipped to conquer the sloped ceiling and bring beautiful, functional lighting to every corner of your home. Happy installing!


Similar Posts



















