How to Seal a Bathtub Surround Properly
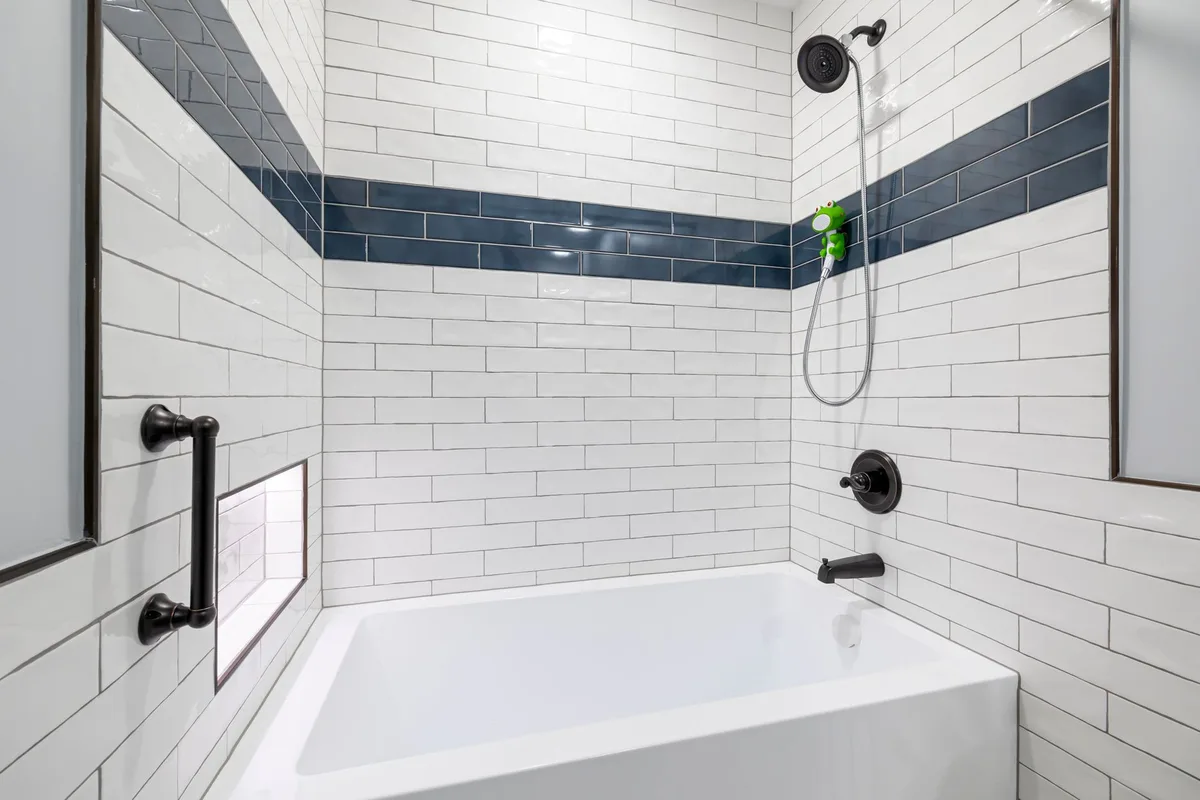
A leaky bathtub surround isn’t just annoying; it’s a fast track to water damage. Mold, mildew, and rot can set in, costing you a fortune in repairs. That’s why sealing your bathtub surround correctly is one of the most critical DIY bathroom maintenance jobs you can tackle.
Done right, it keeps your bathroom dry, prevents costly issues, and makes your tub area look sleek and clean.
We’re talking about that crucial seal along the edges where the surround meets the tub, the walls, and any fixtures. Get this right, and you get peace of mind. Get it wrong, and you’re inviting water to wreak havoc.
I’ll walk you through exactly how to get that professional, watertight finish, ensuring your bathroom stays protected for years to come.
Why Sealing Your Bathtub Surround Matters
Let’s get straight to it: why bother with sealing? It’s all about stopping water where it doesn’t belong. When you shower or bathe, water splashes.
It needs a barrier. This barrier is your sealant.
- Preventing Water Damage: This is the big one. Unsealed gaps let water seep behind your surround. It can damage drywall, insulation, and even the studs in your walls. This leads to rot and structural problems.
- Stopping Mold and Mildew: Damp, dark spaces are a breeding ground for mold and mildew. These aren’t just unsightly; they can impact your indoor air quality and cause health issues. A good seal keeps moisture out.
- Maintaining Appearance: A clean, well-sealed caulk line looks sharp. It gives your bathroom a finished, professional look. Old, cracked, or missing caulk looks shabby and neglected.
- Extending Lifespan: By protecting your bathroom from moisture intrusion, you extend the life of your materials. This means fewer expensive renovations down the line.
Choosing the Right Sealant for Your Bathtub Surround
Not all sealants are created equal, and picking the wrong one is a common mistake. For a bathtub surround, you need something specifically designed for wet environments and flexible applications.
Silicone vs. Acrylic Latex (with Silicone)
This is the main battleground.
- 100% Silicone Sealant: These are excellent for wet areas. They offer superior flexibility and are incredibly waterproof. They adhere well to non-porous surfaces like acrylic, fiberglass, and porcelain. The downside? They can be a bit trickier to work with. They don’t sand, and cleanup often requires mineral spirits. Some people find the smell strong.
- Acrylic Latex Caulk with Silicone: These are often marketed as “kitchen and bath” caulks. They’re easier to work with and clean up with water. They offer good water resistance and are paintable, which can be a plus for some applications. However, they might not be as permanently waterproof or flexible as 100% silicone, especially in high-moisture areas like the direct shower line.
My Recommendation: For the best, longest-lasting, and most waterproof seal around a bathtub surround, I always lean towards a 100% silicone sealant specifically formulated for kitchens and baths. Look for labels that boast mildew resistance.
Other Considerations
- Mildew Resistance: Absolutely essential. You want a sealant that fights off the growth of mold and mildew. Most good quality bathroom caulks have this built-in.
- Flexibility: Bathtubs and surrounds can expand and contract slightly with temperature changes. Your sealant needs to be flexible enough to handle this movement without cracking. Silicone excels here.
- Adhesion: The sealant needs to stick firmly to both the bathtub material and the wall surround. Ensure the product is compatible with both surfaces.
Tools and Materials You’ll Need
Before you start, gather everything. This makes the job smoother and prevents frustrating interruptions.
- Sealant Gun: A basic caulk gun works fine. For silicone, a smooth-rod or ratcheting-rod gun is best. A dripless model is worth the extra few bucks.
- Utility Knife or Caulk Removal Tool: For cutting off old caulk.
- Scraper or Putty Knife: To help remove stubborn old caulk.
- Rubbing Alcohol (Isopropyl Alcohol): For cleaning and preparing the surface.
- Clean Cloths or Paper Towels: Lots of them.
- Painter’s Tape (Optional but Recommended): For creating clean lines.
- Caulk Finishing Tool or Your Finger: To smooth the bead.
- Gloves: To keep your hands clean.
- Your Chosen Sealant: I recommend a high-quality 100% silicone kitchen and bath sealant with mildew resistance.
Step-by-Step Guide to Sealing Your Bathtub Surround
This is where we get hands-on. Take your time, and don’t rush. A little patience now saves you a lot of headaches later.
Step 1: Remove All Old Caulk
This is non-negotiable. You cannot seal over old, deteriorating caulk. It won’t stick properly, and you’ll trap moisture underneath.
- Cut the Old Caulk: Use a sharp utility knife or a dedicated caulk removal tool. Slice along the edge where the old caulk meets the tub and the surround. Go deep enough to loosen it.
- Pry and Peel: Work your way around the entire tub. Use the caulk tool, a scraper, or even a stiff putty knife to gently pry and peel away the old caulk. Be careful not to scratch the tub or surround.
- Stubborn Bits: For any remaining bits, use your scraper. You might need to re-score the caulk line with your knife.
- Clean Up Debris: Once all the old caulk is off, sweep or vacuum up any loose material.
Step 2: Clean the Area Thoroughly
A clean surface is crucial for sealant adhesion. Any soap scum, mildew, or residues will prevent the new caulk from bonding properly.
- Scrub: Use a bathroom cleaner or a solution of vinegar and water to scrub away any soap scum, mildew, or grime from the edges where the old caulk was. A stiff brush helps here.
- Rinse: Rinse the area thoroughly with clean water.
- Wipe with Alcohol: This is a critical step, especially for silicone. Wipe down all the surfaces where the new caulk will go (the edge of the tub and the wall surround) with rubbing alcohol. This removes any lingering oils, soap residue, or moisture. Ensure the surfaces are completely dry before moving on.
- Dry Completely: Let the area air dry for at least an hour, or use a clean, lint-free cloth to speed things up. The surfaces must be bone dry.
Step 3: Prepare Your Sealant Tube and Gun
Getting the bead right starts with proper prep.
- Cut the Nozzle: Use your utility knife to cut the tip of the sealant tube nozzle at a 45-degree angle. Start with a small opening, you can always cut it larger if needed. A smaller opening gives you more control for a finer bead.
- Puncture the Seal: Most sealant tubes have a puncture seal inside. Use the long metal rod on your sealant gun to puncture this seal.
- Load the Gun: Pull back the plunger on the sealant gun, insert the tube, and push the plunger forward until it’s snug against the tube.
Step 4: Apply Painter’s Tape (Optional, but Highly Recommended)
This is the secret to super-clean caulk lines.
- Apply Tape: Apply a strip of painter’s tape along the edge of the tub and another strip along the edge of the wall surround, creating a gap where your caulk bead will go.
- The Gap: Ensure the gap between the two tape lines is the width you want your final caulk bead to be. This makes it easy to get a consistent bead and a sharp edge. I usually aim for a bead that’s about 1/4 inch to 3/8 inch wide.
Image source: Pexels / Curtis Adams
Step 5: Apply the Sealant Bead
This is the main event. Steady hands are key.
- Steady Pressure: Place the tip of the sealant nozzle at the beginning of the joint. Apply consistent, firm pressure to the trigger of the sealant gun.
- Smooth, Continuous Motion: Move the gun along the joint in one continuous motion. Try to maintain an even speed and consistent pressure. The goal is a continuous bead of sealant without gaps or thick spots.
- Work in Sections: Don’t try to do the entire tub in one go. Work in sections that you can manage comfortably.
- Overlap Slightly: When you finish a section and start a new one, overlap the bead slightly to ensure a seamlessly sealed joint.
- Don’t Skimp (but don’t overdo it): You want enough sealant to fill the gap and create a good bond, but you don’t want so much that it’s messy and hard to smooth.
Step 6: Smooth the Sealant Bead
This step makes all the difference between a DIY job and a professional finish. You need to smooth the bead while the sealant is still wet.
- Remove Tape (If you used it for the first pass): If you’re going to tool the caulk, you can often remove the tape immediately after applying the bead before smoothing. This lets you smooth the caulk right up to the edge.
- Tooling: You can use a specialized caulk finishing tool, a plastic spoon, or even a gloved finger.
- With a tool: Drag the tool along the bead of caulk at a consistent angle. This pushes the caulk into the gap and creates a slightly concave, smooth surface.
- With your finger: Dip your finger in a little bit of diluted dish soap or rubbing alcohol. Gently run your wet finger along the bead of caulk. This smooths it out and creates a clean line. Wipe excess caulk off your finger onto a paper towel frequently.
- Clean Excess: Have paper towels ready to wipe away any excess caulk that squeezes out or accumulates on your tool/finger.
- Reapply Tape (If you plan to smooth after taping): If you prefer to tape both sides before smoothing, reapply the painter’s tape after applying the bead. Then, smooth the caulk against the tape edges.
Step 7: Clean Up and Cure
Now, let’s tidy up and let the caulk do its magic.
- Remove Tape (If still in place): If you used painter’s tape and haven’t removed it yet, carefully peel it off immediately after smoothing. Pull the tape away at an angle, in the opposite direction of the caulk bead. This helps ensure a clean edge.
- Final Wipe Down: Use a damp cloth (for acrylic latex) or a cloth with mineral spirits (for silicone) to wipe away any accidental smudges or excess caulk very carefully.
- Curing Time: Check the sealant manufacturer’s instructions for curing times. This is crucial! Most silicone sealants need at least 12-24 hours to fully cure before they can be exposed to water. Some might need longer. Do not use the shower or tub until the caulk is completely cured.
Troubleshooting Common Sealing Issues
Even with careful work, you might encounter a few hiccups.
My caulk bead is uneven.
- Solution: This is why we recommend painter’s tape! For future applications, use tape. If it’s already applied and uneven, you might need to carefully scrape away the offending sections while the caulk is still wet and reapply. Once cured, you’d have to remove it and start over.
There are gaps in my caulk line.
- Solution: You’ll need to apply a second, very thin bead right next to the first, ensuring it bridges the gap and adheres to both surfaces. Smooth it immediately. Be careful not to create too thick of a bead that becomes hard to manage.
The caulk isn’t sticking.
- Solution: This almost always comes down to surface preparation. The surface wasn’t clean enough, or it wasn’t dry. You’ll need to remove the faulty caulk, clean the area thoroughly with rubbing alcohol again, let it dry completely, and reapply.
I used the wrong type of sealant on a painted surface.
- Solution: If you used 100% silicone on a surface you intended to paint, you’re in a bind. Silicone isn’t paintable. You’ll need to remove it completely and replace it with an acrylic latex caulk if you want to paint. For the tub surround itself, painting isn’t usually an issue, but it’s good to be aware of product compatibility.
Maintenance for Long-Lasting Seals
Once you’ve got that perfect, watertight seal, keeping it in good shape isn’t hard.
- Regular Cleaning: Clean your tub and surround regularly with mild bathroom cleaners. Avoid abrasive pads or harsh chemicals that can break down the sealant over time.
- Ventilation: Always ensure good ventilation in your bathroom. Run the exhaust fan during and after showers. Leave the door open when possible. This reduces humidity and helps prevent mold and mildew growth, which can prematurely degrade sealant.
- Wipe Down: After showering, a quick wipe down of the tub edges can help reduce standing water.
- Inspect Annually: Once a year, take a close look at your caulk lines. Check for any signs of cracking, shrinking, or mildew. Early detection makes repairs much simpler. If you notice small cracks, you might be able to do a small touch-up, but if it’s widespread, it’s time for a full removal and reapplication.
When to Call a Professional
While sealing a bathtub surround is a very achievable DIY project, there are times when calling in a pro makes sense.
- Extensive Water Damage: If you suspect water damage behind the surround, or if there’s significant mold or rot, this is beyond a simple sealing job. You need a contractor to assess and repair the underlying structural issues.
- Unfamiliarity with Materials: If you’re dealing with an unusual tub material or surround, and you’re unsure about sealant compatibility, a professional can advise.
- Lack of Confidence: If you’re simply not comfortable with the work or lack the right tools, a professional installer can ensure the job is done correctly the first time.
Conclusion
Properly sealing your bathtub surround is a straightforward but critical task for maintaining your bathroom. By removing old caulk completely, cleaning surfaces diligently, and applying a quality sealant with care, you create a robust barrier against moisture. This protects your home from costly damage and keeps your bathroom looking its best.
Remember, good preparation, the right materials, and a little patience go a long way toward achieving that satisfying, watertight finish. Don’t underestimate the power of a well-sealed tub surround!


Similar Posts



















