How to Wire a Wall Sconce With a Switch
Adding a wall sconce with a built-in switch can dramatically enhance your home’s ambiance and functionality. Whether you’re looking to create a cozy reading nook, illuminate a hallway, or simply add a stylish accent, understanding how to wire one yourself is a valuable skill. This comprehensive guide will walk you through every step, from understanding the basics to completing the installation safely and effectively.
We’ll cover everything you need to know, demystifying the process for DIYers of all levels.
Image source: Pexels / Kindel Media (Pexels License)
Wiring a fixture might sound daunting, but with the right preparation and attention to detail, you can achieve professional results. We’ll dive deep into the electrical concepts, the tools you’ll need, and the practical steps involved, ensuring you feel confident throughout the process. Let’s get your new wall sconce powered up and casting its beautiful light.
Understanding the Core Components: What’s Inside Your Wall Sconce?
Before we start pulling wires, let’s get acquainted with the anatomy of a wall sconce, especially one designed with an integrated switch. Understanding these parts will make the wiring process much clearer.
The Sconce Fixture Itself
This is the decorative piece you see mounted on the wall. It houses the light bulb socket and often has a shade or diffuser. Critically for our task, it will have internal wiring that connects the socket to the fixture’s power cord or to the house wiring.
The Integrated Switch
This is the defining feature for this guide. Unlike sconces that rely on a wall switch, these have a switch built directly into the fixture’s base, arm, or cord. This could be a small toggle, a rocker switch, or even a dimmer.
The wiring within the sconce is designed to interrupt and complete the circuit to the bulb when this switch is activated.
The Power Source (House Wiring or Plug-in Cord)
Wall sconces can be powered in two primary ways:
- Direct Wired: The sconce is connected directly to the electrical wiring within your wall. This is common for permanent installations and requires access to a junction box.
- Plug-In Cord: The sconce has a power cord that plugs into a standard wall outlet. This offers flexibility but still requires careful routing and often involves understanding the cord’s internal wiring for direct connection if you choose to hardwire it.
For this guide, we’ll cover both scenarios, as the internal wiring principles are similar, but the connection to the power source differs.
Safety First: Essential Precautions Before You Begin
Electricity is not to be trifled with. Absolute adherence to safety protocols is non-negotiable. Skipping steps here can lead to serious injury, fire, or damage to your home.
1. Always Turn Off the Power
This is the golden rule. Before doing anything that involves touching bare wires or electrical components, you must de-energize the circuit.
- For Plug-In Sconces: Simply unplug the existing fixture (if replacing one) or ensure the outlet you plan to use is switched off. For added safety, you can remove the fuse or trip the breaker for that specific outlet.
- For Hardwired Sconces: Locate your home’s electrical panel (breaker box). Identify the breaker that controls the circuit you’ll be working on. Flip the breaker to the “OFF” position. To be absolutely certain, use a non-contact voltage tester on the wires at the junction box before touching them. A non-contact tester will alert you to the presence of live voltage.
2. Use the Right Tools and Materials
Having the correct tools ensures the job is done safely and efficiently.
- Screwdriver Set: Phillips and flathead screwdrivers are essential for removing faceplates, securing wires, and disassembling parts.
- Wire Strippers/Cutters: Needed to safely expose the conductor from insulation without damaging the wire.
- Pliers: Needle-nose pliers are useful for bending wire loops and manipulating small components.
- Voltage Tester: A non-contact voltage tester is crucial for verifying that power is off. A multimeter can also be used for more detailed checks.
- Electrical Tape: High-quality electrical tape (rated for 600V) is for insulating wire connections.
- Wire Nuts: These plastic caps are used to securely connect two or more wires. Make sure they are the correct size for the number and gauge of wires you’re joining.
- Mounting Hardware: Ensure your sconce comes with or you have the correct screws and anchors for your wall type.
- Safety Glasses: Protect your eyes from dust, debris, or stray wire strands.
- Ladder or Step Stool: For reaching the installation area safely.
3. Understand Local Electrical Codes
Electrical work must comply with local building codes. While this guide provides general instructions, your local codes might have specific requirements. If you’re unsure, consult a qualified electrician.
Always be aware of any specific regulations concerning line-voltage lighting installations in your area.
4. Inspect the Sconce and Wiring
Before installation, thoroughly inspect your new sconce. Check for any loose parts, damaged wires, or cracks. Examine the wires coming from the sconce, they should be intact and have sufficient length for splicing.
Scenario 1: Wiring a Plug-In Sconce with an Integrated Switch
This is the most common scenario for DIYers, offering flexibility and often a simpler installation. The key here is understanding how the sconce’s internal switch interfaces with its power cord.
Step-by-Step Installation
Step 1: Prepare the Sconce and Power Cord
- Inspect the Cord: Ensure the power cord attached to your sconce is long enough to reach the outlet comfortably, without being stretched or creating a tripping hazard.
- Examine the Plug: The plug should be intact. If you’re replacing an existing plug-in fixture, you might be able to reuse its cord if it’s in perfect condition and the correct gauge for the sconce’s wattage. However, it’s usually best to use the cord supplied with the new sconce.
- Access the Sconce’s Internal Wiring: You’ll likely need to remove a decorative cover, the backplate, or a specific panel on the sconce to access the internal wiring terminals where the power cord connects to the sconce’s internal switch and socket. Consult your sconce’s manual.
Step 2: Identify the Wires
Once you have access to the sconce’s internal connections, you’ll see wires. Typically, there will be three types of wires involved:
- Hot (Live) Wire: Usually black or red. This carries the electrical current from the power source. In a corded appliance, this is often the wire connected to the shorter prong of the plug.
- Neutral Wire: Usually white. This completes the circuit, returning current to the power source. In a corded appliance, this is often the wire connected to the longer prong of the plug.
- Ground Wire: Usually green or bare copper. This is a safety wire that provides a path for electricity to flow to the ground in case of a fault, preventing electric shock.
The power cord itself will have corresponding wires. If the cord is already attached to the sconce, you’ll need to identify which wires within the cord connect to which points inside the sconce. Often, the cord will have a pre-installed plug, and the other end will be terminated at internal connection points in the sconce.
Step 3: Wiring the Sconce’s Internal Switch
This is where the integrated switch comes into play. The power cord’s hot wire will typically connect to one side of the switch, and the other side of the switch will connect to the hot terminal of the light socket. The neutral wire from the cord will bypass the switch and connect directly to the neutral terminal of the socket.
The ground wire from the cord will connect to the sconce’s grounding point and then to the ground connections within the fixture.
- Locate the Switch Terminals: Your sconce’s integrated switch will have terminals (usually small screw terminals or push-in connectors).
- Connect the Hot Wire: Connect the hot wire from the power cord to one terminal of the switch.
- Connect the Switched Hot Wire: Connect the wire leading from the other terminal of the switch to the hot terminal of the light socket within the sconce.
- Connect the Neutral Wire: Connect the neutral wire from the power cord directly to the neutral terminal of the light socket.
- Connect the Ground Wire: Connect the ground wire from the power cord to the grounding screw or terminal on the sconce’s metal structure, and ensure it’s also connected to the ground connection for the light socket.
Important Note on Cord Wiring: If you have a bare wire end on the power cord that needs to be connected internally, you’ll strip about 1/2 inch of insulation and either insert it into a push-in connector or wrap it securely around a screw terminal.
Step 4: Secure the Connections
Use wire nuts of the appropriate size to connect any wires that need splicing (though in a corded sconce, the cord wires often connect directly to internal terminals). Ensure connections are snug and no bare copper is exposed outside the wire nut. For screw terminals, wrap the stripped wire clockwise around the screw and tighten securely.
Step 5: Reassemble the Sconce
Carefully tuck all wires back into the sconce’s housing, ensuring nothing is pinched. Reattach any covers or the backplate you removed.
Step 6: Test the Sconce
Once fully assembled, plug the sconce into a working outlet. Flip the integrated switch to the “ON” position. The light should illuminate.
Test the “OFF” position as well. If it doesn’t work, unplug it immediately and retrace your steps, checking all connections and ensuring the power was off during your work.
Scenario 2: Hardwiring a Wall Sconce with an Integrated Switch
This method integrates the sconce directly into your home’s electrical system. It’s a cleaner look but requires working with house wiring and confirming power is completely off at the breaker.
Step-by-Step Installation
Step 1: Turn Off Power and Verify
- Go to your electrical panel and flip the breaker controlling the circuit to the desired sconce location to “OFF.”
- Use a non-contact voltage tester to confirm there is NO power at the junction box where you’ll be installing the sconce. Test all wires within the box.
Step 2: Prepare the Sconce and Mounting Area
- Inspect the Sconce: As with the plug-in version, check the sconce for damage and ensure all internal wiring and the integrated switch appear sound.
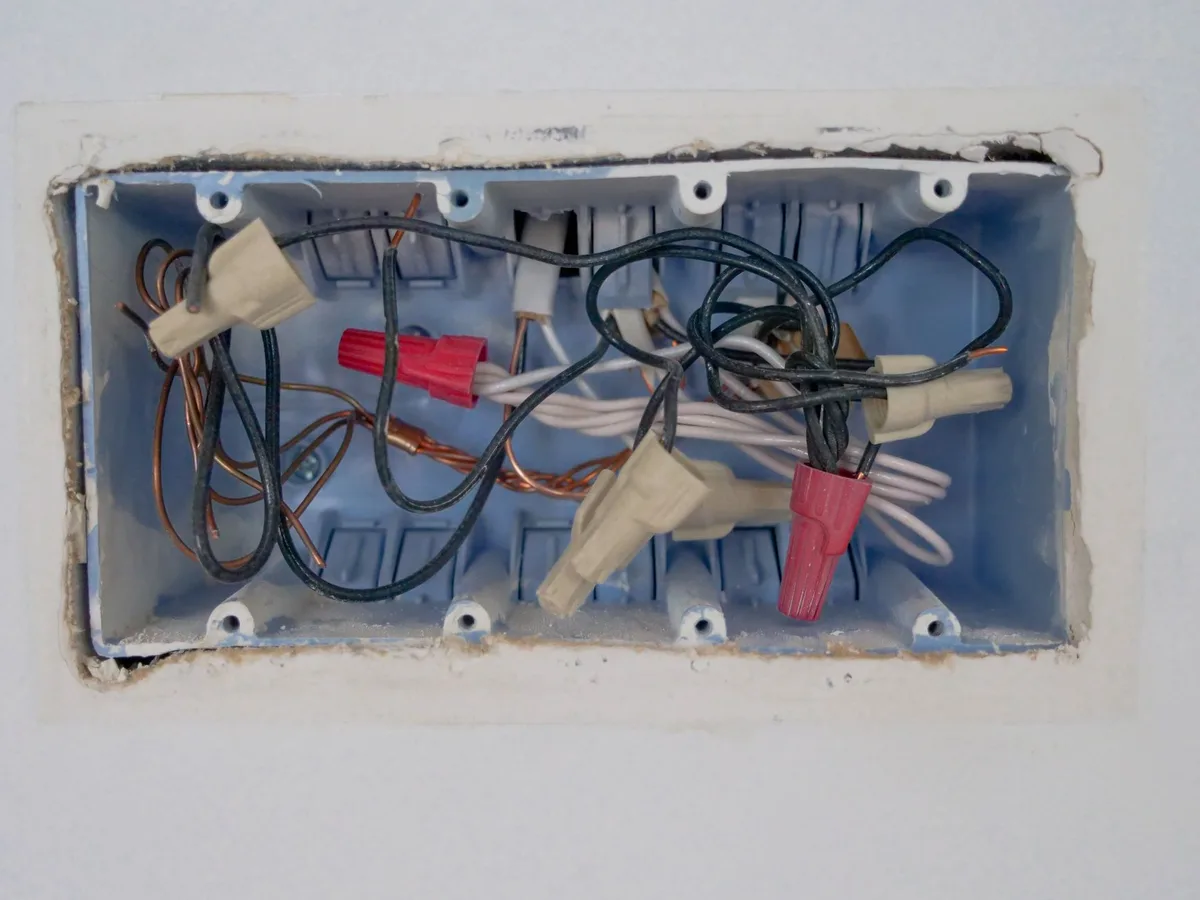
- Locate House Wiring: In the junction box, you’ll find the house wires. Typically, you’ll see a cable containing a black (hot), white (neutral), and bare copper or green (ground) wire.
- Mounting Bracket Installation: Most sconces come with a mounting bracket that attaches to the junction box. Follow the manufacturer’s instructions using the screws provided to secure this bracket to the box.
Step 3: Connect House Wires to Sconce Wires
Inside the junction box, you’ll connect the house wiring to the sconce’s internal wiring. The sconce will have its own set of wires extending from its base, typically a black (hot), white (neutral), and ground wire.
- Ground Connection: Connect the ground wire from the house wiring (bare or green) to the ground wire from the sconce (usually green or bare). Use a wire nut. Also, make sure this ground wire is connected to the grounding screw/terminal on the mounting bracket or junction box itself.
- Neutral Connection: Connect the neutral wire from the house wiring (white) to the neutral wire from the sconce (white). Use a wire nut.
- Hot Connection: This is where the integrated switch matters. The hot wire from the house wiring (black) will connect to a wire that goes into the integrated switch within the sconce. The wire that comes out of the switch will then connect to the hot terminal of the sconce’s light socket.
Visualizing the Sconce’s Internal Circuit:
Think of the sconce’s internal wiring like this:
House Hot Wire → Sconce Switch (Input) → Sconce Switch (Output) → Sconce Socket Hot Terminal
House Neutral Wire → Sconce Socket Neutral Terminal
House Ground Wire → Sconce Ground Terminal → Sconce Socket Ground Terminal
- Performing the Connections:
- Strip about 1/2 inch of insulation from the ends of the house wires and the sconce wires if not already stripped.
- Using wire nuts, twist together the house ground wire and the sconce’s ground wire.
- Using wire nuts, twist together the house neutral wire and the sconce’s neutral wire.
- Identify which wire in the sconce connects to the input of its internal switch. Connect the house hot wire to this wire using a wire nut.
- Identify which wire connects the output of the sconce’s internal switch to the socket. Ensure this connection is secure.
Step 4: Mount the Sconce
Carefully tuck the connected wires back into the junction box. Align the sconce with the mounting bracket and secure it according to the manufacturer’s instructions, usually with screws that pass through the sconce’s base into the bracket.
Step 5: Restore Power and Test
- Go back to your electrical panel and flip the breaker back to the “ON” position.
- Test the sconce’s integrated switch. The light should turn on when the switch is in the “ON” position and off when it’s in the “OFF” position.
Troubleshooting a Hardwired Sconce:
If the light doesn’t work, turn the breaker OFF immediately.
- Check all wire connections to ensure they are secure and correctly matched.
- Verify the wire nuts are properly seated.
- Double-check that the correct breaker was turned on.
- Ensure the light bulb isn’t burned out.
Wiring Variations and Edge Cases
While the fundamental principles remain the same, you might encounter slight variations based on the sconce’s design and its existing wiring.
Sconces with Pre-Attached Cords Needing Hardwiring
Sometimes, a sconce designed to be plugged in comes with a cord, but you want to hardwire it. In this case, you’ll need to carefully modify the cord.
- Disconnect the Plug: Cut off the existing plug from the power cord.
- Expose Internal Wires: Carefully remove the outer insulation of the cord to expose the hot (often black), neutral (often white), and ground (green/bare) wires inside. You’ll then strip a small amount of insulation from the end of each wire.
- Connect to House Wiring: Connect these exposed wires to the corresponding house wires in the junction box as described in the hardwiring section.
- House Hot → Sconce Cord Hot (which then goes to the switch)
- House Neutral → Sconce Cord Neutral (which bypasses the switch to the socket)
- House Ground → Sconce Cord Ground
Sconces with Complex Internal Switching
Some higher-end sconces might have more intricate internal wiring, potentially involving multiple switches or smart home integration. Always refer to the manufacturer’s wiring diagram for these. The core principles of hot, neutral, and ground will still apply, but the path to and from the switch might be less direct.
Sconces with Dimmer Switches
If your sconce has an integrated dimmer switch, the wiring is usually similar to a standard switch. The dimmer simply controls the voltage sent to the bulb. Ensure you’re using a dimmer compatible with the type of bulb (e.g., LED, incandescent) the sconce is designed for.
Wire Gauge and Amperage
It’s vital that the wire gauge used in the sconce and its cord is appropriate for the wattage of the bulb it’s intended to power. Standard household wiring (typically 14-gauge or 12-gauge wires) is usually sufficient for most sconces, but high-wattage fixtures might require thicker wire. The sconce’s specifications will usually clarify this.
Avoid using wires that are too thin, as this is a fire hazard.
Replacing an Existing Fixture
If you’re replacing an old wall sconce with a new one that has an integrated switch, the process is largely the same:
- Turn off the power at the breaker.
- Remove the old fixture.
- Inspect the junction box wiring. You should find the standard hot, neutral, and ground wires.
- Proceed with wiring the new sconce as per the plug-in or hardwiring instructions, connecting the new sconce’s wires to the existing house wires.
When to Call a Professional Electrician
While this guide aims to empower you to tackle this project yourself, there are situations where professional help is essential.
- Uncertainty: If at any point you feel unsure or uncomfortable with the process, stop and call an electrician. Your safety is paramount.
- Old or Faulty Wiring: If the wiring in your junction box appears old, brittle, or damaged, it’s best to have an electrician assess and potentially upgrade it.
- Lack of a Junction Box: If there’s no existing junction box where you want to install the sconce, an electrician can properly install one and run the necessary wiring.
- Recurring Breaker Tripping: If the circuit breaker for the sconce location trips immediately after you restore power, there’s likely a short circuit that needs professional diagnosis.
- Complex Installations: For very-high-wattage fixtures, multi-fixture setups, or custom wiring needs, an electrician is recommended.
Frequently Asked Questions About Wiring Wall Sconces with Switches
Q1: Can I use a dimmer switch with any wall sconce?
No, not all sconces or bulbs are compatible with dimmer switches. The sconce’s integrated switch might be a simple on/off toggle, or it could be a dimmer. If it’s a dimmer, ensure it’s designed for the type of bulb you’re using (e.g., incandescent, halogen, LED).
For non-dimmable bulbs or fixtures, attempting to use a dimmer can damage the bulb, the fixture, or the wiring.
Q2: What kind of wire nuts should I use?
Use wire nuts rated for the number and gauge of wires you are joining. For typical household wiring (14-gauge or 12-gauge), standard plastic wire nuts (often red, blue, or yellow) are common. Ensure they are UL listed and appropriate for the task.
Twist them on until snug, and give a gentle tug to confirm the wires are secure.
Q3: My new sconce doesn’t have a ground wire. Is that a problem?
Yes, it’s a significant concern. A ground wire is a vital safety feature. If your sconce lacks a ground wire and the house wiring does have a ground connection available in the junction box, you should consider finding a sconce that includes a ground wire for safety.
If neither the sconce nor the house wiring has a ground, you’ll need to consult an electrician about the safest way to proceed, as this can be a code violation and a safety risk.
Q4: How do I know which wire is hot, neutral, and ground in the sconce or cord?
- Color Coding: In North America, hot is typically black or red, neutral is white, and ground is green or bare copper.
- Cord Markings: Power cords sometimes have ridges or markings on one of the wires to help distinguish them. The wider prong on a plug usually connects to the neutral wire, and the shorter prong connects to the hot wire.
- Manufacturer’s Diagram: Always consult the wiring diagram that comes with your sconce. It will clearly label each wire.
Q5: What if the instructions say to hardwire, but I want to use the plug?
This is generally not recommended unless the fixture is specifically designed for both options. Manufacturers provide instructions for a reason. Hardwiring is typically done for fixtures that draw more power or are intended for permanent placement where a cord would be unsightly or a hazard.
If the instructions only mention hardwiring, it implies the internal components and wiring are not designed for direct plugging into an outlet via a cord, and attempting to do so could be unsafe.
Q6: How can I ensure my connections are waterproof if the sconce is for an outdoor or damp location?
For outdoor or damp locations, you’ll need specific outdoor-rated fixtures and appropriate waterproof wire connectors. Standard wire nuts are not suitable. Consult the fixture’s manual and local electrical codes for outdoor wiring requirements, which often involve specialized boxes, sealants, and connectors.
Conclusion: Illuminating Your Space Safely and Beautifully
Wiring a wall sconce with an integrated switch is an achievable DIY project that can significantly enhance your home’s aesthetic and utility. By prioritizing safety, understanding the components, and following the steps outlined in this guide, you can confidently install your new fixture. Remember to always turn off the power, use the right tools, and double-check your connections.
If you encounter any complexities or feel uncertain, never hesitate to consult a qualified electrician. Enjoy the beautiful new light your hard work has brought into your home!


Similar Posts



















