How Far Apart to Hang Wall Sconces in Hallway
Hallways. They’re the connective tissue of a home, often overlooked, yet they bear the brunt of daily traffic. A well-lit hallway isn’t just functional; it’s an invitation, setting the tone for the entire house.
And when it comes to hallway lighting, wall sconces offer a sophisticated, stylish solution. But the magic isn’t just in the sconce itself; it’s in how you hang them. Get the spacing wrong, and your hallway can feel awkward, cramped, or even dimly lit.
Get it right, and you achieve a seamless flow, a warm ambiance, and an undeniable sense of curated style.
So, how far apart should you hang wall sconces in a hallway? That’s the million-dollar question, and the answer isn’t a single, rigid number. It’s a blend of design principles, room dimensions, and your personal aesthetic.
We’re going to dive deep into this, exploring the factors that influence your decisions, offering practical guidelines, and arming you with the knowledge to make your hallway shine. Forget guesswork; this is about smart, intentional design.
Understanding the Purpose of Hallway Sconces: More Than Just Light
Before we get to the nitty-gritty of spacing, let’s establish why hallway sconces are such a popular choice. They’re not your primary light source, like a ceiling fixture. Instead, they serve multiple, crucial roles:
- Illumination: They fill in the darker areas of a hallway, preventing that dreaded cave-like feeling, especially in longer or windowless corridors. They provide a gentle, ambient glow that’s perfect for navigating at night without being jarring.
- Ambiance: Sconces cast a soft, often upward or downward light, creating a much warmer and more inviting atmosphere than harsh overhead bulbs. This is key to creating a welcoming entryway.
- Design Accent: They’re decorative elements in themselves, adding architectural interest and a touch of elegance. The right sconces can elevate a hallway from utilitarian to a showpiece.
- Space Saving: Unlike floor lamps, wall sconces don’t take up valuable floor space, making them ideal for narrower hallways where every inch counts.
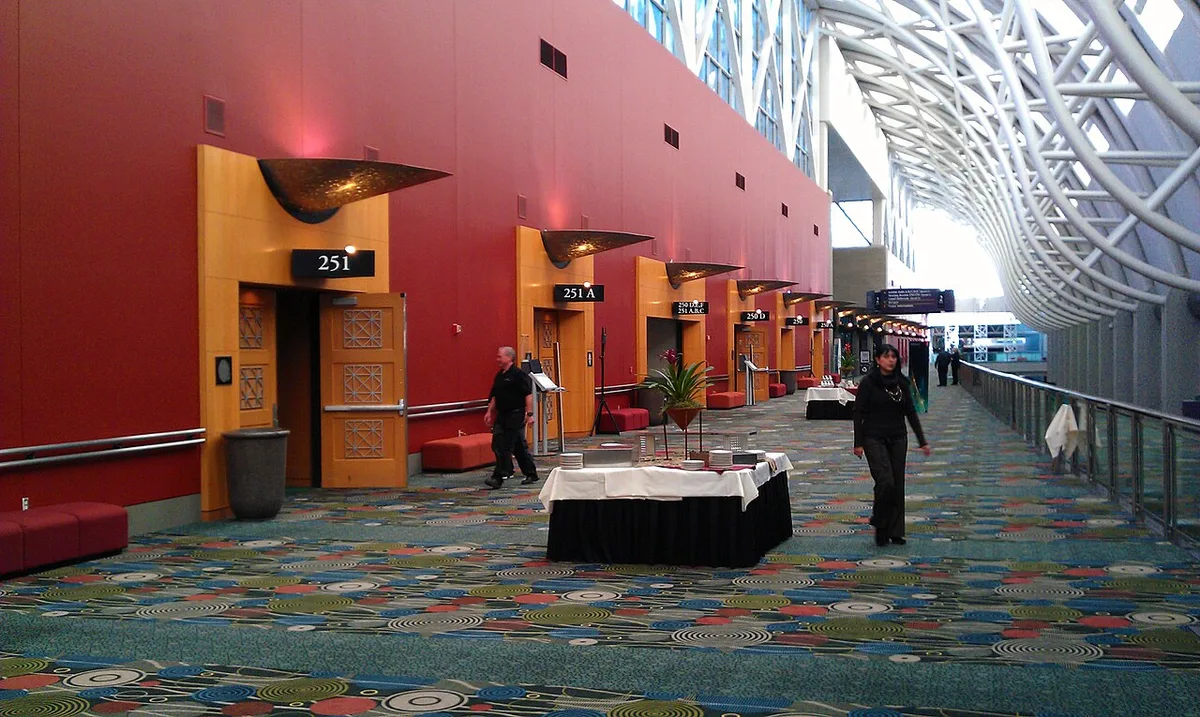
This visual showcases how sconces can enhance a hallway’s aesthetic and functionality.
Key Factors Influencing Sconce Spacing
The ideal distance between your hallway wall sconces is a fluid concept, dictated by several interconnected factors. Think of these as the building blocks of your decision-making process.
1. Hallway Length and Width
This is arguably the most significant factor. A grand, wide hallway can accommodate more generously spaced sconces, perhaps even fewer in number but with a stronger presence. A narrow, long hallway will require more frequent placement to ensure even lighting and a sense of proportion.
- Width: A wider hallway allows for more flexibility. You can space sconces further apart without making the space feel empty. Conversely, a narrow hallway demands tighter spacing to avoid overwhelming the limited width.
- Length: The longer the hallway, the more sconces you’ll likely need. The goal is to avoid large dark gaps between fixtures. Imagine it like a string of pearls; you want consistent spacing along the entire length.
2. Sconce Size and Scale
The physical dimensions of your chosen sconces play a critical role. A petite, delicate sconce will be lost if spaced too far apart, while a large, statement sconce can dominate if placed too close to other fixtures or architectural elements like doors.
- Visual Weight: A sconce’s visual weight isn’t just about its size but also its design. A dark, ornate sconce has more visual weight than a small, minimalist one.
- Light Distribution: Consider how the sconce throws light. Some cast a wide pool, while others focus light upwards or downwards. This will affect how much coverage you get from each fixture.
3. Ceiling Height
Ceiling height impacts how high you should hang your sconces, which in turn influences perceived spacing.
- Low Ceilings: In hallways with lower ceilings, you might want to hang sconces slightly lower to avoid making the space feel top-heavy. This can subtly encourage a slightly tighter spacing.
- High Ceilings: Higher ceilings offer more vertical real estate, allowing you to mount sconces higher. This can create a more dramatic effect and might allow for slightly wider spacing, as the light will travel further.
4. Architectural Features
Doors, windows, artwork, and doorways are natural dividers and focal points within a hallway. Your sconce placement should complement these features, not compete with them.
- Doors: Never place a sconce directly in front of a door swing. Position them to the side, avoiding direct obstruction when the door is open.
- Artwork: If you have a gallery wall or a prominent piece of art, a sconce can be placed to highlight it. Consider the artwork’s dimensions and the light spill.
- Doorways/Entryways: When a hallway opens into another room or a significant entryway, this can be a natural point to place a sconce or adjust spacing.
5. Electrical Wiring and Recessed Boxes
Let’s not forget the practicalities! Your existing electrical setup will dictate where you can install sconces. If you’re adding new wiring, you have more freedom, but it adds to the project’s complexity and cost.
Always consult a qualified electrician for any wiring changes.
- Existing Boxes: If you’re replacing old fixtures, you’ll likely be limited to pre-existing electrical boxes.
- New Installation: Planning new boxes gives you freedom but requires professional installation.
6. Personal Style and Desired Mood
Are you going for a subtle, understated elegance, a dramatic, gallery-like feel, or a warm, cozy glow? Your personal style should guide your spacing decisions.
- Minimalist: Tighter spacing with more numerous, smaller sconces can create a modern, understated look.
- Traditional/Grand: Wider spacing with larger, more decorative sconces can evoke a sense of classic grandeur.
The Golden Rules: Practical Spacing Guidelines
Now, let’s get down to some actionable advice. While there’s no single law, there are widely accepted principles that create aesthetically pleasing and functional results. These are excellent starting points.
Rule 1: Even Distribution is Key
The most fundamental principle is to ensure the light is distributed evenly along the hallway. You don’t want pockets of darkness.
- The “Midpoint” Method: A common approach is to divide the hallway length by the number of sconces you plan to use. For instance, a 20-foot hallway with two sconces would mean placing them roughly 10 feet apart, centered on their respective halves. If using four sconces, divide by four for 5-foot intervals.
- Visual Balance: Beyond pure measurement, step back and visually assess. Does it look balanced? This is where personal judgment comes in.
Rule 2: Consider the “Center of the Wall” Principle
Often, sconces look best when they are not too close to the corners or ends of the hallway.
- Spacing from Corners: A good rule of thumb is to place the first and last sconce about one-quarter to one-third of the distance from the nearest corner or doorway. So, if your hallway is 20 feet long and you’re using two sconces, instead of placing them precisely at the 5-foot and 15-foot marks, you might shift them slightly towards the center, perhaps at 6 feet and 14 feet.
- Example: In a 30-foot hallway, aiming for three sconces:
- Divide total length by number of sconces: 30 ft / 3 = 10 ft.
- This suggests centering each sconce every 10 feet.
- Now, adjust for corners: instead of 10ft, 20ft, 30ft (which would put one right at the end), consider placing them at approximately 7.5 ft, 15 ft, and 22.5 ft. This leaves about 7.5 ft from each end.
For tasks related to home maintenance, remember to address other components. For instance, if you’re revamping lighting, you might also consider how often should you replace vacuum filter to maintain air quality while you’re at it.
Rule 3: The Power of Three (or More)
For longer hallways, using an odd number of sconces (like three or five) often creates a more visually dynamic and balanced feel than an even number, which can sometimes feel too symmetrical or predictable.
- Odd Numbers: Three sconces can be placed at roughly the 1/4, 1/2, and 3/4 points of the hallway. For a 30-foot hallway, this could be around 7.5 ft, 15 ft, and 22.5 ft.
- Even Numbers: If you opt for an even number (two or four), ensure they are well-balanced and spaced thoughtfully from the ends. Two sconces are common for shorter hallways or to flank a significant feature.
Rule 4: Height Matters for Perceived Spacing
The vertical placement of your sconces impacts how they relate to each other and the overall space.
- Standard Height: A common guideline for sconce height is to center them at eye level, typically between 60 and 74 inches from the floor. This often means the bottom of the sconce is around 57-66 inches from the floor.
- Relationship to Ceiling: For higher ceilings, you can mount them a bit higher, perhaps 70-75 inches from the floor. For lower ceilings, aim for the lower end of that range, or even slightly below 60 inches, to avoid making the hallway feel compressed.
- Consistency is Crucial: Whatever height you choose, ensure it’s consistent for all sconces in the hallway.
Rule 5: Consider the Sconce’s Light Spread
How the light emanates from the sconce affects how close they need to be.
- Wide Spread: If your sconces cast a broad pool of light, you can afford to space them a bit further apart.
- Focused Light: Sconces that direct light upwards and downwards, or in a narrow beam, will require closer placement to ensure adequate illumination across the entire hallway.
Rule 6: Measure Twice, Install Once
This old adage is especially true for lighting. Before you drill any holes, mark your intended spots with painter’s tape and assess them visually.
- Use a Laser Level: For perfect horizontal alignment, a laser level is invaluable.
- Get a Second Opinion: Have someone else review your marked placements. A fresh perspective can catch potential issues you might have missed.
Calculating Spacing: A Step-by-Step Approach
Let’s put it all together with a practical method for calculating your sconce spacing.
Step 1: Measure Your Hallway
- Measure the total length of the hallway from the interior side of one end wall to the interior side of the other.
- Measure the width of the hallway.
Step 2: Determine the Number of Sconces
Consider your hallway’s length and your desired aesthetic.
- Short Hallways (under 10-12 feet): Often one or two sconces are sufficient.
- Medium Hallways (12-25 feet): Two or three sconces are typically ideal.
- Long Hallways (over 25 feet): Three or more sconces will likely be needed for even illumination.
Step 3: Calculate Initial Spacing
- Divide Total Length by Number of Sconces: This gives you an approximate distance between the centers of each sconce.
- Example: 30-foot hallway, 3 sconces. 30 ft / 3 = 10 ft apart.
Step 4: Adjust for End Spaces
This is where you refine the placement to avoid placing sconces too close to corners.
- Aim for 1/4 to 1/3 of the Interval: Subtract one interval from the total length and divide that by 2. This is roughly where your first and last sconces should be placed from the nearest end.
- Example: 30-foot hallway, 3 sconces. Initial interval = 10 ft.
- Subtract one interval: 30 ft, 10 ft = 20 ft.
- Divide by 2: 20 ft / 2 = 10 ft. This is problematic as it puts the first at 10ft and the last also at ~20ft, leaving a large gap. Let’s rethink this adjustment.
A better adjustment for end spacing:
- Calculate the total space between your intended sconces. For N sconces, there are N-1 spaces between them.
- Example: 30-foot hallway, 3 sconces. There are 2 spaces between them.
- Total length of these spaces = Total hallway length, (Sconce width * Number of sconces), Wall clearance at each end.
This is still getting complicated. Let’s go back to a simpler, more visual approach for end spacing:
Simpler End Spacing Adjustment:
- Calculate the Interval: Divide the hallway length by the total number of spaces you will have. If you have N sconces, you have N-1 spaces between them.
- Example: 30-foot hallway, 3 sconces. This means 2 spaces between them. 30 ft / 2 = 15 ft per space. This implies sconces at 0ft, 15ft, 30ft, which again, is not ideal.
Let’s use the “mid-point of the wall” principle more directly.
Revised Step 4: Positioning Sconces by Wall Sections
- Divide the Hallway: Mentally divide your hallway into equal sections for the number of sconces plus one.
- Example: 30-foot hallway, 3 sconces. Divide the hallway into 3 + 1 = 4 sections.
- Each section is 30 ft / 4 = 7.5 feet.
- Place Sconces in the Center of Each Section (Except Ends):
- The first sconce goes in the center of the second section.
- The second sconce goes in the center of the third section.
- And so on.
- Example:
- Section 1: 0-7.5 ft
- Section 2: 7.5-15 ft -> Center is 11.25 ft (place first sconce here)
- Section 3: 15-22.5 ft -> Center is 18.75 ft (place second sconce here)
- Section 4: 22.5-30 ft
- This placement puts your sconces at approximately 11.25 ft and 18.75 ft. This gives 11.25 ft from the start, 7.5 ft between them, and 11.25 ft to the end. This still feels too much like one large central space for only two sconces.
Okay, let’s simplify for clarity and common scenarios.
The Most Common and Effective Method: The “Rule of Thirds” for Two Sconces, and “Dividing the Space” for More.
For Two Sconces:
- Divide the hallway length into thirds.
- Place the sconces at the markings for 1/3 and 2/3 of the way down the hallway.
- Example: 20-foot hallway. Divide into thirds: 6.67 ft, 13.33 ft. Place sconces at 6.67 ft and 13.33 ft from one end. This leaves 6.67 ft at each end. Perfect.
For Three Sconces:
- Divide the hallway into fourths.
- Place the sconces at the markings for 1/4, 1/2, and 3/4 of the way down the hallway.
- Example: 30-foot hallway. Divide into fourths: 7.5 ft, 15 ft, 22.5 ft. Place sconces at 7.5 ft, 15 ft, and 22.5 ft from one end. This leaves 7.5 ft at each end. This is a very common and effective layout.
For Four Sconces:
- Divide the hallway into fifths.
- Place the sconces at the markings for 1/5, 2/5, 3/5, and 4/5 of the way down the hallway.
- Example: 40-foot hallway. Divide into fifths: 8 ft, 16 ft, 24 ft, 32 ft. Place sconces at 8 ft, 16 ft, 24 ft, and 32 ft from one end. This leaves 8 ft at each end.
Generalizing: For ‘N’ sconces, divide the hallway into ‘N+1’ sections. Place the sconces at the boundaries of the 2nd, 3rd…, Nth sections. This ensures good spacing from the ends.
Step 5: Consider Sconce Dimensions for Final Placement
Once you have your center-point measurements, account for the physical width of the sconce.
- Measure the actual width of your sconce.
- Adjust the mounting position slightly so the center of the sconce aligns with your calculated measurement. You don’t want the edge of the sconce to be at your measurement; it’s the midpoint.
Step 6: Mark and Double-Check
- Use painter’s tape to mark the exact mounting point for each sconce.
- Step back, view from different angles, and ensure the spacing looks balanced and pleasing. Consider scale against furniture or artwork along the wall.
Edge Cases and Specific Hallway Scenarios
Not all hallways are simple, straight shots. Here’s how to handle variations.
L-Shaped or U-Shaped Hallways
For hallways with turns, treat each straight section independently.
- Applying the Rules: Apply the spacing rules to each straight run. At the corner, you might skip a sconce if it would be too close to the turn, or you might place one strategically to highlight the transition.
- Visual Flow: Ensure the spacing continues logically around the bend. The last sconce on one leg should transition smoothly in visual rhythm to the first sconce on the next leg.
Hallways with Frequent Doors
If your hallway has many doors, your sconce placement will be dictated by these openings.
- Avoid Door Swings: Absolutely critical. Never place a sconce where it will be hit by a door.
- Flanking Doors: Sconces can be effectively used to flank doorways, creating a sense of arrival and emphasizing architectural features.
- Compromise Spacing: You may have to compromise on perfect mathematical spacing to accommodate door placement. Prioritize avoiding obstructions and ensuring adequate light on the non-door sections.
Very Short or Entryway Hallways
For very short hallways, such as an entryway leading into a living space, one or two well-placed sconces are usually enough.
- Single Sconce: If it’s a very short, narrow space, a single sconce might be all that’s needed, positioned to provide ambient light without overwhelming the area.
- Pairs for Entry: Two sconces, perhaps flanking a console table or mirror, are common for entryways. The rule of thirds for placement works well here.
Hallways with Staircases
Staircases add a vertical dimension and a natural break in the wall.
- At the Base/Top: A sconce might be placed near the bottom or top of the stairs.
- Along the Stairs: If the staircase runs along a hallway wall, consider placing sconces to illuminate the stairs themselves, alongside lighting the hallway. This may mean slightly different height considerations for those specific sconces.
- Spacing Adjustment: The presence of a staircase can act as a natural endpoint for a section of hallway lighting, influencing the spacing before and after it.
Sconce Selection: Beyond the Spacing
While spacing is paramount, the sconces themselves deserve consideration to ensure they complement your hallway and your spacing decisions.
Style and Finish
- Matching Your Decor: Choose styles that align with your home’s overall aesthetic, modern, traditional, minimalist, industrial, etc.
- Finish: Consider the finish (brass, nickel, bronze, black) and how it pairs with other hardware in your home.
Light Source and Direction
- Up/Down Lighting: These are very popular for hallways as they cast light upwards and downwards, creating ambiance and highlighting architectural features without glare.
- Shade Material: Glass, fabric, or metal shades will all diffuse light differently. Clear glass will be brighter, while frosted glass or fabric will soften the light.
Bulb Type and Wattage
- LEDs: Energy-efficient and long-lasting, LEDs are the modern standard.
- Brightness (Lumens): For hallways, you typically want softer, ambient light. Aim for bulbs with lower lumen counts for sconces, or use dimmable bulbs to control intensity.
- Color Temperature: Warm white (2700K-3000K) is generally preferred for living spaces and hallways to create a cozy atmosphere.
Professional Installation: Is It Necessary?
While hanging a simple light fixture might seem DIY-friendly, installing wall sconces, especially if new wiring is involved, is often best left to the professionals.
- Electrical Safety: Improper wiring can be a serious fire hazard or cause electrical shocks. An electrician will ensure all connections are safe and up to code.
- Structural Integrity: For heavier sconces, ensuring they are securely mounted to wall studs or using appropriate anchors is crucial.
- Code Compliance: Electricians are up-to-date on local building codes, ensuring your installation is compliant.
- Efficiency: If you have many sconces to install or complex wiring, an electrician can often do the job more efficiently and with less disruption.
If you’re considering a larger home improvement project, perhaps looking at appliances or other fixtures, understanding maintenance schedules is also key. For instance, knowing how often should you replace vacuum filter can be part of a broader home care strategy. Similarly, for broader home improvement guidance, explore resources within a blog section that covers various aspects of home living.
Frequently Asked Questions (FAQ)
Q1: What’s the most common mistake people make when spacing hallway sconces?
A1: The most common mistake is placing them too close to the corners of the hallway, making the ends feel dark and uninviting, or placing them too far apart, creating large shadowed areas. Another frequent error is not considering the visual scale of the sconce relative to the hallway.
Q2: Do I need to match the sconce style to my ceiling light?
A2: Not necessarily. While some cohesion is good, they don’t have to be identical. The sconces should complement the overall style of your home and the ceiling fixture, creating a harmonious layered lighting scheme.
Q3: How do I account for outlets in the hallway when placing sconces?
A3: If an outlet is in an unavoidable spot, you’ll need to work around it. You might place a sconce on either side of it, or if the outlet is low, perhaps choose shorter sconces that don’t visually interfere. In some cases, you might consult an electrician about relocating the outlet if it significantly hampers your desired lighting plan.
Q4: Can I use sconces on both sides of a hallway?
A4: Yes, you can, especially in wider hallways. If you do, ensure you maintain consistent spacing on both sides and between the pairs of sconces on opposite walls. This often requires careful planning to avoid making the hallway feel cluttered.
Q5: What if my hallway has a very low ceiling?
A5: For low ceilings, prioritize mounting sconces on the lower end of the recommended height range (around 60-64 inches from the floor). This prevents the lighting from visually lowering the ceiling further. Also, opt for sconces that cast light upwards and downwards rather than producing a wide glare.
Conclusion: Creating a Welcoming Corridor
Illuminating your hallway with wall sconces is a fantastic way to blend functionality, ambiance, and style. By understanding the interplay of hallway dimensions, sconce size, and architectural features, and by following tried-and-true spacing guidelines, you can transform this transitional space into a beautifully lit pathway. Remember, the goal is even light distribution, visual balance, and a welcoming glow that sets the perfect tone for your home.
Don’t be afraid to mark out your placements and critically assess them before making any permanent holes, a little planning goes a long way in achieving lighting perfection.


Similar Posts



















