How to Hide Cord on Plug in Wall Sconce: Step-by-Step Guide
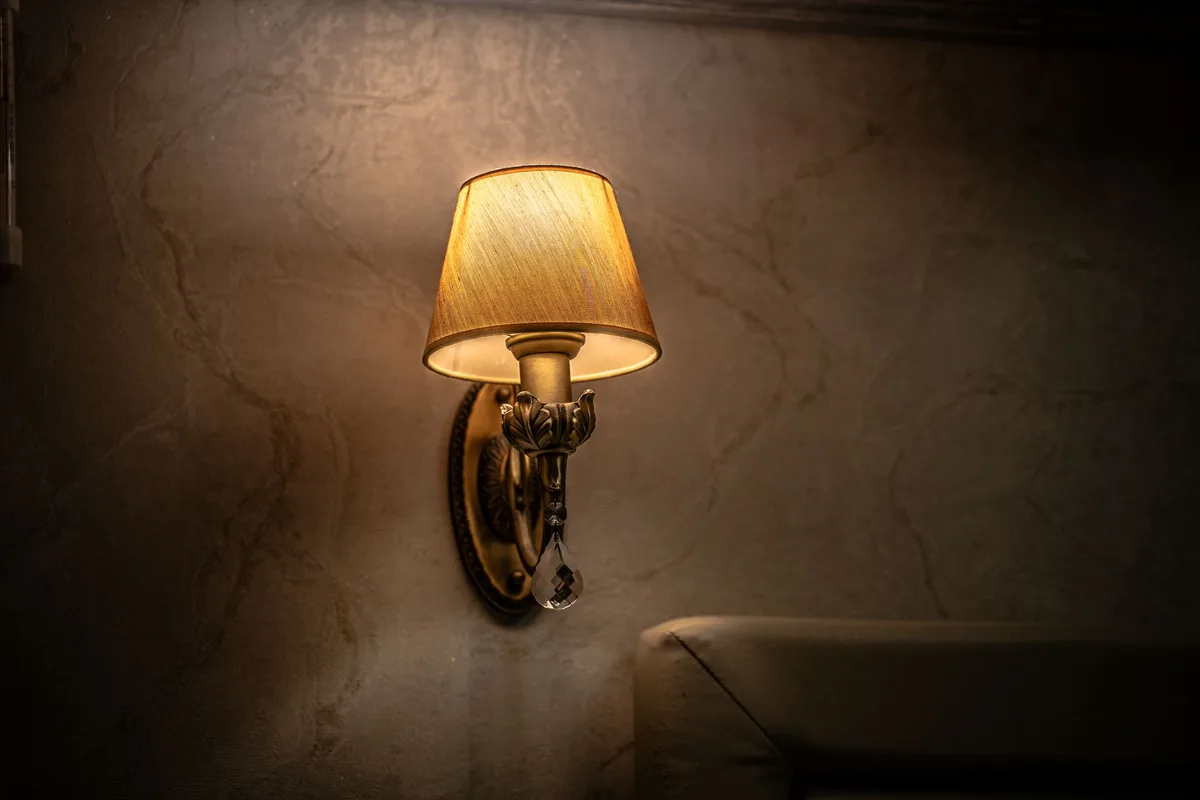
Plug-in wall sconces offer fantastic flexibility for accent lighting, task illumination, and adding a touch of style without the need for an electrician. But let’s be honest, that dangling cord can really throw off the whole vibe. It’s the one thing that can quickly turn an elegant lighting fixture into something that looks… well, less than polished.
The good news? You absolutely don’t have to live with a visible power cord. There are a surprising number of straightforward, effective, and even stylish ways to conceal that wire and achieve the seamless look you’re after.
Whether you’re renting, don’t want to commit to hardwiring, or simply prefer a minimalist approach, this guide has you covered. We’ll walk through everything from simple DIY tricks to more involved solutions, ensuring your plug-in sconce looks as good as it lights up your space.
Why Bother Hiding the Cord? Unpacking the Aesthetic Impact
Before we dive into the “how,” let’s touch on the “why.” A visible cord, especially a standard white or black one, can be incredibly distracting. It breaks the visual line, pulls the eye away from the sconce itself, and can make even the most beautiful fixture look like a temporary setup.
Think of it like this: when you’re decorating a room, you meticulously choose paint colors, furniture, and decor to create a cohesive and pleasing atmosphere. A messy cord is the equivalent of leaving a smudge on a freshly cleaned window, it just undermines all the effort you’ve put in.
Hiding the cord elevates your interior design:
- Enhanced Style: It allows the sconce to take center stage, showcasing its design and the quality of its light.
- Clean & Minimalist Look: This is especially important for modern, Scandinavian, or minimalist interiors where clutter is aggressively avoided.
- Professional Finish: It makes your DIY lighting installation look like it was done by a professional.
- Safety (Indirectly): While not the primary reason, keeping cords tidy and out of sight reduces the tripping hazard and keeps them away from curious pets or children who might chew on them.
So, yes, it’s worth the effort. Let’s get to work!
Method 1: The Power Cord Cover – Your Go-To Solution
This is, by far, the most popular and often the easiest method for concealing plug-in sconce cords. Cord covers are specifically designed for this purpose and come in a variety of styles and materials to blend with your decor.
What is a Power Cord Cover?
Essentially, a cord cover is a channel or sleeve that runs along the wall, hiding the electrical cord within it. They typically adhere to the wall with a strong adhesive backing or can be secured with small screws for a more permanent installation.
Types of Cord Covers:
Paintable Plastic Channels: These are the workhorses of cord concealment. They’re usually made of PVC or similar plastic and come in a neutral color (often white). The magic happens because they can be painted to match your wall color precisely.
- Pros: Inexpensive, readily available, highly customizable (paintable), effective.
- Cons: Can look obviously like a plastic cover if not painted well, might not offer the most premium aesthetic.
Wood-Look or Decorative Channels: Some cord covers mimic the look of wood, brushed metal, or other finishes. These are great if you want the cover to be an intentional design element rather than disappearing into the wall.
- Pros: Can add a decorative touch, requires no painting.
- Cons: Can sometimes look cheap if the finish isn’t high quality, limited color options.
Fabric or Fabric-Sleeve Cord Covers: These are flexible sleeves, often made of nylon or a similar fabric, that you thread the cord through. They’re excellent for covering the cord from the sconce down to an outlet.
- Pros: Very flexible, easy to install, good for rounded or moving cords, can look soft and unobtrusive.
- Cons: Less effective at creating a perfectly straight, architectural line; might not be suitable for very thick cords.
How to Install a Paintable Plastic Cord Cover:
What You’ll Need:
- Your chosen paintable cord cover kit (usually includes the cover channel, often a base piece that sticks to the wall, and separate cover pieces that snap on).
- Measuring tape.
- Pencil.
- Utility knife or strong scissors.
- Rubbing alcohol or degreaser.
- Primer (if needed, especially if you plan to paint it a darker color or over a slick surface).
- Paint that matches your wall color.
- Small paintbrush or roller.
- (Optional) Small screws and a drill if you want extra security.
Step-by-Step Installation:
- Plan Your Route: Decide exactly where the cord will run from the sconce down to the outlet. Measure the distance. Visualize it. Ensure it avoids areas where it might be bumped or kinked.
- Clean the Wall: This is crucial for the adhesive to hold properly. Use rubbing alcohol or a degreaser to clean the wall surface where the cord cover will go. Let it dry completely.
- Measure and Cut: Measure the cord cover pieces to fit your planned route. Most systems have straight sections, possibly corner pieces. You might need to cut these to length using a utility knife or strong scissors. Take your time and get clean cuts.
- Adhere the Base: Many systems have a base piece that adheres directly to the wall first. Peel off the backing paper and carefully press it into place, pressing firmly for 30 seconds.
- Route the Cord: Gently feed the sconce’s power cord into the channel. Some systems have a groove for the cord, while others are designed to snap shut around it.
- Snap On the Cover: Once the cord is in place, snap the outer cover pieces onto the base. They usually click into place. Ensure you work your way down the entire length, snapping each section shut.
- Paint (The Key Step!):
- Prime (Optional but Recommended): If your cord cover is a different color or material than your wall, a coat of primer can help the paint adhere better and create a more uniform finish. Let it dry thoroughly.
- Apply Wall Paint: Using a small brush or a mini-roller, carefully paint the cord cover to match your wall. You may need two coats. Try to get a smooth, even finish. Avoid getting paint on the sconce itself or the outlet.
- Feather the Edges: For an even more seamless look, you can very lightly feather the paint onto the wall just along the edges of the cord cover. Do this incredibly sparingly.
- Allow to Cure: Let the paint dry and cure completely.
Tip: If you’re a renter, check if the adhesive used is paintable and removable. Many brands offer versions that won’t damage your walls.
Method 2: The Cable Raceway – A More Integrated Approach
Similar to cord covers, cable raceways are designed for wire management, but they often offer a more robust and integrated look. They’re frequently used to hide wires for TVs or audio-visual equipment but work just as well for plug-in sconces.
What is a Cable Raceway?
A cable raceway is typically a larger, often more substantial channel than a simple cord cover. They can be installed along baseboards, up corners, or directly on walls. Many are designed to be painted.
Types of Cable Raceways:
- Surface Mount Raceways: These mount directly onto the wall surface. They usually consist of a base that is screwed or adhered to the wall, and a cover that snaps on. They come in various profiles, some are rounded, others more square.
- Corner Raceways: Specifically designed to fit neatly into inside or outside corners, making the transition from wall to ceiling or along edges less noticeable.
How to Install a Cable Raceway:
What You’ll Need:
- Chosen cable raceway kit (base pieces, cover pieces, potentially corner pieces).
- Measuring tape.
- Pencil.
- Drill and screws (most common for raceways, though some have adhesive options).
- Wall anchors (if screwing into drywall without hitting a stud).
- Utility knife or saw for cutting.
- Rubbing alcohol or degreaser.
- Primer and paint matching your wall color.
- Small paintbrush or roller.
Step-by-Step Installation:
- Trace the Path: Hold the raceway base against the wall and trace its outline with a pencil. Ensure it aligns with the desired path from sconce to outlet.
- Drill Pilot Holes: If your raceway requires screws, mark where the holes will go along your traced line. Drill pilot holes. If you’re not drilling into a stud, insert wall anchors.
- Secure the Base: Screw the raceway base firmly to the wall. If using adhesive, clean the wall thoroughly and follow the manufacturer’s instructions for application.
- Feed the Cord: Carefully run the sconce’s power cord along the inside of the raceway base.
- Snap On the Cover: Align the raceway cover over the base and press down firmly until it snaps securely into place. You may need to work down the length of the raceway in sections.
- Paint to Match: As with cord covers, cleaning any factory finish from the raceway and then priming and painting it to match your wall color will make the system virtually disappear. Feather the edges onto the wall for a truly blended look.
- Allow Curing Time: Let everything dry and cure fully.
Pro Tip: For a very sleek look, some people opt for white cable raceways and leave them unpainted if their walls are also white. This still looks much cleaner than a visible cord.
Method 3: The Decorative Cord Cover or Sleeve
This approach shifts from making the cord disappear to making the concealment attractive. Instead of trying to blend the cord cover into the wall, you choose one that complements the sconce or your decor.
Decorative Options:
Braided Sleeves: These are fabric tubes that slip over the cord. They come in various colors, textures (like tweed, linen, or metallic finishes), and patterns. They can add a vintage or a modern flair.
- Installation: Simply thread the power cord through the sleeve. You might need to unplug the sconce for easier installation.
- Styling: Choose a sleeve that matches the aesthetic of your sconce. A copper-braided sleeve might look great with a brass sconce, while a dark grey tweed could complement a modern black fixture.
Concealers Designed to Complement: Some manufacturers offer cord covers that are designed to look like part of the sconce. These might be metallic, have decorative chains, or feature architectural profiles.
- Installation: Follow the specific product instructions. These often attach directly to the sconce and run down the wall.
DIY Fabric Wraps: For the truly crafty, you can create your own cord cover by wrapping the cord in fabric strips or ribbon.
- Installation: You’ll need to unplug the sconce. Use fabric glue to secure the start of your fabric strip to the cord, then wrap it tightly and evenly, working your way down. Secure the end with glue. This can be time-consuming but offers ultimate customization.
When to Use Decorative Covers:
- When you want the cord treatment to be a feature, not a flaw.
- For a more playful or eclectic decor style.
- When a paintable channel might not adhere well to your wall surface (e.g., textured wallpaper).
Method 4: The “Clever Placement” Strategy
Sometimes, the simplest solutions are right under our noses. If hiding the cord entirely feels too involved, or if you’re working with a temporary setup, strategic placement can make a big difference.
Strategies:
- Curtain Camouflage: If your sconce is near a window with curtains, run the cord behind the drapery. Ensure the cord is not pinched or stressed by the fabric.
- Behind Furniture: Position the sconce and outlet so furniture like a bookshelf, console table, or even a strategically placed plant can help obscure the cord.
- Along Molding or Trim: If you have baseboards or crown molding, try to run the cord as close to these as possible. You can often use small, paintable cord clips (which stick to the wall) to secure the cord against the molding.
- Outlet Relocation (Minor): If the outlet is slightly off-kilter from where you’d ideally want the sconce, can you shift the sconce slightly to make the run shorter and more direct? This might involve repositioning the cord entry point on the sconce if it’s adjustable.
Considerations:
- Accessibility: Ensure you can still access the plug and outlet.
- Safety: Never pinch, kink, or strain the cord. Avoid running cords across high-traffic areas where they could be a tripping hazard.
- Aesthetics: Does the “clever placement” look intentional or like an afterthought? Aim for intentional.
Method 5: The Plug-In to Hardwired Conversion (for the Daring)
This is the most involved method, essentially transforming your plug-in sconce into a hardwired one, which eliminates the cord altogether. It’s important to note that this requires electrical knowledge and potentially the help of an electrician, depending on your comfort level and local codes.
WARNING: Electrical work can be dangerous. Always turn off the power at the breaker before working with any electrical wiring. If you are unsure, hire a qualified electrician.
The Process (Simplified):
- Assess the Sconce: Most plug-in sconces are designed to be converted. This usually involves removing the cord that comes with the fixture.
- Install a Junction Box: In the wall where you want the sconce, an electrical junction box must be installed. This is where the house wiring will connect to the sconce wiring.
- Run Wires:House wiring (typically 14/2 or 12/2 Romex cable, depending on the circuit amperage) is run from the junction box to the power source (usually an existing circuit or a new one installed by an electrician).
- Connect Wires: The sconce’s internal wiring is then connected to the house wiring within the junction box. Standard color coding applies: black to black (hot), white to white (neutral), and green or bare copper to the ground screw.
- Mount the Sconce: The sconce is then mounted directly over the junction box, and the bare wires are concealed within.
When to Consider This:
- You want the absolute cleanest, most “built-in” look.
- You are comfortable with electrical wiring or have a trusted electrician.
- You plan to stay in your home long-term and want to enhance its permanent features.
For this method, it’s always better to consult with a qualified electrician. They can ensure the wiring is up to code and safe.
Cable Management Beyond the Wall: Tidying Up the Plug
Don’t forget the final inches! Even with a perfectly hidden wall cord, a messy plug and excess cord near the outlet can ruin the effect.
- Cord Wraps/Ties: Use simple Velcro cable ties or zip ties to bundle any excess cord neatly.
- Outlet Concealers: Some decorative outlet plates have small channels or hooks that can help manage the very end of the cord.
- “Short Cord” Sconces: If available, look for plug-in sconces with shorter cords. This minimizes the amount you need to hide.
- Extension Cords (Use with Caution): If your outlet is inconveniently located, you might need an extension cord. Always use a high-quality, UL-listed extension cord and try to hide it as effectively as the sconce’s cord. Avoid daisy-chaining multiple extension cords.
Safety First: Always Keep These In Mind
Working with electricity, even low-voltage plug-in fixtures, requires caution.
- Turn Off Power: If you are doing anything more than simply plugging in the sconce, always turn off the power to the outlet at the breaker box.
- Inspect Cords: Regularly check the sconce’s power cord for any signs of fraying, cuts, or damage. If you find any, do not use the fixture.
- Proper Insulation: Ensure all wire connections are properly insulated with wire nuts or appropriate connectors.
- Avoid Overheating: Do not run cords in a way that traps heat. Ensure proper ventilation.
- Weight Limits: Don’t overload cord covers or raceways with too many cords or excessively thick ones.
- Adhesive Strength: If using adhesive, ensure it’s rated for the weight and environment. For heavy sconces or in humid areas, mechanical fasteners (screws) are generally more reliable.
Troubleshooting Common Issues
- Cord Cover Won’t Stick:
- Cause: Wall not cleaned properly; temperature too cold or hot for adhesive; wall surface is uneven or textured.
- Solution: Re-clean wall with isopropyl alcohol. Try a temporary fix with painter’s tape to hold in place while adhesive cures. Consider using screws if possible.
- Paint Doesn’t Match Perfectly:
- Cause: Lighting in the room makes the colors look different; paint sprayed or rolled unevenly.
- Solution: Let it dry completely under natural light. You may need a second, very thin coat or a carefully applied touch-up. When in doubt, buy a sample pot of your wall paint for touch-ups.
- Cord Is Too Thick for the Cover:
- Cause: Sconce cord is unusually bulky (e.g., fabric-covered cords can be thicker).
- Solution: You might need a larger profile cable raceway instead of a basic cord cover. Or, consider a decorative fabric sleeve that accommodates bulk.
- Wire Pops Out of Cover:
- Cause: Cover not snapped on securely; cord is angled sharply.
- Solution: Reread the cover’s instructions. Make sure each section is fully clicked into place. Gently adjust the cord’s path to reduce tension.
Frequently Asked Questions About Hiding Plug-In Sconce Cords
Q: Can I just paint the cord itself?
A: While technically possible for temporary aesthetic fixes, painting a cord is generally not recommended for safety and durability. Paint can crack, peel, and potentially compromise the cord’s insulation over time. It’s much safer and more effective to use a cord cover.
Q: What’s the easiest way to hide the cord on a plug-in sconce?
A: The easiest and most popular method is using a paintable plastic cord cover. It’s relatively inexpensive, simple to install, and can be painted to perfectly match your wall, making it nearly invisible.
Q: Will a cord cover damage my walls when I remove it?
A: Most standard adhesive cord covers can leave residue or pull off paint if removed forcefully. If you’re renting, look for cord covers specifically marketed as “removable” or use low-tack adhesive options. Always test in an inconspicuous area first.
For screw-mounted options, you’ll have small holes to patch.
Q: Can I run the cord under a rug?
A: Running cords under rugs is generally discouraged due to safety risks. Cords can be damaged by foot traffic and heat buildup, and they can create a tripping hazard if a rug shifts. It’s best to keep cords either hidden within walls/covers or run discreetly along edges.
Q: How important is color matching when painting a cord cover?
A: It’s critical if you want the cover to disappear. Even a slight mismatch can draw the eye. Use your wall paint for the best results, and consider applying multiple thin coats for a smooth finish.
Q: Can I use a regular extension cord to move the outlet further away?
A: Yes, but use them judiciously. Choose a heavy-duty, UL-listed extension cord and ensure it’s not a tripping hazard. Hide it as you would the sconce cord using raceways or furniture.
Never plug multiple extension cords together.
Q: What if my wall is textured? Will a cord cover stick?
A: Textured walls can make adhesive less effective. Clean the wall thoroughly. For heavily textured walls, you might need to use a strong construction adhesive or opt for a screw-mounted raceway system where possible, or even consider a fabric sleeve that doesn’t rely solely on wall adhesion at all points.
Conclusion: Achieving a Flawless Finish
Hiding the cord on your plug-in wall sconce is a crucial step in achieving a polished and professional look. Whether you opt for the ultra-discreet paintable cord cover, the robust cable raceway, a decorative sleeve, or even the more advanced hardwiring route, there’s a solution for every aesthetic and skill level.
By taking a little extra time to manage that power cord effectively, you unlock the full potential of your wall sconce, allowing its design and light to shine without distraction. It transforms a functional lighting source into a seamless part of your home’s decor. So, go ahead, embrace these methods, and enjoy that clean, elegant look you’ve been aiming for!


Similar Posts



















