How to Build a Wooden Arm Wall Sconce
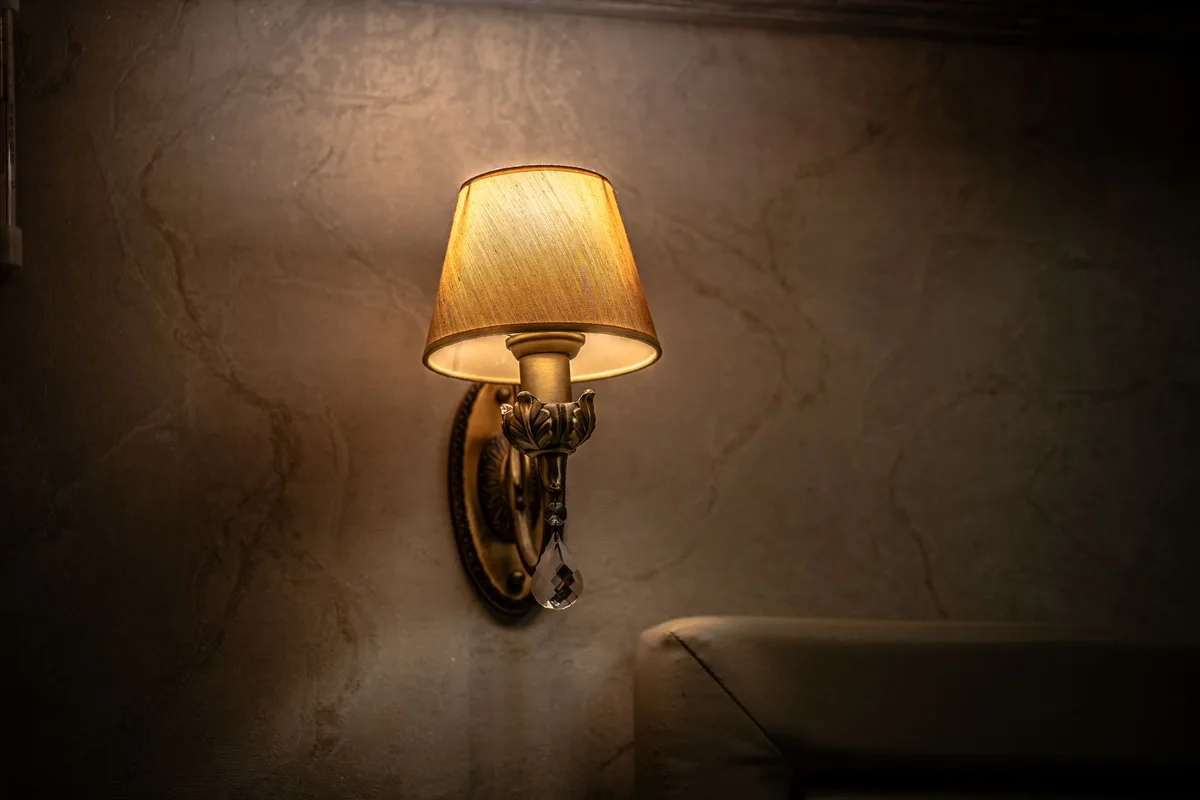
Creating your own lighting fixtures is an incredibly rewarding part of home improvement. It allows you to inject your personal style into a space while saving money. Among the most adaptable and charming DIY projects is building a wooden arm wall sconce.
These fixtures offer a rustic, warm, and handcrafted aesthetic that can elevate any room, from a cozy living area to a sophisticated dining space or even a functional entryway.
This guide breaks down the entire process of building a wooden arm wall sconce from scratch. We’ll cover everything you need: material selection, essential tools, step-by-step instructions, finishing techniques, and even important safety considerations. Whether you’re a seasoned woodworker or a DIY enthusiast taking on your first lighting project, this article is designed to be your definitive resource.
The beauty of a wooden arm wall sconce lies in its simplicity and versatility. The “arm” can be shaped in countless ways, from straight and minimalist to gently curved. The wood itself offers a natural warmth that metal or plastic fixtures often lack.
Plus, you can customize the finish to perfectly match your décor.
This isn’t just about making a light; it’s about crafting a statement piece. It’s about the smell of sawdust, the satisfying feel of wood in your hands, and the glow of a light you built yourself. Let’s get started on transforming a piece of wood into a functional work of art.
Image source: Pexels / Александр (Pexels License)
Understanding the Anatomy of a Wooden Arm Wall Sconce
Before we dive into the build, it’s crucial to understand the basic components of a wooden arm wall sconce. These elements work together to create a safe and functional lighting fixture.
- The Arm: This is the primary wooden component that extends from the wall and holds the light socket. Its design dictates the overall aesthetic of the sconce. It can be a simple plank, carved, or shaped.
- The Base/Mount: This is the part that attaches directly to the wall. It often houses the electrical connections and provides a stable anchor for the arm. It can be a simple wooden block or a more decorative plate.
- The Light Socket (Lampholder): This is where the light bulb screws in. For a DIY sconce, you’ll typically use a threaded socket with a skirt that conceals the wiring connections.
- Wiring and Connectors: This includes the electrical cord, wire nuts or Wago connectors for joining wires, and potentially a plug if it’s a plug-in fixture.
- Shade (Optional): While many wooden sconces are designed to be “bare bulb” fixtures, you can certainly add a small shade to diffuse light or add another design element.
- Fasteners: Screws, nails, or wood glue used to assemble the wooden components and secure the sconce to the wall.
Understanding these parts helps in planning your design and gathering the correct materials.
Your Wooden Arm Wall Sconce Project Plan: What You’ll Need
A successful DIY project starts with a solid plan and the right materials. Building a wooden arm wall sconce requires a blend of woodworking and basic electrical knowledge. Don’t worry if you’re new to the electrical side; we’ll cover the essentials clearly and safely.
Essential Materials
Gathering these items beforehand will streamline your build significantly.
For the Woodwork:
- Lumber: The type of wood you choose will greatly influence the final look and durability.
- Hardwoods: Oak, maple, cherry, or walnut offer a premium look and feel, are durable, and take finishes beautifully. They are also denser and can be more stable. A 1×4 or 1×6 board is often a good starting point, depending on your desired arm width and thickness.
- Softwoods: Pine or poplar are more budget-friendly, easier to work with, and accept paint or stain well. Be mindful that softwoods can dent or scratch more easily. Again, a 1×4 or 1×6 is suitable.
- Reclaimed Wood: For a truly rustic or vintage feel, consider using salvaged wood. Ensure it’s clean, free of pests, and structurally sound.
- Wood Glue: A high-quality PVA wood glue is essential for strong joints.
- Sandpaper: A variety of grits are necessary for smoothing the wood, starting with coarser grits (e.g., 80-120) for shaping and progressing to finer grits (e.g., 180-220) for a smooth finish.
- Wood Finish: This could be stain, paint, polyurethane, wax, or oil, depending on your desired aesthetic.
- Wood Stain/Sealer (Optional): If you plan to seal the wood for protection or to enhance its grain.
For the Electrical Components:
- Lamp Socket (Lampholder): Choose a socket that matches your desired bulb type (e.g., E26/E27 medium base common in the US/UK). A socket with a threaded nipple and a skirt is ideal for a clean look. Ensure it’s rated for the wattage of the bulbs you intend to use.
- Electrical Cord: A 2-conductor stranded electrical wire (e.g., 18-gauge SPT-2 cord) is suitable for most low-wattage sconces. You’ll need enough length to reach your outlet, with a little extra for routing.
- Plug Cap (for plug-in sconces): A standard electrical plug cap for your region.
- Wire Nuts or Wago Connectors: For safely joining electrical wires. Wago connectors are often easier for beginners and provide a very secure connection.
- Strain Relief Bushing (Optional but Recommended): A small rubber or plastic bushing to protect the electrical cord where it enters the wooden fixture. This prevents the cord from being stressed or chafing.
For Assembly and Mounting:
- Wood Screws: Appropriate lengths and sizes for joining your wooden parts and for mounting the sconce to the wall.
- Wall Anchors (if mounting into drywall): Choose anchors suitable for the weight of your sconce and the type of drywall. If mounting into a stud, you won’t need these.
- Mounting Hardware: Depending on your base design, you might need D-rings, a French cleat, or simply screw holes in the wooden base.
Essential Tools
Here’s a list of tools that will make your build efficient and enjoyable.
- Measuring Tape and Pencil: For marking cuts and dimensions.
- Saw:
- Miter Saw or Hand Saw: For making precise, straight cuts. A miter saw is significantly easier for repeatable accurate cuts.
- Jigsaw or Bandsaw (Optional): If you plan to add decorative curves or shapes to your arm or base.
- Drill and Drill Bits: For pilot holes and driving screws. You’ll also need bits for creating any decorative holes or wire channels. A Forstner bit is useful for creating clean, flat-bottomed recess holes for screw heads.
- Screwdriver: To match your chosen screws.
- Clamps: Essential for holding pieces together while glue dries.
- Orbital Sander or Sanding Blocks: For smoothing wood surfaces.
- Wire Strippers: To remove insulation from electrical wires.
- Screwdriver Set (for electrical connections): To properly secure wires to the lamp socket and plug.
- Safety Glasses: Always wear these when operating power tools or working with wood.
- Dust Mask: Especially important when sanding.
Step-by-Step: Building Your Wooden Arm Wall Sconce
Let’s get down to the nitty-gritty. This guide assumes a basic design: a rectangular arm extending from a square or rectangular base, with the light socket mounted at the end of the arm. We’ll focus on a plug-in style for simplicity, but mention considerations for hardwiring.
Step 1: Design and Measure
Before cutting anything, sketch out your sconce. Consider:
- Arm Length: How far do you want the light to extend from the wall?
- Arm Width and Thickness: What visual proportion looks best?
- Base Size: Large enough to house connections and provide stability.
- Projection from Wall: How far will the sconce stick out in total?
Let’s assume for this guide:
- Arm: 1×4 board, 12 inches long.
- Base: 1×6 board, 6 inches long and 6 inches tall (cut from the 1×6).
Cutting List:
- Arm: 1 pc., 1×4, 12 inches long
- Base: 1 pc., 1×6, 6 inches long (for the face that attaches to the wall)
- Mounting Block (optional, for behind the base): 1 pc., 1×4, 6 inches long
Step 2: Cut Your Wood Components
Using your saw, carefully cut the lumber according to your measurements. Ensure all cuts are square and precise.
- Cut the Arm: Take your 1×4 board and cut a 12-inch piece.
- Cut the Base: From your 1×6 board, cut a 6-inch piece. This will be the front face of your base.
- Cut the Mounting Block (Optional): If you want a sturdier mount or a place to hide wires before they enter the fixture, cut another piece from your 1×4, also 6 inches long.
Remember to measure twice, cut once. Accuracy here makes assembly much easier.
Step 3: Shape and Smooth the Arm
This is where you can start adding character.
- Initial Shaping (Optional): If you want to round the edges of the arm, use a router with a round-over bit or simply sand them down. You could also add subtle curves with a jigsaw for a more organic look.
- Drill for Wiring (Optional but Recommended): It’s cleaner if the electrical cord can run through the wood. On the underside of the arm, near the base end, drill a hole large enough for your electrical cord to pass through. Then, drill a channel from that hole towards the end of the arm where the socket will be mounted. This channel will guide the wire neatly.
- Sanding: Start with a medium-grit sandpaper (120-grit) to remove any saw marks and initial shaping. Progress to finer grits (180, then 220-grit) to achieve a smooth surface. Sand in the direction of the wood grain. Thorough sanding is key to a professional finish. For a truly elegant sconce, you might even go up to 320-grit.
Step 4: Prepare the Base Components
- Drill Mounting Holes: On the backing piece (if using), drill two or more pilot holes that you’ll use to secure the sconce to the wall.
- Drill for Wiring (if a channel is desired): If you are routing wires through the base (not recommended for beginners) or simply need a clean exit point, drill an appropriate-sized hole in the back of the base piece.
- Sanding: Sand the base components just as you did the arm, moving from coarser to finer grits.
Step 5: Assemble the Wooden Structure
- Attach Arm to Base: Apply wood glue to the end of the arm that will connect to the base. Position the arm against the base, ensuring it’s flush and square.
- Without a Mounting Block: You can attach the arm directly to the front face of the base. Clamp them securely and let the glue dry. Once dry, you may want to add a couple of screws from the back of the base into the arm for extra strength.
- With a Mounting Block: Attach the arm to the front face of the base using glue and clamps. Once dry, attach the backing block to the back of the base using glue and screws, ensuring the backing block is flush with the outer edges of the base. The backing block will be what you screw into the wall.
- Allow Glue to Cure: Let the assembled wooden parts dry completely according to the glue manufacturer’s instructions. This usually takes at least a few hours, but 24 hours is ideal for maximum strength.
Step 6: Wire the Sconce (Carefully!)
This is the most critical step. Ensure all power is off at the breaker if you are hardwiring. For plug-in sconces, ensure the plug is not connected to an outlet.
- Prepare the Cord: Cut your electrical cord to the desired length, ensuring it’s long enough to reach your outlet with some slack for ease of installation. Strip about 1/2 inch of insulation from both ends of the cord using your wire strippers.
- Feed the Cord: If you drilled a channel and hole in the wood, carefully feed one end of the cord through the hole in the arm, then through the channel, and out through the base (or backing block).
- Connect to the Lamp Socket:
- Unscrew the skirt of the lamp socket. You’ll see two screw terminals inside.
- One wire (usually the “hot” wire, often black or brown insulation) connects to one terminal, and the other wire (usually the “neutral” wire, often white or blue insulation) connects to the other. It doesn’t strictly matter which goes to which on a simple lamp socket, but consistency is good practice.
- Loop the stripped end of the wire around the screw terminal clockwise and tighten securely. Ensure no stray strands are sticking out.
- Push the wire back into the socket base. Reattach the socket skirt, ensuring the wires are tucked away neatly and aren’t pinched.
- Strain Relief: If you have a strain relief bushing, install it where the cord enters the wood. This is often a rubber grommet that the cord passes through, providing a buffer.
- Connect to the Plug (for plug-in):
- Most plug caps are designed to be wired in. You’ll typically remove a cover, and inside you’ll find two screw terminals.
- Connect the other end of your electrical cord to these terminals, again looping the wire around the screw clockwise and tightening securely. Usually, the “hot” wire connects to the narrower blade of the plug, and the “neutral” wire connects to the wider blade. Refer to the plug cap’s instructions if provided.
- Reassemble the plug cap.
Important Electrical Note: If you are unsure about any aspect of the electrical wiring, it is always best to consult with a qualified electrician or a knowledgeable friend. Safety is paramount.
Step 7: Finishing Touches
This is where your sconce truly comes to life.
- Apply Finish:
- Stain: Apply wood stain according to the product instructions. Wipe off excess. Allow it to dry completely.
- Paint: Apply a primer if necessary, followed by your chosen color. Two thin coats are usually better than one thick coat.
- Clear Coat: Once the stain or paint is dry, apply a protective clear coat like polyurethane or a natural oil finish. This protects the wood and enhances its appearance. Apply multiple thin coats, sanding lightly with very fine sandpaper (e.g., 320-grit) between coats for a super smooth finish.
- Install the Socket: Securely attach the pre-wired lamp socket to the end of the arm. This might involve screwing it in place or using a threaded nipple and locknut if your socket has one.
Step 8: Mounting Your Sconce
- Choose Location: Decide where you want to hang your sconce. Consider nearby electrical outlets for plug-in models, or junction boxes if hardwiring.
- Locate Studs (Recommended): For the most secure mounting, locate wall studs using a stud finder.
- Mark and Drill: Hold the assembled sconce against the wall at the desired height. Use a pencil to mark the location of the screw holes from your backing block onto the wall. If you’re not hitting a stud, pre-drill holes for your wall anchors.
- Secure the Sconce: Drive screws through the mounting holes in your sconce’s backing block into the wall studs or anchors. Ensure the sconce is firmly attached to the wall.
Step 9: Add the Light Bulb
- Choose Your Bulb: Select an LED bulb that fits your socket. Consider the wattage rating of your socket to avoid overloading it. For a more vintage look, Edison-style LED bulbs are popular.
- Screw it In: Gently screw the light bulb into the socket.
Step 10: Test Your Sconce
Plug the sconce into the outlet (if plug-in) and flip the switch or wall outlet to test. Congratulations, you’ve built your own wooden arm wall sconce!
Advanced Techniques and Design Variations
The basic design we’ve outlined is just a starting point. Here are some ideas to customize your sconce further:
Arm Shapes and Styles
- Curved Arm: Use a jigsaw or bandsaw to cut a gentle curve into your arm piece. You can also steam-bend wood for more complex shapes, though this is advanced!
- Tapered Arm: Taper the arm from a wider base to a narrower end where the socket is mounted to create a more elegant profile.
- Multi-Piece Arm: Construct the arm from multiple pieces of wood joined together to create unique shapes or add contrasting wood accents.
- Carved Details: If you have carving tools, you can add decorative elements to the arm or base.
Base Designs
- Round Base: Cut a circle from a thicker piece of wood (e.g., a 1×8 or plywood) for a circular base.
- Rectangular Base with Beveled Edges: Use a router to bevel the edges of your rectangular base for a more finished look.
- Integrated Shelf: Design a base that incorporates a small shelf for displaying a trinket or a small plant.
Electrical Options
- Hardwiring: For a cleaner look with no visible cord, you can hardwire your sconce directly into your home’s electrical system. This requires knowledge of junction boxes and using electrical cables (like Romex). If you are not comfortable with this, hire a qualified electrician.
- Inline Switch: Incorporate an inline switch onto the electrical cord for easy on/off control without unplugging.
- Dimmer Compatibility: Ensure your socket, cord, and plug are compatible with a dimmer switch if you wish to control the light intensity.
Finishes: Elevating Your Sconce
The finish is crucial for both aesthetics and protection.
Natural Wood Finishes
- Oil Finishes: Tung oil or linseed oil penetrate the wood, offering a natural, matte look that highlights the grain. They require periodic reapplication.
- Wax Finishes: Paste wax provides a soft sheen and a smooth feel. It’s often applied over an oil finish.
- Polyurethane/Varnish: These offer durable protection and a range of sheens from matte to high gloss. They can sometimes look more “plasticky” if applied too heavily.
Stains and Paints
- Wood Stains: Available in a vast spectrum of colors, from traditional wood tones to bold hues. They enhance the grain of the wood.
- Milk Paint or Chalk Paint: Offer a matte, chalky finish that’s perfect for a farmhouse or shabby-chic look. They often require a topcoat for durability.
- Lacquers and Enamels: For a smooth, durable, and sometimes glossy paint finish.
Preparing for Finish
- Dust Removal: After sanding, thoroughly wipe down the wood with a tack cloth or a slightly damp rag to remove all dust particles. Any dust left behind will be sealed into the finish.
- Pre-Stain Conditioners: For softwoods like pine, a pre-stain conditioner can help ensure the stain absorbs evenly and prevents blotchiness.
Safety First: Electrical and Woodworking Precautions
Working with electricity and power tools demands respect and adherence to safety protocols.
Electrical Safety
- Always Turn Off Power: Before connecting any wires, ensure the power is off at the breaker or the plug is removed from the outlet.
- Proper Wire Connections: Use appropriate wire nuts or Wago connectors. Ensure all connections are secure and that no bare wire is exposed beyond the terminal screws where it’s meant to be.
- Correct Gauge Wire: Use wire of an appropriate gauge for the fixture’s wattage. 18-gauge is typically sufficient for single-bulb sconces.
- Socket Rating: Ensure your lamp socket is rated for the wattage of the bulb you intend to use. Never exceed the maximum.
- Strain Relief: Always use a strain relief mechanism where the cord enters the fixture to prevent stress on the wire connections.
- Consult an Expert: If you’re ever in doubt about electrical work, stop and ask a qualified electrician.
Woodworking Safety
- Eye Protection: Always wear safety glasses when cutting, sanding, or drilling.
- Dust Mask: Protect your lungs from sawdust and finishing fumes by wearing a dust mask.
- Tool Familiarity: Understand how to operate all your tools safely. Read their manuals.
- Secure Your Work: Clamp your wood pieces firmly before cutting or drilling.
- Keep Fingers Clear: Be mindful of where your hands are at all times when using power tools.
- Sharp Blades: Use sharp saw blades and drill bits. Dull tools are more dangerous as they require more force and can slip.
- Ventilation: Work in a well-ventilated area, especially when using stains, paints, or finishes.
Frequently Asked Questions (FAQ) about Wooden Arm Wall Sconces
Q1: Can I use any type of wood for a wall sconce?
While you can use almost any wood, hardwoods like oak, maple, or walnut offer better durability and a more premium aesthetic. Softwoods like pine are more affordable and easier to work with, but they can dent more easily. Reclaimed wood adds character but ensure it’s stable and free of pests.
Always choose wood that is dry and well-seasoned.
Q2: What’s the easiest way to attach the sconce to the wall?
For maximum security, screws driven directly into wall studs are best. Use a stud finder to locate them. If studs aren’t available at your desired location, use appropriate heavy-duty drywall anchors rated for more than the weight of your sconce.
Q3: How do I hide the electrical cord?
You can drill a channel through the wood arm and base. Alternatively, you can use cord covers (raceways) that stick to the wall and conceal the cord along its path to the outlet. For a truly seamless look, hardwiring into your wall’s electrical system via a junction box is the cleanest solution, but this requires more advanced electrical knowledge or professional help.
Q4: What kind of light bulb should I use?
LED bulbs are highly recommended. They are energy-efficient, produce less heat (important for wood fixtures), and come in a vast array of styles, including vintage Edison bulbs. Always check the maximum wattage rating for your lamp socket and ensure your chosen bulb stays within that limit.
Q5: Is it safe to use a bare bulb in a wooden fixture?
Yes, with proper precautions. Ensure the bulb itself doesn’t get excessively hot, LED bulbs are ideal for this. Also, make sure the bulb is positioned so it doesn’t directly contact the wood if it were to overheat, though this is rare with modern LEDs.
Ensure your socket is rated for the bulb’s wattage.
Q6: How do I make the wood waterproof?
For interior sconces, this isn’t usually necessary. A good quality varnish, polyurethane, or a hard wax oil finish will provide sufficient protection against typical household humidity and light cleaning. If the sconce were for an outdoor, covered application, you’d need exterior-grade finishes.
Q7: Can I make a dimmer-controlled sconce?
Yes. You’ll need a lamp socket, cord, and plug that are all rated as “dimmer compatible.” The light bulb itself also needs to be a dimmable LED. Most standard medium-base sockets will work, but always check product specifications.
You can also incorporate an inline dimmer switch onto the cord.
Q8: My glue isn’t holding. What am I doing wrong?
Ensure you’re using a good quality wood glue (like Titebond or similar PVA glues). Make sure the wood surfaces are clean and free of dust or old finishes. Apply an even, moderate amount of glue to one surface (or both, depending on the glue type).
Clamp the pieces together firmly. Wipe away any squeezed-out glue immediately with a damp cloth, dried glue can interfere with finishes.
Q9: How often should I check my sconce for wear and tear?
It’s wise to perform a quick visual inspection every 6-12 months. Check the cord for any signs of fraying or damage, ensure the socket is secure, and that the sconce is still firmly mounted to the wall. Wood finishes may need a refresh every few years depending on the type of finish and exposure.
This is similar to how you might check filter replacements on home appliances, for instance the how often should you replace vacuum filter article highlights the importance of regular checks for optimal performance and longevity.
Conclusion: Your Handcrafted Light Awaits
Building your own wooden arm wall sconce is a project that blends creativity, craftsmanship, and a touch of practical utility. It’s an opportunity to create a unique piece that reflects your personal style and adds a warm, handcrafted ambiance to your home. By understanding the materials, tools, and techniques involved, and by always prioritizing safety, you can embark on this rewarding DIY journey.
Don’t be afraid to experiment with different wood types, shapes, and finishes. The world of woodworking and home décor is vast, and a simple sconce can be a gateway to exploring new skills and creating more personalized elements for your living space. So, gather your lumber, dust off your tools, and get ready to illuminate your home with a fixture you can proudly say you built yourself.
For more home improvement and DIY inspiration, remember to explore our blog for a wide range of practical guides and ideas.


Similar Posts



















