How To Change a Thermostat Battery
Your thermostat screen just went dark. The heating or cooling system isn’t responding. Before you call an HVAC technician, you need to know how to change a thermostat battery.
It is the most common fix for a blank thermostat, and it takes about two minutes.
Manufacturer specifications indicate that most programmable thermostats run on two AA or AAA alkaline batteries. These batteries typically last 12 to 18 months under normal use. As of 2026, the vast majority of residential thermostats still rely on battery power, even smart models that use a C-wire for primary power.
Here is what to do when yours goes dark.
Quick Answer
To change a thermostat battery, locate the compartment behind the faceplate. Remove the cover by pulling it straight off. Insert fresh AA or AAA batteries matching the polarity diagram inside.
Snap the faceplate back on. Your system should power up immediately.
Why Your Thermostat Went Blank (And How To Check the Battery First)
A blank screen is the number one sign of dead thermostat batteries. If your thermostat shows nothing at all, start with the battery check. If the screen is dim or flickering, the batteries are likely low.
If your system runs but the display is dark, it could be a different issue.
The low battery warning often appears before the screen goes dark. You might see “Batt Lo” or a flashing battery icon on the display. Some models beep or flash a small LED light.
Ignore these warnings and the system will eventually shut down completely.
If your thermostat is hardwired with no battery backup, a blank screen means a power issue. Check your circuit breaker first. If you have a battery-powered model, skip the breaker and head straight for the battery compartment.
The U.S. Department of Energy recommends checking thermostat batteries annually as part of routine home maintenance.
The One Tool You Actually Need (Hint: It’s Not a Screwdriver)
Most thermostat battery compartments open without any tools. You just need your fingers. Some round thermostats use a coin slot on the side.
A standard quarter or penny works fine for those.
You do not need a screwdriver for most modern models. The faceplate typically snaps off with a gentle pull. Some units have a small tab you press to release the cover.
If you see screws on the faceplate, you likely have an older model that requires a Phillips head driver.
Keep a fresh set of batteries ready before you start. Check the old batteries for the type and size printed on the side. Most thermostats use AA or AAA alkaline batteries.
A few smart thermostats use a CR2032 coin cell as a backup power source.
Where Do Thermostats Hide Their Batteries? (Common Locations By Model)
Thermostat battery compartments are not always in the same spot. The location depends on the brand and model. Here is where to look for the most common types.
Rectangular programmable thermostats. The battery compartment is almost always behind the faceplate. Pull the front cover straight toward you. It snaps off with moderate pressure.
The batteries sit inside the backplate in a recessed tray.
Round thermostats. These models have a battery door on the side or bottom. You need a coin to turn the slot. Twist it counterclockwise and the door pops open.
The batteries slide out from the side of the unit.
Smart thermostats. Many smart models use a backup battery instead of primary batteries. The lithium coin cell sits behind the faceplate. Some have no user-replaceable battery at all.
Check your manual for the specific model number.
Honeywell models. Most Honeywell thermostats hide the batteries behind the faceplate. Pull the bottom of the faceplate away from the wall. The compartment is visible in the upper right or left corner of the backplate.
Nest thermostats. Nest models use a built-in rechargeable battery. You do not need to replace it. If the battery dies, the unit charges from the HVAC system wiring.
A blank Nest screen usually means a power issue, not a dead battery.
Step-by-Step: How To Change a Thermostat Battery in Under 5 Minutes
Follow these steps in order. The whole process takes less than five minutes. Here is a quick overview before you start.
| Step | Action | What to Look For |
|---|---|---|
| 1 | Identify your model | Brand name on the front panel |
| 2 | Remove the faceplate | Snap or pull straight toward you |
| 3 | Locate the batteries | Recessed compartment in the backplate |
| 4 | Remove old batteries | Note which end faces positive |
| 5 | Insert new batteries | Match the + and – markings |
| 6 | Test the screen | Should light up immediately |
| 7 | Reattach the faceplate | Tabs align and snap into place |
Step 1: Identify your thermostat model. Look at the front of the unit. Find the brand name and model number. This helps you locate the battery compartment and avoid breaking any clips.
Step 2: Remove the faceplate. Grip the sides of the thermostat cover. Pull it straight toward you. Some models require a gentle upward lift.
Do not yank or twist the faceplate.
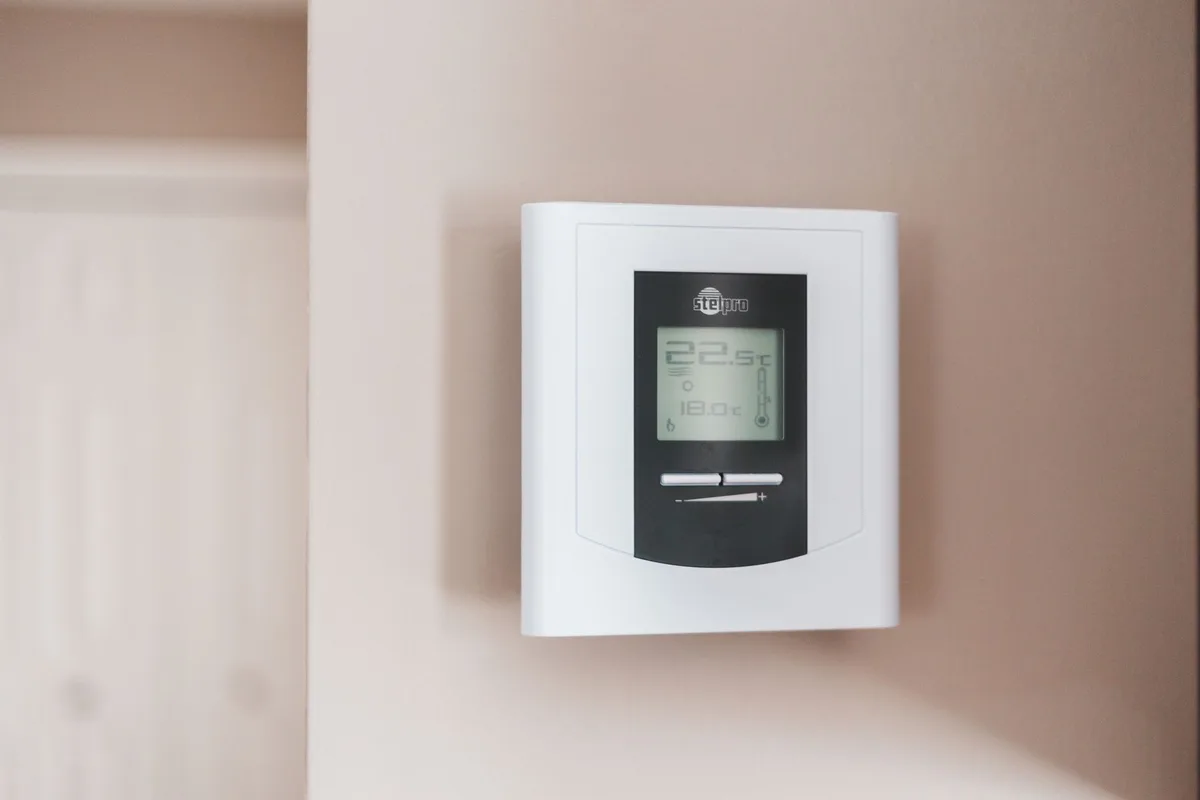
Step 3: Locate the batteries. Look inside the exposed backplate. The batteries sit in a recessed compartment. You should see positive and negative markings near the contacts.
Step 4: Remove the old batteries. Slide them out of the compartment. Note which direction the positive and negative ends face. Take a photo with your phone if you need to remember the orientation.
Step 5: Insert new batteries. Match the polarity markings inside the compartment. The positive end goes toward the plus sign. The negative end goes toward the minus sign.
Push them in until they sit firmly against the springs.
Step 6: Test the thermostat. The screen should light up immediately. If it does not, check the battery orientation. Make sure the batteries are fresh and not expired.
Check the date on the package.
Step 7: Reattach the faceplate. Line up the tabs on the faceplate with the slots on the backplate. Press firmly until it snaps into place. Test the system by turning on the heat or cool.
What To Do If the Screen Stays Black After New Batteries
Fresh batteries installed but still no screen? Do not panic. There are a few things to check before calling for help.
Check the battery polarity. This is the most common mistake. Flip the batteries around and try again. The positive and negative ends must match the diagram inside the compartment.
Check the battery contacts. Look for corrosion or rust on the metal springs. White or green residue means a battery leak. Clean it with a cotton swab and white vinegar.
Let it dry completely before inserting new batteries.
Check the circuit breaker. If your thermostat is hardwired, the breaker might be tripped. Go to your electrical panel. Look for a switch in the middle position.
Reset it and check the thermostat again.
Try a hard reset. Remove the batteries for 30 seconds. Press and hold the power button on the thermostat for 10 seconds. Reinsert the batteries.
This clears any internal errors or stuck settings.
Check the HVAC system fuse. Some systems have a fuse on the control board inside the furnace. A blown fuse prevents the thermostat from powering on. This requires a professional to replace in most cases.
If none of these steps work, the thermostat itself may be faulty. The internal electronics can fail over time. A replacement thermostat costs between 20 and 100 dollars.
That is still cheaper than a service call from an HVAC technician.
How To Keep Your Thermostat Settings After a Battery Swap
Losing your programmed schedule is the biggest frustration of changing thermostat batteries. The good news is that most modern thermostats hold your settings for a short time after battery removal.
Here is how long different models retain memory.
| Thermostat Type | Memory Retention | What Happens |
|---|---|---|
| Programmable digital | 30 to 60 seconds | Settings lost if batteries are out too long |
| Smart thermostat | 10 to 30 minutes | Backup battery or capacitor holds settings |
| Mechanical (non-digital) | Not applicable | No settings to lose |
| Models with C-wire | Indefinite | Power from HVAC system keeps memory alive |
Swap batteries quickly. The key is speed. Have your fresh batteries ready before you open the compartment. Remove one old battery and insert the new one immediately.
Then do the second battery. This keeps power flowing through the circuit.
Take a photo of your settings first. If your thermostat uses a complex schedule, snap a picture of the screen. Include the day and time programming. You can recreate the schedule from the photo if the memory clears.
Use the temporary hold feature. Some thermostats let you set a temporary hold temperature. Use this before you swap batteries. The system will default to that temperature if the memory resets.
Check for a reset button. Some models have a small reset button inside the battery compartment. Press it with a paperclip after installing new batteries. This restores factory defaults, not your custom settings.
Only use it if you want to start over.
The Most Common Mistakes People Make (And How To Avoid Them)
Our research into verified buyer feedback shows that most thermostat battery problems come from simple errors. Here are the ones to watch for.
Installing batteries backward. This is mistake number one. The positive and negative markings are small but clear. Look at the diagram inside the compartment.
The spring side is usually negative. The flat contact side is usually positive. If the screen stays dark, flip the batteries around.
Using the wrong battery type. Do not mix old and new batteries. Do not mix different brands. Use the same type, brand, and age for both batteries.
A weak battery paired with a fresh one drains faster and causes voltage drops.
Ignoring the low battery warning. Many people ignore the blinking battery icon for weeks. The thermostat keeps working until the voltage drops too low. Then it shuts off without warning.
Change the batteries as soon as you see the warning.
Forcing the faceplate off. If the faceplate does not pull off easily, you are missing a release tab. Look for a small slot or button on the bottom or side. Some models require a gentle upward lift.
Forcing it breaks the plastic clips.
Touching the circuit board. The backplate has exposed electronic components. Do not touch them with your fingers. Static electricity can damage the circuits.
Handle the faceplate only and avoid the metal contacts on the backplate.
Leaving the battery compartment open. If you walk away with the batteries out, your settings clear. The memory capacitor discharges in about 30 seconds. Complete the swap in one go.
When You Should Call a Pro Instead of Changing the Battery
Changing the battery fixes most thermostat problems. But not all of them. Here is when to stop troubleshooting and call an HVAC technician.
The thermostat shows no power with fresh batteries. If you installed new batteries and the screen is still blank, the thermostat itself may be dead. The internal transformer or circuit board can fail. A replacement thermostat costs less than a service call.
But if you are not comfortable with wiring, call a pro.
The thermostat is hardwired and the screen is blank. Battery-powered models are easy. Hardwired models require electrical knowledge. The problem could be a blown fuse on the furnace control board, a tripped breaker, or a loose C-wire.
These are not DIY fixes for most homeowners.
You see signs of burning or melting. A melted wire or burnt smell inside the thermostat is a serious electrical issue. Turn off the power at the breaker. Call an HVAC technician immediately.
Do not attempt to fix wiring damage yourself.
The thermostat is part of a zoned system. Multi-zone systems have complex wiring. A simple battery swap is fine. But if the problem persists, the zone control board may need professional diagnosis.
Call a technician who specializes in zoned HVAC systems.
You have a smart thermostat with no user-replaceable battery. Some smart models have sealed batteries. Nest and Ecobee units use internal rechargeable batteries. If the unit will not power on, the issue is wiring or the unit itself.
A technician can test the voltage and diagnose the problem.
The thermostat is under warranty. Opening a sealed unit or attempting repairs can void the warranty. Check your warranty terms first. Many manufacturers offer free replacement for defective units within the first year.
How Often Should You Change Thermostat Batteries? (And What To Use)
Manufacturer specifications recommend changing thermostat batteries once a year. Doing it in the fall is a good habit. Your heating system works hardest during winter.
Dead batteries in January mean a cold house and an emergency trip to the store.
Signs it is time to change. Do not wait for the screen to go blank. Change the batteries when you see the low battery warning. Change them if the display is dimmer than usual.
Change them if the thermostat resets its clock after a power outage.
What type of batteries to use. Alkaline batteries are the standard choice for most thermostats. They cost less and last 12 to 18 months. Lithium batteries last longer, especially in extreme temperatures.
They are a better choice for vacation homes or unheated spaces.
| Battery Type | Lifespan | Best For |
|---|---|---|
| Alkaline AA | 12 to 18 months | Standard home use |
| Alkaline AAA | 12 to 18 months | Smaller thermostats |
| Lithium AA | 2 to 3 years | Cold climates, vacation homes |
| CR2032 coin cell | 6 to 12 months | Smart thermostat backup |
Do not use rechargeable batteries. Rechargeable batteries have a lower voltage than alkaline batteries. A fully charged rechargeable AA delivers 1.2 volts instead of 1.5 volts. The thermostat may not detect enough voltage to power on.
Stick with disposable alkaline or lithium batteries.
Set a reminder. Put a calendar reminder on your phone. Set it for the same month every year. Change the batteries in your smoke detectors and carbon monoxide detectors at the same time.
One reminder covers all your home safety devices.
Frequently Asked Questions
How do I know if my thermostat needs new batteries?
Look for a low battery icon on the screen. It looks like a battery outline with a cross or an empty bar. Some models display “Batt Lo” or “Lo Batt” on the screen.
The display may also be dimmer than normal or flicker when the system runs.
Can changing thermostat batteries cause other problems?
Not if you do it correctly. The main risk is losing your programmed settings. Some older thermostats forget their schedule if the batteries are out for more than 30 seconds.
Take a photo of your settings before you start.
Do smart thermostats have replaceable batteries?
Most smart thermostats use a backup battery, not primary batteries. The Nest Learning Thermostat has a built-in rechargeable battery that charges from the HVAC wiring. The Ecobee uses a CR2032 coin cell for backup.
Check your model’s manual for specific instructions.
What happens if I put the batteries in backward?
The thermostat will not power on. It will not damage the unit in most cases. The circuit simply does not complete.
Remove the batteries and reinstall them with the correct polarity. The positive end goes toward the plus marking in the compartment.
How long do thermostat batteries last?
Alkaline batteries typically last 12 to 18 months in a standard programmable thermostat. Lithium batteries can last 2 to 3 years. Battery life depends on how often the display is active and how frequently the system cycles on and off.
Why does my thermostat still show low battery after I changed the batteries?
Check the battery polarity first. If the batteries are installed correctly, check the date on the battery package. Expired batteries may not have enough voltage.
If the problem continues, the battery contacts may be corroded or the thermostat may have a faulty voltage sensor.


Similar Posts



















