How to Install Wall Sconce on Drywall Without Stud
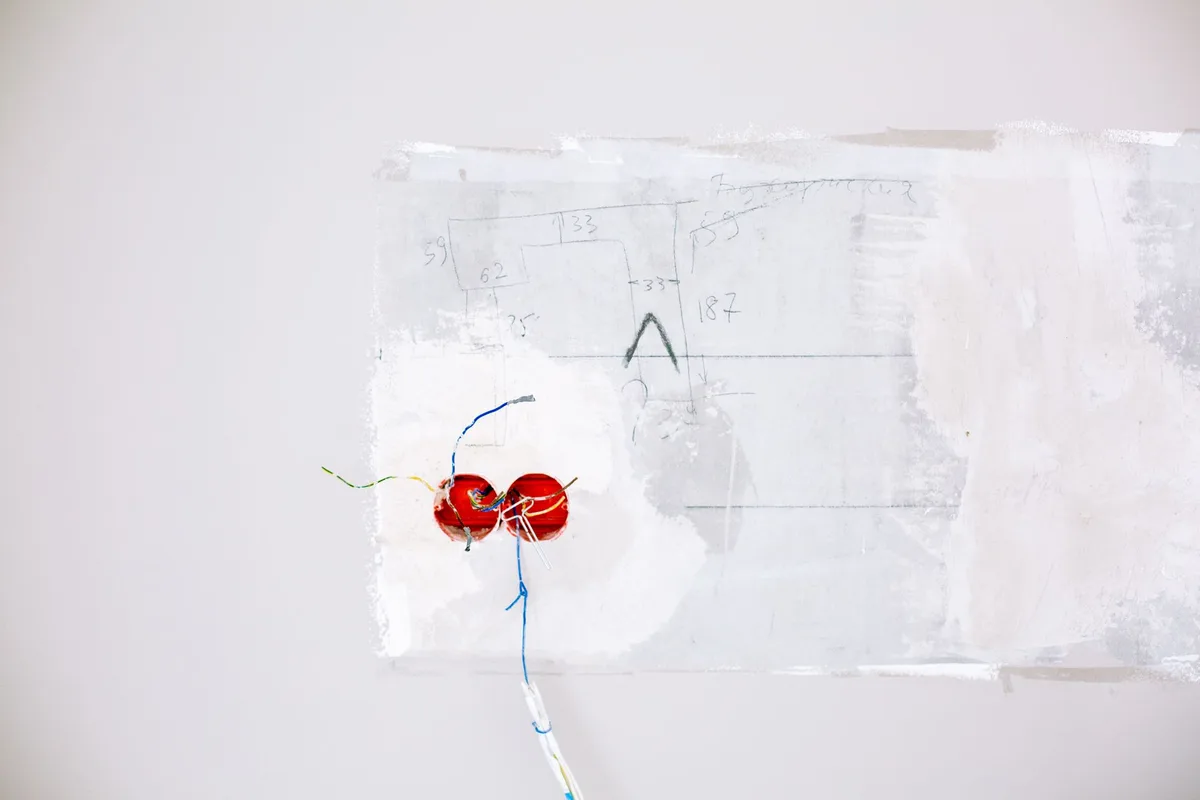
Adding a wall sconce can beautifully transform a room, casting a warm glow and enhancing your decor. But what if your ideal spot isn’t conveniently located near a wall stud? Don’t let that stop you!
Installing a wall sconce on drywall without a stud is absolutely achievable with the right knowledge and anchoring hardware.
This isn’t about risking your sconce, or worse, your drywall, by shoving a screw into empty space and hoping for the best. We’re talking about using specialized anchors designed to bear weight securely in drywall. I’ve done this countless times, and I’m here to walk you through it, step-by-step, ensuring a safe and professional-looking installation.
We’ll cover everything from choosing the right anchors to the final wiring and mounting.
One of the biggest fears people have is that without a stud, the sconce will simply pull away from the wall. That’s a valid concern if you’re just using drywall screws or nails. But the solutions we’ll discuss are engineered to create a robust hold, distributing the weight and preventing just that.
Think of it as creating your own anchor point within the drywall itself.
Let’s break down the process. We’ll look at the types of anchors that make this possible, the tools you’ll need, the wiring considerations, and the actual mounting process. By the end, you’ll be confident in your ability to hang that beautiful sconce, even on a blank expanse of drywall.
Understanding Drywall Anchors for Wall Sconces
The key to safely installing a wall sconce on drywall without a stud lies in the anchor. Drywall itself is made of gypsum plaster sandwiched between two sheets of paper. It’s surprisingly fragile and can’t hold screws or nails on its own for any significant weight.
That’s where anchors come in. They expand or provide a larger surface area behind the drywall to distribute the load.
The Different Types of Drywall Anchors and Their Suitability
There are several types of drywall anchors, and not all are created equal when it comes to supporting the weight and leverage of a wall sconce. We need anchors designed for holding power, especially considering the dynamic forces a sconce might encounter (like someone bumping into it, however gently).
Plastic Expansion Anchors (Molly Bolts): These are perhaps the most common type newbies think of. They are plastic sleeves that you insert into a pre-drilled hole. When you screw into them, they expand behind the drywall. While they work for lighter items like picture frames, they generally aren’t robust enough for the weight and leverage of most wall sconces, especially those that might be hardwired and therefore heavier without a plug to rest on the floor. They can also degrade over time.
Metal Expansion Anchors (Molly Bolts): These are superior to their plastic counterparts. They are metal sleeves with a threaded section. After inserting the sleeve into the drilled hole, you drive a screw into the anchor. This screw expands metal fingers or a hollow sleeve behind the drywall, creating a strong mechanical hold. These can be suitable for lighter sconces, but you still need to be mindful of the sconce’s weight and how far it projects from the wall.
Self-Drilling Anchors (Threaded Drywall Anchors): These are often made of nylon or metal and have a sharp point that allows them to be screwed directly into the drywall without a pilot hole (though drilling one can make installation easier and more precise). As you screw them in, they create their own threads within the drywall. They offer decent holding power for their size and are often used for shelves or lighter fixtures. For a sconce, you’d need to ensure the anchor’s weight rating is sufficient.
Toggle Bolts: Now we’re getting into the heavier duty options. Toggle bolts consist of a bolt with a spring-loaded wing or “toggle” on one end. You drill a hole large enough for the folded toggle to pass through. Once the toggle is behind the drywall, it springs open. You then tighten the bolt, and the toggles pull against the back of the drywall, providing a very strong hold. They are excellent for heavier items, but they do require a larger hole and can be a bit more fiddly to install.
Toggle-Lite Anchors / Snap Toggle Anchors: These are a more modern, user-friendly version of traditional toggle bolts. They often feature a plastic or metal body with a hinged toggle mechanism that snaps into place behind the drywall simply by pushing the anchor through the hole. They are much easier to install than traditional toggle bolts, require less fiddly maneuvering, and offer excellent holding strength, making them one of the best choices for wall sconces on drywall without stud support. They come in various sizes and weight ratings.
The Best Anchor for the Job
For installing a wall sconce on drywall without a stud, my top recommendations are Snap Toggle Anchors (Toggle-Lite style) and heavy-duty Metal Toggle Bolts.
Why?
- Holding Power: These anchors create a much larger bearing surface on the back of the drywall, distributing the weight and preventing the anchor from pulling through. Sconces, especially hardwired ones, have weight, and they also exert leverage as they extend from the wall. Toggle-style anchors are designed to handle this.
- Ease of Use: Snap toggles, in particular, are incredibly user-friendly, making them accessible even for DIYers.
- Reliability: When installed correctly, they provide a secure and long-lasting hold.
Always check the weight rating on the anchor packaging. It’s crucial to choose anchors that can support more than the estimated weight of your sconce, including the bulb and any glass shades. I usually err on the side of caution and go for anchors rated for at least 50 lbs, even if my sconce feels lighter.
Tools and Materials You’ll Need
Before you start, gather everything. This makes the process much smoother and prevents those frustrating trips to the hardware store mid-project.
Essential Tools
- Electric Drill/Driver: For drilling pilot holes and driving screws.
- Drill Bits: A set of drill bits. You’ll need one for the pilot hole for your anchor and potentially a larger one for the opening where the anchor’s toggles will pass through. Check your specific anchor’s instructions for the exact drill bit size.
- Screwdriver: A Phillips or flathead screwdriver, depending on the screws that come with your sconce or anchors.
- Stud Finder (Optional but Recommended): Even though we’re specifically installing without a stud, using a stud finder can help you confirm there isn’t one in your desired location and, more importantly, identify electrical wiring behind the wall. A good stud finder often has a “stud” and “AC wire” detection mode.
- Level: Absolutely essential for hanging anything straight, especially a sconce that will draw attention to its alignment.
- Measuring Tape: For precise placement.
- Pencil: For marking.
- Wire Strippers/Cutters: If you’re hardwiring the sconce.
- Voltage Tester (Non-Contact): Crucial for safety to ensure the power is off.
- Safety Glasses: Always protect your eyes when drilling or working with electricity.
- Dust Mask: Recommended when drilling drywall to avoid inhaling fine dust.
- Drop Cloth or Newspaper: To catch any dust or debris.
Necessary Materials
- Wall Sconce: The star of the show! Ensure it’s suitable for dry locations (or wet/damp if installing in a bathroom/kitchen but without a stud, which adds complexity).
- Appropriate Drywall Anchors: As discussed, e.g., Snap Toggle Anchors or heavy-duty Metal Toggle Bolts. Ensure they have a sufficient weight rating.
- Wire Nuts: If you are hardwiring, you’ll need these to connect the sconce’s wires to your home’s electrical wiring.
- Electrical Tape: For added security on wire connections.
- The Sconce’s Mounting Bracket: It usually comes with the sconce.
Safety First: Electrical and Installation Precautions
Safety cannot be stressed enough. Working with electricity and hanging fixtures carries inherent risks if not done properly.
Electrical Safety
- TURN OFF THE POWER: This is non-negotiable. Locate the circuit breaker that controls the power to the area where you’ll be working. Flip it firmly to the OFF position.
- Verify Power is Off: Before touching any wires, use your non-contact voltage tester. Hold it near the existing wires (if you’re replacing an old fixture) or the junction box location you plan to use. It should not light up or beep. Test your voltage tester on a known live outlet first to ensure it’s working correctly.
- Understand Your Wiring: Most home wiring for light fixtures will consist of black (hot), white (neutral), and green or bare copper (ground) wires. Your sconce will have corresponding wires. If you’re unsure about identifying wires or making connections, stop and consult a qualified electrician.
Installation Safety
- Weight Ratings are Vital: Always select anchors that exceed the weight of your sconce. Remember to factor in the weight of glass shades, bulbs, and the fixture itself. If the sconce has a long arm that extends far from the wall, it creates more leverage, putting more stress on the anchor.
- Check for Obstructions: Use your stud finder’s AC wire detection feature to scan the area where you plan to drill. You don’t want to drill into an existing electrical wire. Also, be aware of plumbing, though less common in standard wall sconce locations behind drywall.
- Drill Accurately: Using the correct drill bit size is crucial for the anchor to engage properly. Too small, and you won’t get the anchor in; too large, and it won’t have enough drywall to grip.
- Don’t Over-Tighten: Overtightening screws into drywall anchors can strip the threads or damage the drywall itself, compromising the hold. Make them snug and secure, but don’t force them.
- Consider the Sconce’s Design: Some sconces have a heavy base or shade that might put uneven pressure on the anchor. Position your anchors to best distribute this load.
Step-by-Step Installation Guide
Alright, let’s get to it! Here’s the detailed breakdown for installing your wall sconce on drywall without a stud.
Step 1: Planning and Preparation
- Choose the Location: Decide exactly where you want your sconce. Consider the height, typically around 60-70 inches from the floor to the center of the fixture, but this can vary based on ceiling height and personal preference. If it’s next to a door or window, consider clearances.
- Mark the Spot: Hold the sconce’s mounting bracket against the wall at your desired location. Use your pencil to mark the center point where the electrical box (or where your wires will emerge) needs to be. If your sconce has a separate base plate, you might also want to mark the four corners of where that will sit to ensure it covers the electrical box opening.
- Confirm Power Source: If you’re replacing an existing fixture or tapping into an existing electrical box, ensure the power is off (as per our safety section). If you’re creating a new junction point, you’ll need to know where to safely tap into an existing circuit, which might require more advanced electrical knowledge or an electrician. For simplicity, let’s assume you’re working with an existing junction box or are comfortable making a new wire connection.
- Gather Your Tools and Materials: Double-check you have everything listed in the “Tools and Materials” section.
Step 2: Preparing the Wall and Wiring
- Turn Off Power: Again, ensure the circuit breaker is OFF.
- Expose Wires (if applicable): If you’re replacing an old fixture, carefully remove it. You should find a junction box in the wall with wires coming out. If you are installing a new fixture and don’t have a junction box, you’ll need to cut an appropriately sized hole (usually 3-4 inches round or square) for a new junction box and install one. This might involve running new wiring, which is best left to a qualified electrician if you’re not experienced. For this guide, we’ll assume you have a junction box or can safely access wires.
- Verify Power is Off (Again): Use your voltage tester.
- Mark Anchor Placement: Your sconce will likely mount to a bracket, which then attaches to the wall. The bracket usually has screw holes. Hold the bracket in place, ensuring it’s level. Use your pencil to mark the wall through the screw holes of the bracket where your anchors will go. Crucially, ensure these marks are NOT aligned with any existing wall studs if you’re specifically avoiding them.
Step 3: Installing the Drywall Anchors
This is where the magic happens. The exact procedure depends on the type of anchor. We’ll focus on Snap Toggle Anchors as they are highly recommended and user-friendly.
- Drill Pilot Holes: Based on the instructions that came with your Snap Toggle anchors, select the correct drill bit size. Carefully drill holes at each of your marked anchor locations. It’s essential to drill straight into the wall.
- Prepare the Anchor: For Snap Toggles, you’ll typically need to fold the toggles flat against the body of the anchor.
- Insert the Anchor: Push the Snap Toggle anchor through the drilled hole. As you push it through, the toggles should spring open behind the drywall. You’ll feel a slight resistance as they pass through the hole, and then they should be able to sit flush against the wall’s surface. Some anchors have a small plastic cap that you break off after inserting the toggle.
- Tighten the Anchor (Slightly): Gently pull outwards on the anchor. It should feel secure, with the toggles holding firm on the back of the drywall. You don’t need to crank down on it hard at this stage, just ensure it’s seated properly.
- Repeat for All Anchors: Do this for every anchor point required by your sconce’s mounting bracket.
Step 4: Wiring the Sconce
This assumes you have successfully installed anchors and are ready to connect the sconce.
- Prepare Sconce Wires: If your sconce isn’t pre-wired, you might need to attach wires based on its instructions. Otherwise, you should see wires emerging from the sconce (usually black, white, and ground).
- Connect Wires:
- Ground Wire: Connect the green or bare copper ground wire from your sconce to the ground wire in the junction box (usually green or bare copper). Use a wire nut.
- Neutral Wire: Connect the white wire from your sconce to the white wire from the junction box. Use a wire nut and twist it firmly.
- Hot Wire: Connect the black wire from your sconce to the black wire from the junction box. Use a wire nut.
- Secure Connections: Ensure all wire nuts are twisted on tightly. You can wrap each wire nut connection with a layer of electrical tape for extra security and insulation.
- Tuck Wires: Carefully push the connected wires and wire nuts back up into the junction box.
Step 5: Mounting the Sconce
- Attach Mounting Bracket: Feed the sconce’s wires through the center hole of the sconce’s mounting bracket. Align the bracket with the installed anchors on the wall.
- Secure Bracket to Anchors: Insert the screws provided with your anchor kit (or the sconce, if they’re compatible) through the mounting bracket and into the installed drywall anchors. Tighten these screws securely. Make sure the bracket is snug against the wall and doesn’t wobble. Use your level on the bracket to ensure it’s perfectly straight before fully tightening.
- Attach the Sconce: Once the bracket is securely mounted, attach the sconce itself to the bracket. This usually involves screwing the sconce body onto the bracket, or it might have decorative nuts or finials to secure it. Follow your sconce’s specific instructions for this step.
- Install Bulb and Shade: Screw in the appropriate light bulb (check wattage limits!) and attach any glass shades or decorative elements.
Step 6: Final Check and Power Up
- Clean Up: Remove any dust or debris, and dispose of your drop cloth.
- Turn Power Back On: Go to your circuit breaker and flip the breaker back to the ON position.
- Test the Sconce: Turn on the light switch. Your sconce should illuminate!
Congratulations, you’ve successfully installed a wall sconce on drywall without a stud!
Troubleshooting Common Issues
Even with the best planning, hiccups can occur. Here are a few common problems and their solutions:
Sconce Feels Loose After Mounting:
- Cause: Anchor not fully engaged, screw loosened, or drywall damage.
- Solution: Turn off the power. Carefully remove the sconce. Check if the anchors are still secure in the drywall. If the screw holes in the drywall are stripped or enlarged, you might need to patch the holes and use larger anchors or a different mounting location. Ensure the screws going into the anchors are tight but not so tight they strip.
Light Flickers or Doesn’t Turn On:
- Cause: Loose wire connection, incorrect wiring, faulty bulb, or breaker issue.
- Solution: Turn off the power FIRST. Double-check all wire connections inside the junction box. Ensure wire nuts are tight and connections are correct (black to black, white to white, ground to ground). Try a new bulb. If the issue persists, you may have a more significant electrical problem, and an electrician should be consulted.
Anchor Won’t Go In or Feels Like It’s Spinning:
- Cause: Hole is too small or too large, or the drywall is weak/damaged.
- Solution: If the hole is too small, you may need to carefully enlarge it slightly with a drill bit. If the hole is too large, the anchor won’t be able to grip. In this case, you’ll need to patch the hole and start over with a new location or a different type of anchor that can handle a slightly larger hole (check anchor specs). For spinning anchors, it means it’s not gripping the drywall. You may need to remove it, patch the hole, and try a different anchor or location.
Frequently Asked Questions (FAQ)
Can I use regular screws to hang a sconce on drywall?
Absolutely not. Regular screws have very little holding power in drywall alone and are designed to go into studs or use with anchors. Using plain screws will almost certainly result in the sconce falling off the wall.
What is the weight limit for drywall anchors for sconces?
This varies greatly by anchor type and size. Self-drilling anchors might be rated for 20-30 lbs, while heavy-duty toggle bolts can often handle 50-100 lbs or more. Always check the manufacturer’s specifications for the specific anchor you are using.
For a sconce, select an anchor rated significantly higher than the estimated weight of the fixture.
How far apart should the anchors be?
The distance between anchors is determined by the hole pattern on your sconce’s mounting bracket. The anchors need to align with these holes. The goal is to distribute the weight across as many secure anchor points as possible.
Do I need to call an electrician to install a sconce without a stud?
Not necessarily, if you are comfortable with basic electrical wiring and safety procedures, and if you are mounting to an existing junction box. However, if you are unsure about any part of the electrical process, or if you need to relocate an existing junction box or run new wiring, it is highly recommended to hire a qualified electrician.
What if my sconce is very heavy?
For very heavy sconces, especially if they are mounted on a long arm far from the wall, I would strongly advise against relying solely on drywall anchors. While heavy-duty toggle bolts are robust, the safest bet for exceptionally heavy fixtures is to locate a wall stud. If a stud is indispensable, you may need to get creative with placement or consider a different fixture.
Can I install a hardwired sconce on drywall without a stud in a bathroom or kitchen?
Installing any electrical fixture in damp or wet areas introduces additional safety considerations. While it’s possible with appropriate anchors and ensuring you tap into a properly GFCI-protected circuit, it is generally recommended to have a qualified electrician handle such installations to ensure all codes and safety standards are met. The risk of moisture ingress can compromise the integrity of drywall anchors over time if not installed perfectly.
How do I know if I hit a stud if I’m NOT supposed to?
A stud finder can help you locate studs. If you’re not aiming for a stud, use the stud finder to ensure your chosen mounting location is not where a stud is present. This prevents you from trying to install an anchor into solid wood when you intend to use it in the hollow space of the drywall.
Also, some stud finders can detect live electrical wires, which is crucial to avoid drilling into them.
Conclusion
Installing a wall sconce on drywall without a stud is a perfectly viable DIY project when you equip yourself with the right knowledge and materials. The key is understanding the limitations of drywall and employing specialized anchors, think heavy-duty toggle bolts or snap toggles, that create a secure hold by leveraging the material behind the wall.
By carefully planning your location, using appropriate tools, prioritizing safety above all else (especially with electrical connections), and following these steps, you can confidently add ambient lighting and aesthetic appeal to your home. Remember, when in doubt about electrical work, always call a professional. Happy decorating!


Similar Posts



















