How to Install Wall Sconces on Shiplap Walls
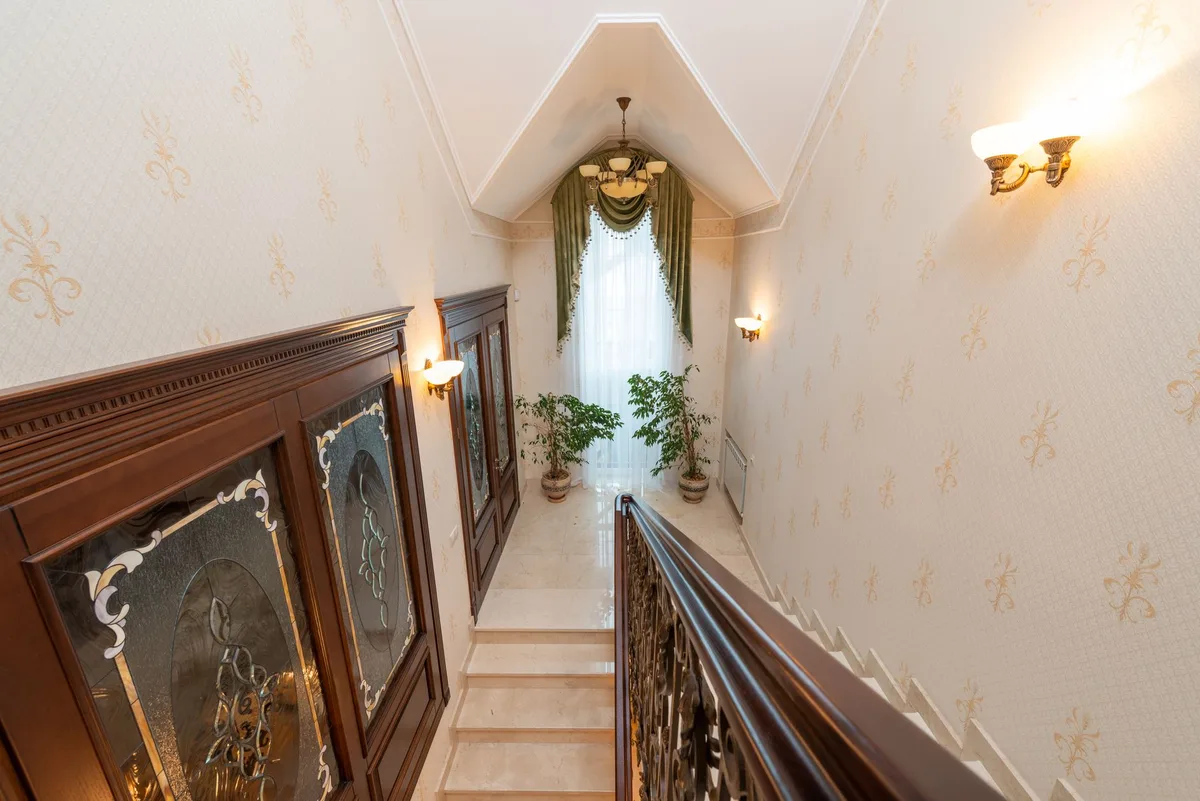
Adding wall sconces to a shiplap wall can dramatically transform the ambiance of any room. Shiplap’s distinct horizontal lines offer a rustic charm, but they also present unique considerations when it comes to mounting fixtures. Installing wall sconces, especially if they’re hardwired, requires a bit more planning than on a standard drywall surface.
But don’t let that deter you! With the right tools and a methodical approach, you can achieve a professional-looking installation that enhances your home’s aesthetic.
This guide breaks down the entire process, from choosing the right sconce to drilling those crucial holes, ensuring you get a secure and stylish finish on your shiplap. We’ll cover everything you need to know to tackle this DIY project with confidence.
Understanding Shiplap and Its Mounting Challenges
Shiplap walls are characterized by their overlapping wooden planks. This creates a beautiful texture and depth, but it also means you’re not drilling directly into a solid, uniform surface like drywall. The gaps between the planks, the varying thickness of the wood, and the potential presence of studs behind them all need to be accounted for.
The primary challenges when installing anything on shiplap, including wall sconces, are:
- Uneven Surface: The overlapping nature of shiplap means the mounting surface isn’t perfectly flat. This can make it difficult for a sconce’s backplate to sit flush.
- Structural Support: Ensuring your sconce is securely anchored is paramount for safety and longevity. Simply screwing into a plank might not be enough, especially for heavier fixtures.
- Electrical Wiring (if applicable):Hardwiring sconces involves running wires, which can be trickier when navigating the shiplap’s structure. You need to ensure you’re not damaging hidden wires or pipes and that your connection points are sound.
- Aesthetics: You want the installation to look clean and intentional, not like an afterthought. This means precise measurements and careful placement of hardware.
That said, shiplap isn’t an insurmountable barrier. With the right techniques, you can overcome these challenges and enjoy beautiful new lighting.
Choosing the Right Wall Sconce for Shiplap
Before you even think about tools, let’s talk about the sconce itself. The type of sconce you choose will influence the installation process significantly.
Hardwired vs. Plug-In Sconces
This is your first major decision.
- Hardwired Sconces: These are connected directly to your home’s electrical system. They offer a clean, seamless look with no visible cords. However, they require electrical work, which might involve turning off power at the breaker, running wires, and connecting them to an existing junction box or installing a new one. This is generally a job for someone comfortable with basic electrical wiring, or it might require a qualified electrician.
- Plug-In Sconces: These sconces come with a power cord that plugs into a standard wall outlet. They are considerably easier to install, as they don’t involve direct wiring into your home’s electrical system. You typically just need to mount the fixture and then hide the cord. They offer more flexibility in placement but require an outlet nearby and careful cord management to maintain a clean look.
For shiplap, plug-in sconces are an excellent starting point for DIYers due to their simplicity. If you opt for hardwired, ensure you have a plan for running the wires and accessing a junction box.
Sconce Design and Weight
The design of a sconce can impact how it sits on your shiplap.
- Backplates: Sconces with larger, flatter backplates are generally easier to mount flush on shiplap. If the backplate is small or has an intricate design, you might need to improvise with a mounting block or plate to create a stable, level surface behind it.
- Weight: Heavier sconces will require more robust anchoring. Always check the manufacturer’s specifications for weight limits and recommended mounting hardware. A sconce that’s too heavy for the shiplap alone shouldn’t be your first choice unless you’re prepared for more involved structural reinforcement.
Essential Tools and Materials
Gathering your supplies beforehand will make the installation process smoother.
Tools You’ll Likely Need:
- Drill and Drill Bits: Essential for creating pilot holes and driving screws. You’ll need wood-specific bits.
- Stud Finder: Crucial for locating wall studs for secure mounting, especially for heavier sconces.
- Level: To ensure your sconce is mounted straight.
- Measuring Tape: For precise placement.
- Pencil: For marking your drill points.
- Screwdriver Set: Matching the screw heads on your sconce and any mounting hardware.
- Wire Strippers/Cutters (for hardwired): If you’re connecting wires.
- Voltage Tester (for hardwired): To confirm power is off.
- Safety Glasses: Always protect your eyes.
- Dust Mask: Especially if drilling into older wood.
- Drywall Saw or Oscillating Multi-Tool (for hardwired): If you need to cut a hole for a junction box.
- Wire Nuts (for hardwired): For connecting electrical wires.
- Screwdriver (Electric or Manual): For screwing into wood.
Materials:
- Wall Sconce(s): The star of the show!
- Mounting Bracket (often included): This is what attaches to the wall and supports the sconce.
- Mounting Block or Metal Electrical Box (for hardwired): This provides a secure anchor point for the sconce and a safe enclosure for wiring. For shiplap, a mounting block is often essential.
- Screws: Appropriate length and type for wood and your mounting hardware. You’ll likely need longer screws than what comes with a standard sconce for good anchoring into studs or a mounting block.
- Wall Anchors (if not hitting studs): Use heavy-duty anchors specifically designed for wood or your shiplap’s material. Toggle bolts can be a good option for added strength.
- Wire (if hardwired): The correct gauge for your fixture and circuit.
- Electrical Tape: For insulating connections.
- Painter’s Tape: To protect the shiplap surface around your drilling area.
Step-by-Step Installation Guide: Plug-In Sconces
Let’s start with the simpler of the two: plug-in sconces. These are fantastic for adding ambiance without the complexities of electrical wiring.
Step 1: Planning and Placement
- Determine Location: Decide exactly where you want your sconce. Consider the height, a common placement is around 60-66 inches from the floor to the center of the fixture, but this can vary based on room size and ceiling height. Think about how it will complement your furniture and other decor.
- Visual Placement: Hold the sconce (or its mounting bracket) against the wall to visualize its position. Use a level to ensure it’s straight.
- Mark Pilot Holes: Once you’re happy with the placement, use your pencil to mark the spots for your screw holes, ensuring they align with the mounting bracket.
Step 2: Securing the Mounting Bracket
This is where shiplap requires a bit of extra attention.
- Check for Obstructions: Before drilling, use your stud finder to see if there’s a stud behind your desired mounting location. Mounting into a stud is ideal for maximum stability.
- Consider a Mounting Block: If you’re not hitting a stud, or if you want a more robust installation, creating or using a mounting block is highly recommended.
- What is a Mounting Block? It’s a piece of wood (often a 1×4 or 1×6) cut to size. It mounts directly to the shiplap (and ideally, into studs if possible), creating a flat, solid surface to which you then attach the sconce’s bracket.
- Preparing the Mounting Block: Cut your wood to a size that will fit behind the sconce backplate, providing ample surface area. Pre-drill holes in the mounting block for attaching it to the wall.
- Attaching the Mounting Block: Position the mounting block on the shiplap where you intend to hang the sconce. Mark where the mounting block’s holes will go. You may need to drill through the shiplap and into the studs behind it, or use heavy-duty anchors if studs aren’t accessible. Secure the mounting block firmly.
- Mounting the Bracket:
- Directly to Shiplap/Studs: If you’re mounting directly into studs or using strong anchors, use your drill to create pilot holes through your marked points on the shiplap. The pilot hole should be slightly smaller than your screws. Then, drive your mounting screws through the sconce’s mounting bracket and into the pilot holes.
- To Mounting Block: Once the mounting block is securely attached to the wall, align the sconce’s mounting bracket with the pre-drilled holes on the mounting block. Drive screws through the bracket and into the mounting block.
Important Note: Use screws long enough to get a good purchase. If you’re going into studs, you’ll want screws that penetrate at least 1-1.5 inches into the stud. If you’re using a mounting block and going into drywall anchors or backing, ensure the screws are appropriate for that system and the block.
Step 3: Attaching the Sconce
- Connect Wires (if applicable): Some plug-in sconces have a small wiring segment that connects the cord to the fixture itself. Follow the manufacturer’s instructions.
- Mount the Sconce: Most sconces attach to the mounting bracket with a central screw or by twisting into place. Align the sconce with the bracket and secure it.
- Install Light Bulb and Shade: Screw in the appropriate light bulb (check wattage limits!) and attach any shades or globes.
Step 4: Cord Management
This is key for a clean look on shiplap.
- Run the Cord: Route the power cord discreetly. You can run it along baseboards, tuck it behind furniture, or use cord covers that can be painted to match your wall color.
- Secure the Cord: Use cord clips or staples designed for electrical cords to keep it tidy and prevent it from hanging loosely. Be careful not to pierce the cord itself.
- Plug In and Test: Plug the sconce into the nearest outlet and turn it on.
Step-by-Step Installation Guide: Hardwired Sconces
Hardwired sconces offer a more integrated look but involve more electrical work. If you’re not comfortable with electrical systems, it’s wise to hire a qualified electrician for this part.
Safety First: Turn Off Power!
Before you do anything, go to your home’s electrical panel and switch off the circuit breaker that supplies power to the area where you’ll be working. Use a voltage tester to confirm the power is indeed off at the junction box location. This is non-negotiable.
Step 1: Planning and Placement
- Locate Existing Junction Box or Plan New One:
- Existing Box: If you’re replacing an existing fixture, you might have a junction box already in place. You’ll need to ensure it’s suitable for the new sconce and that it’s securely mounted to a stud or framing.
- New Box: If there’s no existing box, you’ll need to install one. This is where shiplap can be trickier. You’ll need to determine the best location, which ideally involves a stud. You might need to cut an access hole in the shiplap to install a new electrical box designed for this purpose (often a “pancake” box or a remodel box).
- Sconce Placement: Determine the exact height and position, similar to plug-in sconces. Use a level to mark your intended center point.
Step 2: Preparing the Mounting Surface and Electrical Box
- Mounting Block/Box: For hardwired sconces on shiplap, a mounting block is essential for providing a secure, flat surface and a point to attach the electrical box.
- Install Electrical Box: If installing a new box, you’ll typically mount it to a stud. For remodels, you’ll often use a remodel box with tabs that clamp onto the drywall/shiplap from the inside after you’ve cut the opening.
- Wiring: Gently feed the electrical wire from your home’s wiring into the electrical box through the designated knockout or clamp. Leave enough slack to work with.
- Secure the Box: Ensure the electrical box is firmly secured to the wall structure (stud, joist, or framing). It should not wiggle.
- Attaching the Sconce Mounting Bracket: The sconce’s mounting bracket typically screws directly into the electrical box. Align the bracket’s holes with the threaded holes in the electrical box.
Step 3: Wiring the Sconce
This involves connecting the wires from your home’s electrical system to the sconce. Always follow the sconce manufacturer’s specific wiring diagram.
- Identify Wires: You’ll typically find three types of wires:
- Hot (usually black): This is the live wire.
- Neutral (usually white): This completes the circuit.
- Ground (usually green or bare copper): For safety.
- Connect Wires:
- Ground: Connect the ground wire from the house to the ground wire on the sconce. Use a wire nut. If the electrical box has a ground screw, connect the house ground wire to it as well.
- Neutral: Connect the neutral wire from the house to the neutral wire on the sconce. Use a wire nut.
- Hot: Connect the hot wire from the house to the hot wire on the sconce. Use a wire nut.
- Insulate and Secure: Ensure all wire connections are tight and covered with wire nuts. Gently tuck the wires and wire nuts up into the electrical box.
Step 4: Attaching the Sconce Fixture
- Secure Mounting Bracket: If you haven’t already, attach the sconce’s mounting bracket to the electrical box using the provided screws. It should be flush and secure.
- Mount Sconce: Align the sconce with the mounting bracket. Most sconces are secured with a central screw that passes through the sconce’s backplate and into the mounting bracket. Hand-tighten this screw, then give it a final quarter-turn with a screwdriver. Don’t overtighten, as you could strip the threads or crack the sconce.
- Install Bulb and Shade: Install the correct light bulb and attach any shades or globes as per the manufacturer’s instructions.
Step 5: Testing and Final Touches
- Restore Power: Go back to your electrical panel and turn the circuit breaker back on.
- Test the Sconce: Flip the light switch to ensure your sconce is working correctly. If it doesn’t, immediately turn off the power at the breaker and re-check your wiring connections.
- Conceal Wiring (if applicable): If you had to cut an access hole for the electrical box, you might need to trim it out or cover it with a decorative plate. For the power cord of a plug-in version, ensure it’s neatly managed as described earlier.
Mounting Blocks: Your Shiplap Secret Weapon
We’ve mentioned mounting blocks multiple times, and for good reason. They’re a game-changer for installing fixtures on shiplap.
What is a Mounting Block?
A mounting block is essentially a piece of wood, cut to accommodate your sconce’s backplate, that you securely fasten to the wall structure first. Then, you attach your sconce’s mounting hardware or the sconce itself to this block.
Why Use a Mounting Block?
- Flat, Stable Surface: Shiplap planks aren’t perfectly flat. A mounting block creates a smooth, even surface, allowing your sconce’s backplate to sit flush and look professional.
- Secure Anchoring: By screwing the mounting block directly into wall studs, you gain significantly more support for your sconce, especially crucial for heavier fixtures.
- Hides Gaps: It can help cover any slight gaps between the shiplap and the sconce backplate, improving the overall appearance.
- Electrical Box Support: For hardwired sconces, a mounting block provides a solid base to attach the electrical junction box, ensuring it’s firmly in place.
How to Create and Install a Mounting Block:
- Measure and Cut Wood: Determine the size of the wood needed. It should be large enough to span at least two shiplap planks and provide a surface area bigger than your sconce’s backplate. A good starting point is a piece of 1×4 or 1×6 lumber.
- Locate Studs: Use a stud finder to determine where wall studs are located and mark them on the wall.
- Drill Pilot Holes in Mounting Block: Pre-drill holes in the mounting block where you plan to screw it into the studs.
- Position and Attach Block: Hold the mounting block in place on the shiplap. Drive long screws through the pre-drilled holes in the mounting block and into the wall studs. Ensure the block is very secure. If you can’t hit studs adequately, you may need to use very heavy-duty drywall anchors in conjunction with the block.
- Mount Sconce Hardware: Now, treat the mounting block as your solid wall surface. Attach the sconce’s mounting bracket (for plug-in) or electrical box (for hardwired) to the mounting block using appropriate screws.
Troubleshooting Common Issues
Even with careful planning, you might encounter a snag. Here are a few common problems and how to solve them:
Sconce Isn’t Sitting Flush on Shiplap
- The Problem: The uneven surface of the shiplap planks prevents the sconce’s backplate from making full contact.
- The Solution:
- Shim It: Use thin shims or pieces of cardboard behind the mounting bracket or backplate where it’s not making contact. This can help fill the gaps and create a more flush appearance.
- Custom Mounting Block: If it’s a persistent issue, a larger or custom-shaped mounting block might be necessary to create a perfectly flat surface.
- Adjust Screws: Slightly loosen or tighten mounting screws to see if it pulls the backplate closer to the wall in key areas.
Sconce Feels Loose or Wobbly
- The Problem: Insufficient anchoring is causing the sconce to sway.
- The Solution:
- Find Studs: Always aim to mount into wall studs. Use a stud finder and mark their locations clearly.
- Use Longer Screws: Ensure your screws are long enough to penetrate deep into studs or a solid mounting block.
- Heavy-Duty Anchors: If studs aren’t an option, use high-quality, appropriately rated anchors (e.g., toggle bolts, robust wood anchors) that can handle the weight of the sconce.
- Reinforce with a Mounting Block: As discussed, a mounting block screwed into studs provides the best stability.
Difficulty Running Wires (Hardwired Sconces)
- The Problem: The shiplap construction makes it hard to route wires to a junction box.
- The Solution:
- Access Panels: You might need to cut small, discreet access holes in the shiplap (perhaps in a less visible area) to run wires. These can later be patched and painted to blend in.
- Surface-Mount Wire Concealers: For less invasive solutions, consider using paintable wire concea lers that run along the wall surface from the electrical source to the sconce.
- Consult an Electrician: If you’re struggling with wire routing, this is a clear sign to call in a professional. They have the tools and expertise to navigate these challenges safely.
Electrical Issues (Hardwired Sconces)
- The Problem: Sconce doesn’t turn on, breaker trips, or lights flicker.
- The Solution:
- Turn Off Power: Immediately turn off the circuit breaker.
- Double-Check Wiring: Carefully inspect all wire connections. Ensure they are secure and correct (hot to hot, neutral to neutral, ground to ground).
- Voltage Tester: Use a non-contact voltage tester to ensure power is off before touching any wires and to confirm power is reaching the box.
- Wattage: Ensure you’re using the correct wattage bulb as specified by the sconce manufacturer.
- Consult an Electrician: If you suspect a fault in the home’s wiring or an issue with the sconce itself, professional electrical assessment is required.
Aesthetics and Integration with Shiplap
Beyond just mounting, consider how your sconces will look with the shiplap.
Complementing the Shiplap Style
- Rustic Charm: Industrial or farmhouse-style sconces with metal finishes (black, bronze, brushed nickel) often pair beautifully with shiplap. Think exposed bulbs, simple metal shades, or lantern-style fixtures.
- Modern Twist: Even on shiplap, you can introduce modern elements. Sleek, minimalist sconces with clean lines can create a striking contrast.
- Color Coordination: Choose sconce finishes that complement or intentionally contrast with your shiplap’s color. Black sconces pop against white shiplap, while brass or gold can add warmth.
Placement and Symmetry
- Pairing: Sconces are often installed in pairs, flanking a window, a fireplace, a doorway, or a piece of artwork. This creates a balanced and inviting look.
- Single Sconce: A single, well-placed sconce can also be a focal point, especially in smaller areas like a hallway or reading nook.
- Height and Spacing: Pay attention to how the sconce’s height and the distance between paired sconces relate to the room’s scale and furniture.
Maintaining Your Shiplap Sconce Installation
Once installed, a little care will keep your sconces looking great and functioning properly.
Cleaning
- Sconces: Dust regularly with a soft cloth. For metal finishes, use a cleaner appropriate for that material. Avoid abrasive cleaners that can scratch.
- Bulbs and Shades: Turn off the sconce and ensure the bulb is cool before cleaning shades or glass. Use a damp cloth or a mild cleaner as needed.
- Shiplap: Clean the shiplap walls around the sconces as you normally would. Be mindful when dusting or wiping near electrical components.
Bulb Replacement
- Always turn off the power to the sconce at the switch or breaker before replacing a bulb.
- Ensure you’re using the correct type and wattage of bulb as recommended by the sconce manufacturer. Using a bulb that’s too high in wattage can overheat the fixture and potentially cause damage or a fire hazard.
Regular Checks
- Periodically check that the mounting screws are still tight and that the sconce itself is securely attached to its bracket.
- For hardwired sconces, if you notice any flickering, loose connections, or unusual sounds, turn off the power immediately and have it inspected by an electrician.
Investing in Quality: Why It Matters
When choosing wall sconces, especially for shiplap walls where secure mounting is key, investing in quality makes a difference.
- Durability: Well-made sconces are built to last, using stronger materials and better construction. This means they’ll hold up better to daily use and the rigors of installation.
- Safety: Quality fixtures are designed and tested to meet safety standards. This is particularly important for electrical components.
- Ease of Installation: Higher-quality sconces often come with more robust mounting hardware and clearer instructions, making the installation process more straightforward.
- Aesthetics: The finish, design, and overall craftsmanship of a quality sconce will be evident, enhancing your home’s decor beyond just basic illumination.
For those looking for reliable and well-crafted lighting options, exploring manufacturer websites like Kohler Co. (https://www.kohler.com) can provide insight into the quality and design standards to look for in home fixtures.
Frequently Asked Questions About Installing Sconces on Shiplap
Q1: Can I mount a sconce directly into shiplap without hitting a stud?
A: For plug-in sconces that are very lightweight, you might get away with using heavy-duty drywall anchors designed for wood. However, it’s strongly not recommended for long-term stability or safety, especially for hardwired sconces. Using a mounting block screwed into studs or a very solid anchoring system is the best bet.
Q2: How high should I hang wall sconces on a shiplap wall?
A: The general rule of thumb for wall sconces is to have the center of the fixture around 60-66 inches from the floor. This can be adjusted based on your ceiling height and the furniture in the room. For shiplap, ensure the height works with the plank lines and doesn’t feel awkwardly placed between the horizontal boards.
Q3: What if my shiplap is very old or uneven?
A: Older shiplap can be more brittle or have more pronounced imperfections. In such cases, a robust mounting block is even more crucial. You might also consider a more flexible sconce mount or one with a larger backplate that can better bridge uneven surfaces.
Always check for structural integrity before drilling.
Q4: Do I need a mounting block for every sconce on shiplap?
A: While not strictly mandatory for every single sconce, it’s highly recommended for all sconces, especially those that are hardwired or have any significant weight. It ensures a professional finish and a secure installation, preventing sagging or loosening over time due to the uneven nature of shiplap. It’s a small step that yields big results.
Q5: Can I use a template to mark my drill holes for sconces on shiplap?
A: Yes, absolutely! Many sconce manufacturers provide paper templates in their installation instructions. If yours doesn’t, you can create one by tracing the mounting bracket onto a piece of sturdy paper or cardboard.
This helps ensure precise alignment when marking your drill points on the shiplap.
Q6: What’s the most common mistake people make when installing sconces on shiplap?
A: The most common mistake is not accounting for the uneven surface of the shiplap. People often try to mount directly to the planks, leading to a wobbly fixture or a gap between the sconce and the wall. Over-reliance on flimsy anchors or not using a mounting block when needed are other frequent errors.
Q7: How can I make plug-in sconces look less cluttered with the cord management?
A: Effective cord management is key. Use adhesive cord clips or small staples to run the cord along the wall and baseboards. You can also paint the cord or use a paintable cord cover to blend it with the shiplap.
Tucking cords behind furniture is another simple solution. For more advanced concealment, consider shallow wire channels that can be painted to match.
Q8: I’m replacing an old fixture. Do I need to worry about the old mounting holes on my shiplap?
A: Yes, you might. If the old holes are larger or in a different position, you may need to fill them or use a larger mounting plate or block to cover them and provide a solid new mounting surface. For plug-in sconces, sometimes you can position the new sconce to cover the old marks.
For hardwired, you may need to patch and repair the shiplap before installing the new box and mounting block.
Conclusion
Installing wall sconces on shiplap walls is a rewarding DIY project that can profoundly enhance your home’s interior. By understanding the unique nature of shiplap and employing the right techniques, particularly the strategic use of mounting blocks and ensuring secure anchoring, you can achieve a beautiful, professional result. Whether you opt for the simplicity of plug-in fixtures or the integrated look of hardwired sconces, careful planning, the right tools, and adherence to safety guidelines are paramount.
Take your time, follow these steps, and you’ll soon be enjoying the warm, inviting glow of your newly installed wall sconces, perfectly complementing the rustic charm of your shiplap walls.


Similar Posts



















