How to Organize Craft Supplies With Storage Bins
Let’s be honest. For many of us, our craft space can quickly resemble a creative explosion. When the urge to make strikes, we often dig through piles of fabric scraps, rummage for that one specific embroidery floss, or find ourselves buried under a mountain of beads.
It’s frustrating, time-consuming, and frankly, a joy killer. But what if I told you there’s a simple, elegant solution that can bring order to the chaos? Storage bins.
Yes, humble storage bins are the unsung heroes of craft room organization. They’re versatile, affordable, and can transform a messy area into a functional, inspiring haven. In this guide, we’ll dive deep into how to effectively organize your craft supplies using storage bins.
We’re talking about bins for every type of craft imaginable, from hefty sewing projects to delicate jewelry making.
Why Storage Bins Are Your Craft Organization MVP
Before we get into the nitty-gritty, let’s quickly touch upon why storage bins are so darn effective for crafters.
- Visibility & Accessibility: Clear bins let you see what’s inside at a glance. No more pulling out ten boxes to find that one lost item. This saves you time and frustration. Even opaque bins can be labeled clearly for easy identification.
- Containment: They keep similar items together. Think beads in one bin, yarn in another, paintbrushes in a third. This prevents your supplies from migrating and creating new piles of clutter.
- Protection: Bins shield your precious supplies from dust, moisture, and accidental spills. This is especially important for delicate items like paper, paints, or delicate threads.
- Space Maximization: Many bins are stackable, allowing you to utilize vertical space in your craft room. This is a game-changer for smaller spaces. You can also fit bins into shelves, under tables, and in closets.
- Cost-Effective: Compared to custom cabinetry or elaborate shelving systems, storage bins are incredibly budget-friendly. You can find them at almost any home goods store, craft store, or online retailer.
Planning Your Craft Supply Storage Bin Strategy
Before you rush out and buy a dozen bins, a little planning goes a long way. Think about your specific crafting habits and the types of supplies you have.
Assess Your Craft Arsenal
Take a good, hard look at what you have.
- Categorize: Group your supplies by craft type (sewing, knitting, scrapbooking, painting, jewelry making, etc.).
- Sub-categorize: Within each craft type, break things down further. For sewing, you might have fabric, thread, patterns, notions, tools. For jewelry making, you might have beads, findings, wire, pliers.
- Volume: How much of each category do you have? Do you have an overwhelming amount of yarn? A small collection of watercolors? This will dictate the size and number of bins you need.
- Frequency of Use: What do you reach for most often? These should be the easiest to access. Less frequently used items can be stored higher up or further away.
Choose the Right Bin Types
Storage bins come in a dizzying array of shapes, sizes, colors, and materials. Here’s a breakdown of common types and what they’re best for:
- Clear Plastic Bins: These are the workhorses.
- Pros: Excellent visibility, durable, easy to clean, come in countless sizes.
- Cons: Can feel a bit utilitarian (though some have attractive designs), might accumulate static that attracts dust if not stored somewhere very clean.
- Best For: Almost anything. Storing yarn, fabric fat quarters, paper pads, paints, tools, unfinished projects, beads, buttons, notions.
- Opaque Plastic Bins:
- Pros: Hide visual clutter, can make a space look cleaner and more unified, often more affordable than clear options.
- Cons: You can’t see what’s inside. Labeling is essential.
- Best For: Items you don’t need to see instantly, or items that might fade in direct light. Think larger fabric stashes, backup supplies, or projects you’re taking a break from.
- Stackable Bins:
- Pros:Maximize vertical space, create neat towers, often have interlocking designs for stability.
- Cons: The higher you stack, the harder it is to reach the bottom.
- Best For: Any supplies where you have multiple categories that can be housed vertically. Great for shelves and closets.
- Art/Craft Supply Organizers (with compartments): These are often shallower bins with built-in dividers.
- Pros: Perfect for small, fiddly items that would get lost in a larger bin. Keeps categories within categories very organized.
- Cons: Less versatile for bulkier items.
- Best For: Beads, buttons, embroidery floss, small findings, dice, miniatures, electronic components for crafting.
- Fabric Bins/Baskets:
- Pros: Soft, aesthetically pleasing, good for lighter items.
- Cons: Less durable, don’t offer much protection from dust or spills, can collapse if not full.
- Best For: Yarn, felt, larger fabric pieces, soft toys, or for visible storage where aesthetics are key. Often used for decorative overflow.
- Drawer Units/Crates: While not strictly “bins,” these modular systems function similarly, offering compartmentalized storage.
- Pros: Excellent for frequent access, can be visually appealing.
- Cons: Can be more expensive, might not be as adaptable as individual bins.
- Best For: Frequently used tools, papers, or smaller projects in a studio setting.
Measure Twice, Buy Once
Before you commit to buying, measure your storage spaces.
- Shelving Units: Measure the width, depth, and height of each shelf.
- Closets: Measure the width, depth, and available height.
- Desk Drawers: Measure the internal dimensions.
This ensures that the bins you choose will actually fit where you intend to put them. You don’t want to end up with bins that are too tall for your shelves or too deep for your closet.
Organizing Specific Craft Supplies with Storage Bins
Now for the fun part, putting those bins to work! Here’s a breakdown of how to organize common craft supplies.
Sewing and Quilting Supplies
Your sewing room can be a treasure trove of small items and large fabrics. Bins are your best friend here.
- Fabric:
- Fat Quarters & Small Scraps: Clear, shallow plastic bins are perfect. Stack them neatly on shelves. You can even store them vertically, like files, if the bins are open-fronted or you can prop them up.
- Larger Fabric Yardage: For yards of fabric, consider larger, opaque bins. You can roll your fabric around a piece of cardboard or a ruler before placing it in the bin. This keeps it tidy and prevents creases. Stacking these larger bins on a closet shelf or the floor works well.
- Pre-cuts (Charm Packs, Jelly Rolls): These can fit into medium-sized clear bins, often stacked by fabric collection or color.
- Thread:
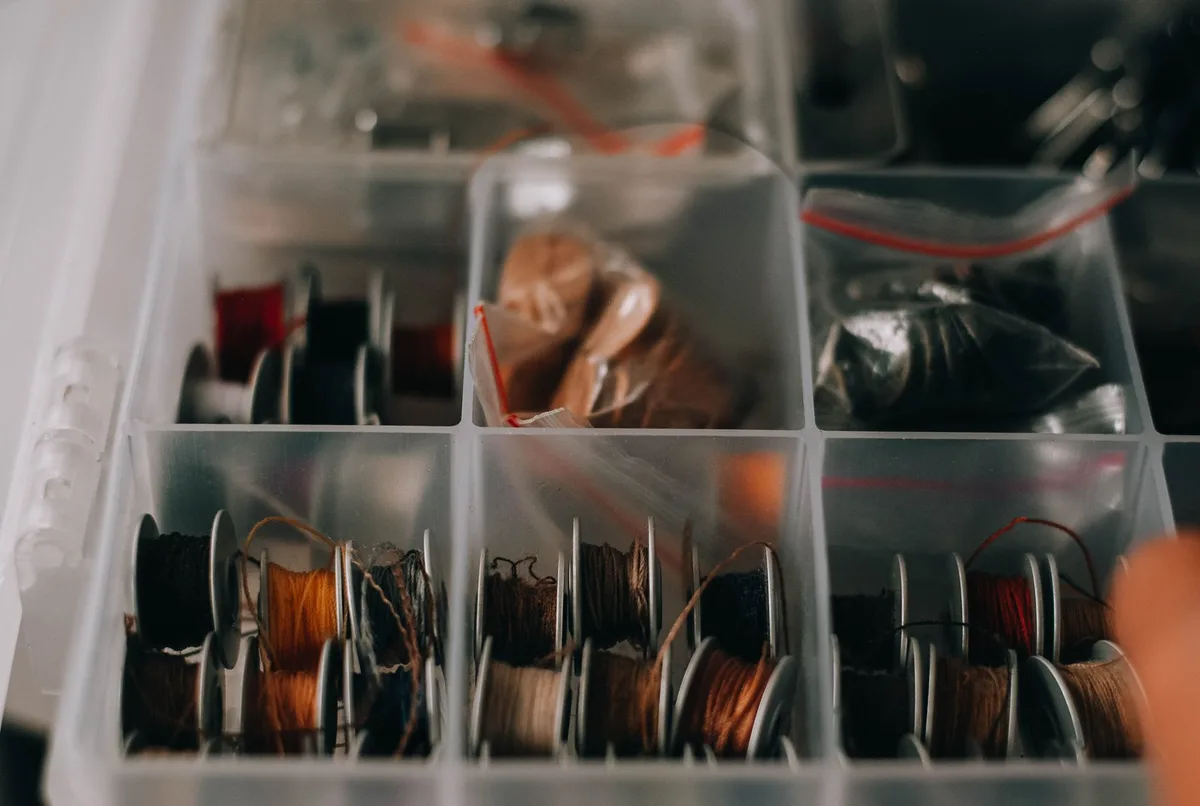
- Spools: Small craft organizer bins with numerous compartments are ideal. If you have a lot of thread, consider a dedicated thread organizer with individual spool slots. Alternatively, a clear bin with small dividers can work. You can even store spools vertically if you lay them down carefully.
- Embroidery Floss: Tiny compartment bins are a must for embroidery floss. Color-coding is your friend here!
- Patterns:
- Paper Patterns: Store patterns in larger, flat, clear bins or magazine holders. Label them clearly by type (e.g., “Dresses,” “Tops,” “Home Decor”).
- Notions (Buttons, Zippers, Pinking Shears, etc.):
- Small Notions: Use small compartment bins or shallow drawers for buttons, beads, snaps, and other tiny bits.
- Medium Notions: Zipper assortments, ribbon spools, bias tape, these can go into medium plastic bins with dividers or even shoebox-sized bins. Store frequently used scissors and rotary cutters in a designated tool bin or holder.
- WIPs (Works in Progress): Use larger fabric bins or dedicated project bins for your sewing projects that aren’t quite finished. This keeps them contained and prevents fabric from unraveling or threads from tangling.
Yarn and Knitting/Crochet Supplies
Yarn can be bulky and prone to tangling. Bins offer a structured way to manage it.
- Yarn Skeins/Balls:
- Medium to Large Skeins: Large, clear or opaque plastic bins are excellent. You can stack them by color, yarn weight, or fiber type.
- Small Balls/Scraps: Smaller compartment organizers or even repurposed candy jars can hold small balls of yarn or yarn scraps for amigurumi projects.
- Patterns: Small, clear bins or binders work best for storing knitting and crochet patterns.
- Tools (Hooks, Needles, Stitch Markers, Scissors):
- Hooks: Dedicated crochet hook cases or small compartment bins keep hooks organized and prevent them from getting lost.
- Needles: Knitting needle cases or longer, narrow bins work well for straight needles. Circular needles can be stored in larger bins, perhaps bundled with their patterns.
- Accessories: Stitch markers, row counters, tapestry needles, use small compartment organizers. Keep a dedicated bin for your project bags and notions.
- Unfinished Projects: Similar to sewing, use larger bins to store knitting or crochet projects that are in progress. This keeps your yarn tidy and your project ready to pick up.
Paper Crafts (Scrapbooking, Card Making, Stamping)
Paper can warp, stamps can get lost, and embellishments can be a nightmare.
- Paper:
- Cardstock & Patterned Paper: For standard 12×12 or 6×6 inch paper pads, use dedicated paper storage bins or trays. You can store them upright like files, or lay them flat in larger bins, depending on your space. Clear bins are fantastic here, allowing you to see your beautiful papers.
- Scrapbook Pages (Completed): Store completed scrapbook pages in specialized page protectors housed in larger, flat bins.
- Stamps:
- Unmounted Stamps: Stamp sets often come in plastic cases. Store these cases neatly in clear bins. You can organize them by theme (holidays, birthdays, general sentiment) or by manufacturer.
- Cling/MDF Mounted Stamps: These can also be stored in their original cases within bins.
- Ink Pads:
- Standard Size: Bins with dividers or specialized ink pad racks are ideal. Store them label-side up for easy identification.
- Smaller Dye Pads: Small compartment organizers can work well for collections of smaller ink pads.
- Embellishments (Stickers, Die Cuts, Brads, Sequins):
- Small Items: Small compartment organizers are your best bet here. Sequins, brads, eyelets, and small buttons should go into these tiny bins.
- Stickers & Die Cuts: Sticker sheets can be stored in clear plastic sleeves within slightly larger, flat bins. Die-cut packs can be filed upright in paper storage bins.
- Tools (Scissors, Punches, Adhesives):
- Punches: Store punches upright in medium to large bins.
- Adhesives: Keep glue sticks, tape runners, and liquid glues organized in a bin dedicated to adhesives.
Jewelry Making Supplies
Small beads and intricate findings require precise organization.
- Beads:
- Small Beads: This is where bead organizer trays with tiny compartments shine. Use these for seed beads, tiny gemstones, and spacer beads.
- Larger Beads: For larger beads (wooden, glass, acrylic), use medium-sized bins with dividers or small jars within a larger bin.
- Color Coding: For both small and large beads, color coding is incredibly helpful.
- Findings (Clasps, Earring Hooks, Jump Rings):
- Small Findings: Tiny compartment organizers are essential. You can even label each compartment with the type of finding.
- Bulk Findings: Store larger quantities of jump rings or clasps in small, clearly labeled jars or bins.
- Wire & Stringing Material:
- Beading Wire: Store spools of beading wire upright in a bin or in a dedicated wire organizer.
- Thread & Cord: Spools of thread and cords can be stored similarly to thread for sewing, using compartment bins or small jars.
- Tools (Pliers, Cutters, Awls):
- Small Pliers: Store these in a dedicated tool bin. You can wrap rubber bands around them to keep them from splaying open.
- Specialty Tools: Keep them all together in a single, accessible bin.
Painting and Drawing Supplies
From brushes to paints, keeping these organized prevents dried-out supplies and accidental spills.
- Paints:
- Tubes & Bottles (Acrylic, Oil, Watercolor): Store paint tubes and bottles upright in bins. You can organize by color or type (heavy body acrylics, gouache, watercolors). Some bins have dividers that can help keep them from tipping.
- Watercolor Palettes: Keep opened palettes in a bin to protect them from dust. Store unused palettes in a separate bin.
- Brushes:
- Clean Brushes: Use dedicated brush holders or bins with narrow openings that keep bristles upright. This prevents them from bending.
- Used Brushes (to be washed): Keep these in a separate, possibly water-resistant bin to contain any residual paint and water.
- Pencils, Charcoal, Pastels:
- Pencils & Charcoal: Store in pencil cases or bins with dividers to prevent breakage.
- Pastels: These are fragile. Store them in their original cases or in specialized pastel boxes within a larger bin to protect them.
- Canvas & Paper:
- Small Canvases: Stack these in larger, open-fronted bins or use them to prop up other supplies.
- Sketchpads & Drawing Paper: Store these in flat bins or upright in paper storage units to prevent bending.
Tips for Maximizing Your Bin Storage
- Label Everything! I can’t stress this enough. Even with clear bins, labels help you and anyone else find what they need. Use a label maker, stickers, or even masking tape and a marker. On opaque bins, labels are non-negotiable.
- Go Vertical, Then Horizontal: Utilize the full height of your shelves and closets with stackable bins. Then, use smaller bins within larger ones for further organization.
- Decant Smaller Items: For tiny items like buttons, beads, or sequins, consider using smaller, clear, sealable containers (like those old spice jars or small screw-top containers) and then placing those into larger bins for easy transport and containment.
- Assign Homes: Every bin, and the supplies within it, should have a designated “home.” This makes putting things away much easier.
- Regular Decluttering: Schedule time every few months to go through your bins. Get rid of anything you no longer use or love.Donate usable items to schools, community centers, or other crafters.
- Consider Mobility: If you move your supplies around a lot, consider bins with lids that snap shut securely, or bins on wheels for larger quantities.
- Aesthetics Matter: While function is key, don’t be afraid to choose bins that look good. A visually appealing craft space can boost your creativity. Mix and match clear bins with decorative fabric bins or even painted opaque bins for a personalized look.
Thinking Beyond the Basic Bin
While the focus is on bins, remember that some supplies might benefit from specialized organizers that can then fit inside your bins. Think about ribbon dispensers, pegboards with small bins, or drawer inserts. These can work in tandem with your bin system.
Conclusion: Your Organized Craft Haven Awaits
Organizing craft supplies with storage bins isn’t just about tidying up; it’s about creating an environment where your creativity can flourish, free from the frustration of searching. By taking the time to assess your supplies, choose the right bins, and implement a thoughtful system, you’ll transform your craft space. No more creative roadblocks due to lost supplies.
Just pure, unadulterated crafting joy. So, grab those bins, get sorting, and enjoy the beautiful order you’ve created!


Similar Posts



















