How to Organize Under Bed Storage Containers
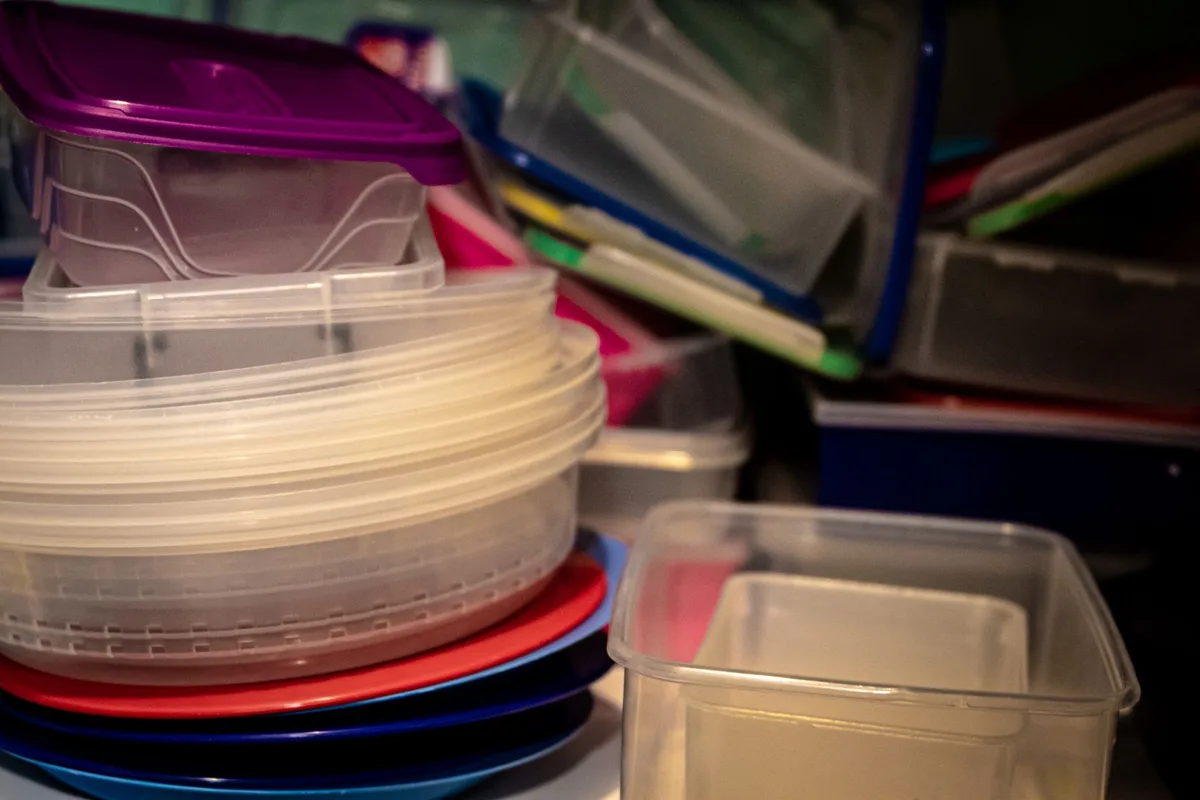
That space under your bed is prime real estate. Most people just shove stuff under there and hope for the best. But with a little strategy, you can turn that dark void into a seriously efficient storage zone.
I’ve organized dozens of homes, and under-bed storage is almost always the most wasted space. Let me show you exactly how to fix that.
Image source: Pexels / Magda Ehlers (Pexels License)
Why Under-Bed Storage Falls Short (and How to Fix It)
The biggest mistake I see is people buying containers that just don’t work. They grab whatever is on sale, toss their stuff in, and slide it under. Six months later, they can’t find anything.
The containers get stuck. Dust builds up. And they never actually rotate what’s stored there.
Here’s the truth. Under-bed storage works brilliantly when you follow a system. It fails when you treat it like a junk drawer.
The good news? You don’t need fancy products. You just need the right approach.
I’ve nailed down a process that works for any bed, any room, and any budget.
Let’s walk through it step by step.
Measuring Your Bed Clearance
Before you buy or repurpose any containers, grab a tape measure. This step is non-negotiable.
Measure the height from the floor to the bottom of your bed frame. Write it down. Now subtract an inch. That’s your maximum container height.

Image source: Pexels / Lucent Designs Media International (Pexels License)
Most standard beds have about 12 to 15 inches of clearance. Platform beds? Often less.
Some beds with risers can give you up to 18 inches. But you need to know your exact number.
Why subtract that inch? Because containers slide much easier when they’re not scraping the bottom of the frame. You’ll also protect your boxes from getting torn up over time.
Next, measure the depth of your bed frame. Not the mattress. The actual frame underneath.
You want to know exactly how deep you can go without hitting the bed legs or center support beam.
Pro tip: Measure both sides separately. Bed frames aren’t always perfectly symmetrical. Trust me, I’ve learned this the hard way.
Once you have those measurements, write them on a sticky note and attach it to your bed frame. You’ll thank me later when you’re shopping for containers.
Choosing the Right Storage Containers
Now that you know your clearance, it’s time to pick your containers. This is where most people go wrong.

Image source: Pexels / Dmitry Zvolskiy (Pexels License)
Low-Profile Bins
These are my go-to for most beds. They sit flush with the floor and maximize every inch of vertical space. Look for bins that are exactly 1 inch shorter than your bed clearance.
What works best:
- Clear plastic bins so you can see contents
- Snap-tight lids that won’t pop off when stacked
- Flat tops that allow you to stack two thin bins if you’ve got the height
Fabric Storage Boxes
These are lighter and often cheaper. They’re great for clothes and linens. But they have downsides.
They absorb dust. They don’t stack well. And you can’t see what’s inside without opening them.
When I recommend them: Seasonal bedding and off-season clothes only. Not for things you need often.
Vacuum-Seal Bags
These are a game changer for bulky items. Comforters, winter coats, pillows. They compress down to almost nothing.
You can fit three winter blankets in the space of one.
But here’s the catch: Vacuum bags don’t slide well. They’re also hard to organize once compressed. I always put them inside a flat bin after sealing.
Rolling Carts
If you have tall clearance (18 inches or more), rolling under-bed carts are fantastic. They pull out like a drawer. No bending.
No wrestling with stuck containers.
My favorite use: Craft supplies, wrapping paper, or tools that you access monthly.
Sorting and Decluttering Before You Load Anything
Do not skip this step. I cannot stress this enough.
Pull everything out from under your bed. Yes, everything. You might find things you forgot about.
I once found a pair of shoes I’d been looking for for two years.
Sort everything into three piles:
- Keep, things you use at least once a year
- Donate, things in good condition you no longer need
- Trash, broken items, empty boxes, random wrappers
Here’s the rule I teach my clients: if you haven’t used it in the last 12 months and it’s not a sentimental item, it goes. Seasonal decorations are an exception. Everything else?
Out.
Under-bed storage is for things you actually need. Not for hoarding random stuff because you don’t know where else to put it.
For more guidance on letting go of items you no longer use, check out the National Association of Productivity and Organizing Professionals. They have excellent resources on decision-making frameworks.
Cleaning and Protecting Your Items
Under your bed is a dust magnet. It collects hair, dust bunnies, and whatever else floats through your room. If you don’t protect your items, they’ll come out covered in grime.
First, clean the space. Vacuum thoroughly. Wipe down the floorboards. If you have hardwood, a quick mop is worth it.
Let everything dry completely before sliding containers back.
Now think about protection.
Line your containers with acid-free tissue paper for delicate items. This prevents yellowing over time. Use cedar blocks or lavender sachets to deter moths and keep things smelling fresh.
Moisture is your enemy. If you live in a humid area, toss in a silica gel pack. You can buy reusable ones online. They absorb excess moisture and prevent mold.
Never store electronics or important documents under a bed without a climate-controlled bin. Just don’t do it.
The Labeling System That Actually Works
Here’s where organization goes to die. People put things in bins, slide them under, and then have no idea what’s where. Don’t be that person.
Label every single container on three sides.
- The lid
- The front
- The end that faces you when you pull it out
Yes, three labels. Here’s why. When the bin is pushed all the way under, you can only see the end.
When you pull it halfway, you see the front. When you lift it out, you see the lid. Label all three.
What to write:
- Category (Winter Clothes, Extra Linens, Holiday Decor)
- Season (if applicable)
- Date last accessed
Use a label maker for clean results. Or use masking tape and a Sharpie. Both work fine.
The key is legibility and consistency.
Color coding helps too. Use blue labels for winter items, green for spring, red for holiday stuff. You’ll recognize the colors even from across the room.
The “One-Touch Access” Rule
This is my secret weapon. I call it the one-touch rule.
Organize your bins so that the items you need most are in the front. Sounds obvious, right? But most people just fill bins randomly.
Think about frequency. Things you grab monthly go in the bin closest to the edge. Things you pull out twice a year go in the middle.
Things you access once a year go in the very back.
Here’s how I set it up for a typical bedroom:
| Bin Position | Contents | Frequency |
|---|---|---|
| Closest to edge | Extra sheets, blankets | Monthly |
| Middle | Off-season shoes, bags | Quarterly |
| Back | Holiday decor, memorabilia | Annually |
This system means you never have to drag out three bins just to find a single pillowcase.
Another trick:Store your bins in the order you’ll pull them out. Put the most-used bin on the side where you typically stand to access the bed. For most people, that’s the right side.
Seasonal Rotation Strategy
Under-bed storage shines brightest for seasonal items. But only if you rotate properly.
Set two swap dates per year.
- Spring (April): Switch winter stuff to under-bed storage. Pull out summer gear.
- Fall (October): Switch summer stuff out. Pull in winter gear.
Put these dates in your phone calendar. Set a reminder. Otherwise it won’t happen.
What to rotate:
- Winter sweaters and coats → summer t-shirts
- Heavy flannel sheets → lightweight cotton sheets
- Boots and scarves → sandals and hats
When you rotate, take a minute to clean each bin. Wipe down the inside. Check for damage.
Replace cedar blocks if they’ve lost their scent.
Pro tip: Store the current season’s items in easy-access bins. The off-season stuff goes in bins that are deeper under the bed or harder to reach. You’ll access them less, so they can be slightly less convenient.
Mistakes People Make (And How to Avoid Them)
I’ve seen it all. Here are the biggest errors and how to fix them.
Mistake 1: Using containers that are too tall.
They fit when you slide them in. But they scrape the frame every time you pull them out. Eventually the lids crack or the boxes tear.
Measure first.
Mistake 2: Overfilling bins.
Overstuffed bins are impossible to slide. They bulge at the sides. They get stuck under the bed frame.
Fill your bins to about 80 percent capacity. Leave wiggle room.
Mistake 3: Stacking bins without checking the height.
Two thin bins stacked might fit. But if you stack them wrong, the top bin hits the bed frame. Measure the combined height before you stack.
Mistake 4: Not using handles.
Containers without handles are a pain. You’ll end up dragging them by the lid. The lid pops off.
Everything spills. Get bins with sturdy handles built in. Or add adhesive handles to existing bins.
Mistake 5: Forgetting what’s stored.
You think you’ll remember. You won’t. Six months later, you’ll be pulling out every bin looking for that one sweater.
Label everything. Trust me.
Mistake 6: Ignoring dust protection.
Even sealed bins collect dust on top. If you have slatted bed frames, dust falls right through. Cover your bins with a lightweight cloth or use bins with tight-sealing lids.
Dealing with Low-Clearance Beds
Not everyone has the luxury of high bed clearance. Platform beds, low-profile frames, and bunk beds often leave just a few inches.
Here’s what works:
Thin under-bed bags. These are flat, low-profile storage bags designed for tight spaces. They’re usually made of heavy-duty plastic. They slide easily and fit in gaps as small as 4 inches.
Vacuum-seal everything. If you only have 4 to 6 inches, compression bags are your best friend. You can fit surprisingly bulky items in a flat bag.
Use the space between slats. If you have a slatted bed frame, you can slide flat items between the slats. Think gift wrap tubes, yoga mats, or rolled posters. Not ideal for daily access, but great for long-term storage.
Skip the bins entirely. For extremely low beds, lay items flat on the floor. Cover them with a dust sheet. Then slide the whole thing under.
It’s not pretty, but it works.
Maintaining Your System Over Time
Organizing is not a one-and-done task. You need to maintain it.
Every six months:
- Pull all bins out
- Vacuum the floor
- Check for moisture or pests
- Refresh labels if they’re worn
- Reorganize based on what you’ve actually used
Every year:
- Go through every bin
- Donate or toss anything you no longer need
- Rotate seasonal items
- Replace any damaged containers
Set a recurring reminder on your phone. I use the first weekend of April and October. It takes me about 30 minutes total. That’s it.
Frequently Asked Questions
Can I store shoes under my bed?
Absolutely. Use a low-profile shoe organizer or a wide bin with dividers. Keep shoes clean first.
Store pairs together. Label the bin “Shoes, Summer” or “Shoes, Dress.”
What’s the best container for under-bed storage?
Clear, low-profile bins with snap-tight lids and sturdy handles. They’re durable, stackable, and you can see inside without opening them.
How many bins fit under a standard bed?
Most queen and king beds fit four to six standard under-bed bins. Two bins fit on each side. Some beds accommodate three per side if the center support doesn’t get in the way.
Should I store things under a bed if I have allergies?
Yes, but with caution. Use sealed plastic bins, not fabric. Vacuum the space regularly.
Add dust covers. Consider HEPA-filter vacuuming before sliding bins back in.
Can I store books under the bed?
Technically yes. But books are heavy. They make bins hard to slide.
And paper attracts moisture. If you must store books, use a waterproof bin and add silica gel packs. Only store books you won’t need often.
Final System Summary
Here’s the complete process in eight steps:
- Measure your bed clearance and depth
- Choose containers that fit with 1 inch of clearance
- Declutter everything before storing
- Clean the space and protect items
- Label every bin on three sides
- Organize by frequency of use
- Rotate seasonally twice a year
- Maintain the system with regular checks
That’s it. No complicated systems. No expensive products.
Just a solid process that works every time.
Your under-bed storage can be a model of efficiency. It just needs a little planning and consistency. Start with measuring.
Then take it one bin at a time. You’ve got this.


Similar Posts




















[…] stick vacuum with a low‑profile head slides under most frames. If you own a canister, attach a flat‑crevice tool. Upright models work only when the bed sits […]