How to Make DIY Storage Bins From Cardboard
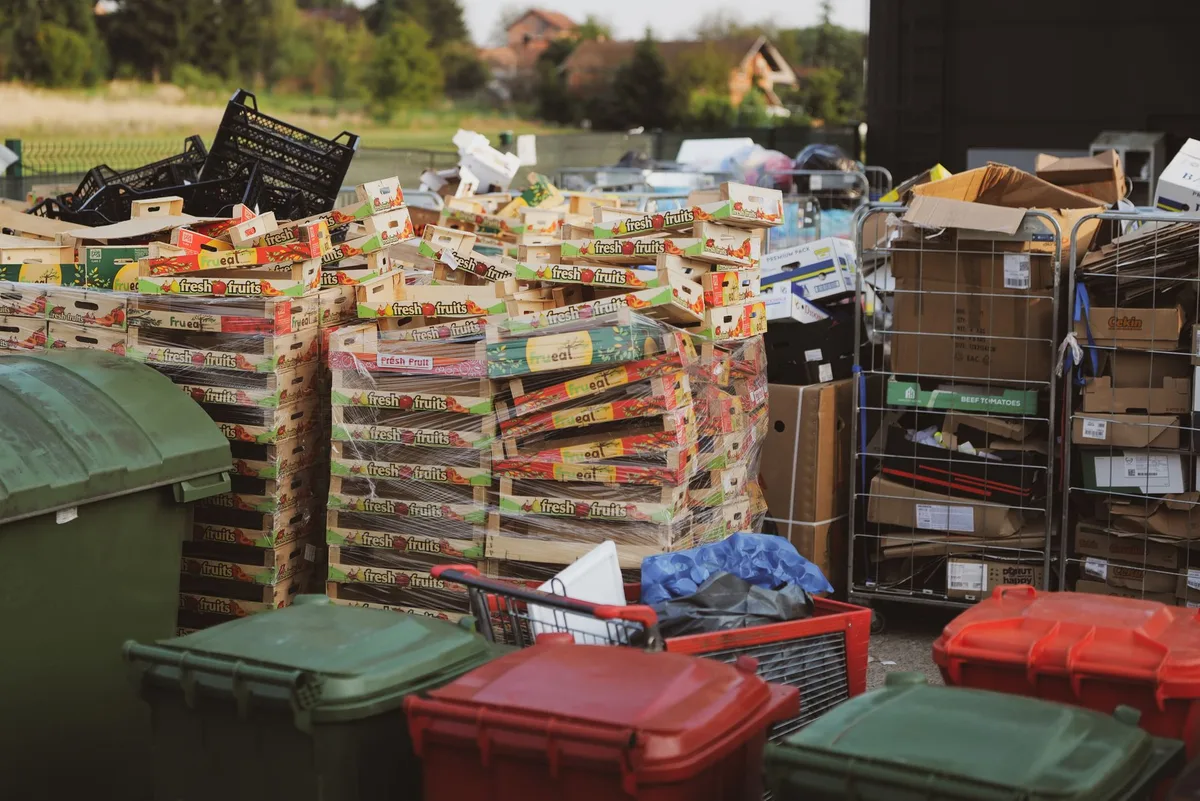
Tired of clutter taking over your home? Worried about the cost of buying fancy storage solutions? You’re in luck.
We’ve all been there, staring at piles of stuff that just won’t seem to stay put. But what if I told you some of the most effective, surprisingly sturdy storage solutions are hiding in plain sight, in your recycling bin? That’s right, we’re talking about cardboard.
Making your own DIY storage bins from cardboard isn’t just a budget-friendly hack; it’s an eco-conscious choice that helps you declutter smarter. It’s a creative outlet, a way to customize exactly what you need, and honestly, it’s pretty satisfying to build something functional with your own two hands. Forget expensive plastic containers or fabric bins that sag under pressure.
Cardboard, when treated right, can be incredibly robust.
You don’t need a workshop or advanced crafting skills to pull this off. All it takes is some readily available cardboard, a few basic tools, and a little bit of know-how. We’ll cover everything from choosing the right cardboard to reinforcing your bins for maximum durability.
So, let’s dive in and transform that everyday shipping box into a custom storage marvel.
Why Choose Cardboard for DIY Storage Bins?
Many people might dismiss cardboard outright when thinking about storage. It seems flimsy, right? But that’s precisely where the magic of DIY comes in.
We can reinforce it, shape it, and transform its inherent properties into something far more useful than you might expect. There are several compelling reasons to champion cardboard for your storage projects.
First off, it’s practically free. Think about all the boxes that arrive at your doorstep every week. Instead of sending them straight to the recycling bin, you can give them a second life.
This significantly cuts down on the cost associated with traditional storage solutions. When you’re trying to organize multiple areas of your home, like a garage, a kids’ playroom, or a pantry, the savings really add up.
Beyond affordability, cardboard is incredibly versatile. You can cut it, fold it, glue it, and even join pieces together to create containers of almost any size or shape. Need a specific dimension to fit a narrow shelf?
No problem. Want a shallow tray for art supplies? Easily done.
This customizability is a huge advantage. You’re not limited by pre-made sizes; you create exactly what fits your space and your items perfectly.
Sustainability is another major win. We’re all trying to be a bit more mindful of our environmental impact. By upcycling cardboard, you divert waste from landfills.
It’s a tangible way to practice recycling and reuse, turning potential trash into treasure. It’s a small step that contributes to a larger, positive environmental shift.
Finally, let’s talk about ease of use. Most of us have basic scissors or a craft knife lying around. Cardboard is easy to cut and manipulate.
You don’t need specialized tools or a dedicated workspace. You can knock out a few simple bins in an afternoon, right there in your living room if you wanted to. It’s an accessible project for almost anyone.
Choosing the Right Cardboard: Not All Boxes Are Created Equal
When you’re embarking on a cardboard storage bin project, the type of cardboard you select makes a big difference. Not all cardboard is built the same. For truly functional and durable bins, you’ll want to look for specific characteristics.
The most common type you’ll encounter is corrugated cardboard. This is the stuff that makes up most shipping boxes. It’s characterized by its layered structure: an inner and outer liner board sandwiching a wavy layer called the fluting.
The fluting is what provides the strength and cushioning.
For storage bins, thicker, double-walled corrugated cardboard is your best friend. You can usually identify this by looking at the edge of a box: if you see two distinct layers of fluting, you’ve got a winner. Single-walled cardboard can work for lighter-duty bins, but double-walled material offers significantly more rigidity and load-bearing capacity.
Think about toy bins for heavy toys or storage for tools in a garage. You definitely want the robust stuff.
Where can you find good quality cardboard? Keep an eye on delivery boxes from online purchases. Larger, sturdier boxes from electronics or appliances are often made from excellent corrugated material.
If you need a lot of it, don’t hesitate to ask local businesses, especially small retailers or shops that receive regular shipments. Many are happy to let you take their used boxes before they’re broken down and recycled. Just make sure the cardboard is clean and dry.
Avoid boxes that are damp, stained, or have any signs of mold or insect damage. These will compromise the integrity and safety of your bins.
Essential Tools and Materials for Your Cardboard Project
Gathering your supplies is part of the fun. The good news is you probably already have most of what you need. The core of your project, of course, is cardboard.
Aim for boxes that are relatively clean and free from excessive tape or labels, though these can often be removed.
Here’s what you’ll want to have on hand:
- Cardboard Boxes: As discussed, look for sturdy, double-walled corrugated cardboard when possible. A variety of sizes can be helpful depending on what you want to store.
- Cutting Tool: A sharp utility knife or craft knife is essential for clean, precise cuts. A good pair of sturdy scissors can also work for thinner cardboard, but a knife will give you more control. Always use a cutting mat or a thick piece of scrap cardboard underneath to protect your work surface.
- Measuring Tool: A ruler or a measuring tape is crucial for accurate measurements. This ensures your pieces fit together properly and your bins are the right size.
- Marking Tool: A pencil or a marker will help you draw your cut lines and folding guides directly onto the cardboard.
- Adhesive: Strong glue is key. White craft glue (like Elmer’s) works well for many applications. For extra strong bonds, consider wood glue or a hot glue gun. Hot glue is fast and effective for quick assembly, but be mindful that it creates a thick bond that might be visible. If structural integrity is paramount, a strong PVA glue or even strong packing tape can be used in conjunction with glue.
- Optional Reinforcement Materials:
- Packing Tape/Duct Tape: Excellent for reinforcing edges, seams, and corners. Black or clear packing tape is common, but duct tape offers superior strength and comes in many colors if you want a decorative element.
- Contact Paper or Decorative Paper: For a polished, finished look, you can cover your bins. Contact paper is durable and wipes clean easily. Wrapping paper or wallpaper scraps can also add a nice touch.
- Cardboard Scraps: Keep extra pieces of cardboard handy. They’re perfect for reinforcing the bottom of bins or creating dividers.
Simple Cardboard Storage Bin: The Basic Box Method
Let’s start with a foundational technique: creating a simple, open-top storage bin from a single cardboard box. This method is straightforward and perfect for beginners. It’s ideal for items you need to access easily, like craft supplies, socks, or mail.
Prepare Your Box: Choose a sturdy cardboard box of a suitable size. Remove any excess tape, labels, or staples. If your box has flaps, you can either cut them off completely or fold them inside and glue them down to create a cleaner edge.
Determine Your Height: Decide how tall you want your bin to be. Measure this height down from the top edge of the box. Use your ruler and pencil to draw a horizontal line all the way around the box at your desired height. This line will be your cut line.
Make the Cut: Carefully use your craft knife or utility knife to cut along the line you just drew. Go slowly and make sure to cut through all layers of the cardboard. If you’re using a box cutter, it’s best to do this by standing the box upright and making controlled downward slices. If the cardboard is thick, you may need to make multiple passes with your knife to cut all the way through. Be sure to use a protective surface underneath your cutting area.
Reinforce the Top Edge (Optional but Recommended): To make the top edge of your bin more durable and prevent fraying, apply a layer of packing tape or duct tape all the way around the cut edge. Fold the tape over the edge so it covers both the inside and outside. This will also give your bin a tidier appearance.
Strengthen the Base (Optional): If you want your bin to hold heavier items, consider adding a reinforcing layer to the bottom. Cut a piece of cardboard that is the exact same size as the bottom of your bin. Glue this piece securely to the inside of the base. For even more strength, you can glue a second layer on top of the first.
And that’s it! You’ve got a basic, open-top cardboard storage bin. This method is incredibly quick and easy, allowing you to create a whole set of bins in no time at all.
Building a Cardboard Drawer or Tray
Sometimes, an open-top bin isn’t quite what you need. You might want something that slides in and out of a shelf like a drawer, or a shallow tray to keep smaller items contained. For these, we’ll use a slightly different approach, often involving cutting and assembling pieces.
Creating a Basic Drawer:
Measure and Cut Panels: You’ll need four sides and a bottom.
- Sides: Cut two long rectangular pieces for the front and back, and two shorter rectangular pieces for the left and right sides. The height of these pieces will be your desired bin height. The length of the front and back pieces should be the desired width of your drawer, and the length of the side pieces should be the desired depth of your drawer.
- Bottom: Cut one rectangular piece for the bottom. Its dimensions should match the inside dimensions of your assembled sides (so, the width of the front/back pieces minus twice the thickness of your cardboard, and the depth of the side pieces minus twice the thickness of your cardboard).
Score and Fold (for integrated sides): If you want a drawer where the sides fold up from the base, measure your desired length and width on a flat piece of cardboard. Mark these dimensions. Then, draw lines extending upwards from each edge by your desired bin height. Score, but don’t cut through, these upward lines. This allows you to fold the cardboard up to form the sides. You’ll then need to cut small tabs at the corners to glue or tape together.
Assemble the Sides: If you cut individual panels, begin by joining the side panels to the front and back panels. Use strong glue and/or tape to create a sturdy frame. Apply glue to the edges and press them together firmly. Reinforce the edges with packing tape or duct tape for extra durability.
Attach the Bottom: Once the side frame is secure, apply glue to the bottom edges of the frame. Carefully place the bottom panel onto the glued edges and press firmly. You can add tape around the outer seam where the bottom meets the sides for added strength.
Creating a Shallow Tray:
- Cut a Base: Cut a flat rectangular or square piece of cardboard to your desired tray dimensions.
- Cut Side Strips: Cut strips of cardboard to the desired height of your tray’s lip. The length of these strips should correspond to the perimeter of your base.
- Attach the Sides: Apply glue along one edge of a side strip. Attach it to the edge of the base panel, pressing firmly. Repeat this for all four sides. You can create mitered corners (cut at 45-degree angles where the strips meet) for a neater appearance, or simply overlap the strips.
- Reinforce: Once the glue is dry, reinforce the inside and outside seams with tape for extra strength.
These methods allow for a lot of flexibility. You can create shallow trays for organizing desk drawers, or build deeper drawer-style bins to slide into cubbies or shelves.
Advanced Techniques: Reinforcing and Decorating
Now that you’ve mastered the basics, let’s talk about taking your cardboard storage bins to the next level. Durability and aesthetics are key here.
Reinforcing for Longevity:
The biggest enemy of cardboard is moisture and weight. When building bins for heavier items or for use in potentially damp environments (like a garage or basement), reinforcement is crucial.
- Double-Layered Bottoms: As mentioned, this is a simple yet effective way to add strength. Cut two identical pieces for the bottom and glue them together. For extreme durability, use a piece of thin plywood or plastic sheeting as the very bottom layer, sandwiching it between two layers of cardboard.
- Corner Reinforcements: Cardboard bins often fail at the corners first. You can use extra strips of cardboard, cut into L-shapes, to reinforce each inside corner. Glue these thoroughly. Another excellent option is using heavy-duty duct tape wrapped around the outside corners.
- Lining with Fabric or Plastic: For bins that will hold items that might snag or for added moisture resistance, line the inside with a piece of sturdy fabric (like canvas or felt) or a durable plastic sheeting. Glue it in place, making sure to keep it as smooth as possible.
- Sealing Edges: A thorough application of packing tape or duct tape along all cut edges, especially the top rim, significantly enhances durability and prevents fraying.
Decorating for Style:
Practical doesn’t have to mean plain. You can transform your functional bins into stylish storage that complements your home decor.
- Contact Paper: This is a fantastic, user-friendly option. Contact paper comes in countless patterns and colors, wood grains, marble effects, solid colors, or fun prints. Simply peel back the backing and carefully apply it to the outside of your bin, smoothing out any air bubbles as you go. It’s also wipeable, making it great for high-traffic areas.
- Decorative Paper or Fabric: Wrapping paper, gift wrap, wallpaper samples, or even fabric scraps can be glued to the outside of your bins. Use a good quality craft glue or Mod Podge for a durable finish. Ensure the paper is applied smoothly and consider a clear sealant or varnish over the top for extra protection, especially if you’re using paper.
- Painting: You can paint your cardboard bins. Use a primer specifically designed for non-porous surfaces, or choose a sturdy acrylic craft paint. Apply multiple thin coats for even coverage. For a really durable finish, you can spray a clear sealant over the dried paint.
- Stenciling and Stamps: Add custom designs using stencils or rubber stamps. This can add a unique, personalized touch without covering the entire bin.
- Handles: For easy carrying, you can add handles. Cut holes in the sides of your bin and thread through sturdy rope or fabric strips, securing them on the inside with knots or by gluing them firmly. Alternatively, you can attach pre-made drawer pulls or rope handles to the outside of the bin using strong bolts or glue.
By combining these reinforcement and decoration techniques, you can create cardboard storage bins that are not only functional and budget-friendly but also beautiful and built to last.
Storing Different Types of Items: What Works Best?
The beauty of DIY cardboard storage bins lies in their adaptability. You can tailor their size, shape, and strength to suit the specific items you need to store.
For Lighter Items:
- Open-Top Bins: Perfect for quick access to items like toiletries in a bathroom cabinet, accessories in a closet (scarves, belts), or even as mail sorters on a desk.
- Shallow Trays: Ideal for organizing small items in drawers: pens, paperclips, craft supplies (beads, buttons), or hardware like screws and nails in the garage.
- Magazine Holders: By cutting a diagonal front panel, you can create effective magazine holders for keeping periodicals tidy on shelves.
For Moderate Weight Items:
- Standard Height Bins (Single or Double Wall): Good for books, board games, kids’ toys (non-chunky plastic ones), and linens in cupboards. Ensure the bottom is well-reinforced if stacking.
- Drawer-Style Bins: Excellent for shelving units or cubbies. They keep items neatly contained and prevent them from falling out. Use them for DVDs, small electronics, or folded clothing.
For Heavier Items:
- Double-Walled Construction is Key: For anything heavy like large hardcover books, tools, or substantial collections of items, always opt for double-walled cardboard.
- Reinforced Bottoms and Corners: Absolutely essential. Consider adding an extra layer of cardboard, plywood, or even a plastic sheet to the base. Reinforce all corners with extra cardboard strips or heavy-duty tape.
- Deep Bins: If you have a lot of heavy items, consider making deeper, more robust bins. These can be used for things like storing winter boots in the garage, organizing garden tools, or keeping automotive fluids tidy.
- Lids (Optional but Recommended): For heavy items, especially in a garage or workshop, adding a lid (made from reinforced cardboard) can help protect the contents from dust and debris. You can create a simple lid that rests on top or a slightly larger one that fits over the rim.
Important Considerations for Longevity:
- Avoid Moisture: Cardboard and water are not friends. Never store bins in areas prone to dampness or leaks unless you’ve thoroughly waterproofed them with plastic sheeting or a strong sealant.
- Beware of Pests: In garages or basements, some pests are attracted to cardboard. If this is a concern, ensure bins are sealed well and consider storing them off the floor if possible.
- Don’t Overload: Even reinforced cardboard has its limits. Be realistic about how much weight your bin can handle before it starts to sag or break.
By mindfully selecting your cardboard and applying the right reinforcement techniques, you can create DIY storage bins that are surprisingly strong and suitable for a wide variety of household needs.
Troubleshooting Common Cardboard Bin Issues
Even with the best intentions, you might run into a few hiccups when creating your cardboard storage bins. Don’t worry, these are usually easy to fix.
Issue 1: Corners aren’t staying glued.
- Why it happens: Insufficient glue, not enough drying time, or the material is too smooth for the glue to adhere properly.
- The fix: Apply a generous amount of strong glue (wood glue or hot glue can be better here than basic craft glue). Hold the corners together firmly while the glue sets (use clamps or heavy objects if needed). For added security, reinforce the inside and outside of the corners with strong packing tape or duct tape once the glue is dry.
Issue 2: The cardboard is bending or sagging under weight.
- Why it happens: The cardboard isn’t strong enough for the contents, or the base/sides aren’t adequately reinforced.
- The fix: For bins already made, try adding a reinforcing layer to the bottom. Cut a piece of sturdy cardboard to fit the inside base and glue it in securely. If the sides are sagging, you can create cardboard “ribs”, strips of cardboard glued vertically along the inside walls, for extra support. For future bins, always use double-walled cardboard for heavier items and reinforce corners and the base liberally.
Issue 3: Cuts are ragged and uneven.
- Why it happens: A dull blade, cutting too fast, or not using a guide.
- The fix: Most of these issues can be masked with decorative elements. If the problem is the top edge, ensure you apply a strong tape (duct tape or packing tape) all the way around to create a clean, uniform line. For future cuts, invest in a new, sharp utility knife blade and cut slowly and deliberately, using a ruler as a guide.
Issue 4: The glue isn’t drying, or tape is peeling.
- Why it happens: Using the wrong type of glue for the surface, or humidity affecting drying times. Tape might not be sticking well to a dusty or greasy surface.
- The fix: Make sure you’re using a good quality glue. For cardboard, PVA or wood glues are often best for a lasting bond. Ensure the cardboard is clean and dry before applying glue or tape. If humidity is an issue, try to assemble the bins in a drier environment and allow extra drying time. If tape is peeling, carefully remove it, clean the area with a damp cloth (let it dry completely), and reapply.
Issue 5: The bin is a bit wobbly.
- Why it happens: Not enough support at the base or sides, or the assembly isn’t tight.
- The fix: As with sagging, reinforcing the base and corners will help. Ensure all your seams are glued and taped securely. If it’s a box and lid design, a snug fit between the two will provide more stability.
By understanding these common issues and their solutions, you can create more durable and functional cardboard storage bins with confidence.
Conclusion: Your Sustainable Storage Solution Awaits
There you have it. From simple cuts to reinforced structures and stylish finishes, you now have the knowledge to transform ordinary cardboard boxes into incredibly useful and personalized storage solutions. We’ve explored why cardboard is a fantastic medium for DIY storage, its affordability, versatility, and eco-friendliness leading the charge.
You’ve learned how to choose the best cardboard, gathered your essential tools, and walked through straightforward methods for creating open-top bins, drawers, and trays.
We didn’t stop there. We delved into advanced techniques for reinforcing your creations, ensuring they can handle the weight and wear of everyday life. And for those who want their storage to look as good as it functions, we covered a range of decorative options from contact paper to paint.
You’re now equipped to store everything from light odds and ends to heavier, more substantial items, with advice on what works best for different needs. Plus, we’ve armed you with solutions to troubleshoot any common issues that might pop up.
The environmental impact of choosing DIY cardboard storage is significant. By repurposing these materials, you’re actively reducing waste and embracing a more sustainable lifestyle. It’s a satisfying way to declutter your home while doing a little bit of good for the planet.
So, next time you receive a delivery, don’t just toss the box. See it for the potential it holds. Grab your tools, get creative, and start building.
You’ll be amazed at how much organization and style you can achieve, all thanks to a humble cardboard box. Happy building!


Similar Posts



















