How to Install a Toilet Flush Handle: Everything You Need
A running toilet or a stubborn flush can be a real nuisance. Often, the culprit is a simple, inexpensive part: the toilet flush handle. Replacing a broken or worn-out flush handle is a surprisingly straightforward DIY task.
You don’t need to be a plumbing expert to get this done. In fact, with just a few basic tools and this guide, you’ll have your toilet flushing like new in no time.
We’ll walk you through the process, from identifying the right replacement handle to securing it in place. We’ll cover common issues and offer tips to make the job even easier. Let’s get your toilet back in working order!
Understanding Your Toilet’s Flush Mechanism
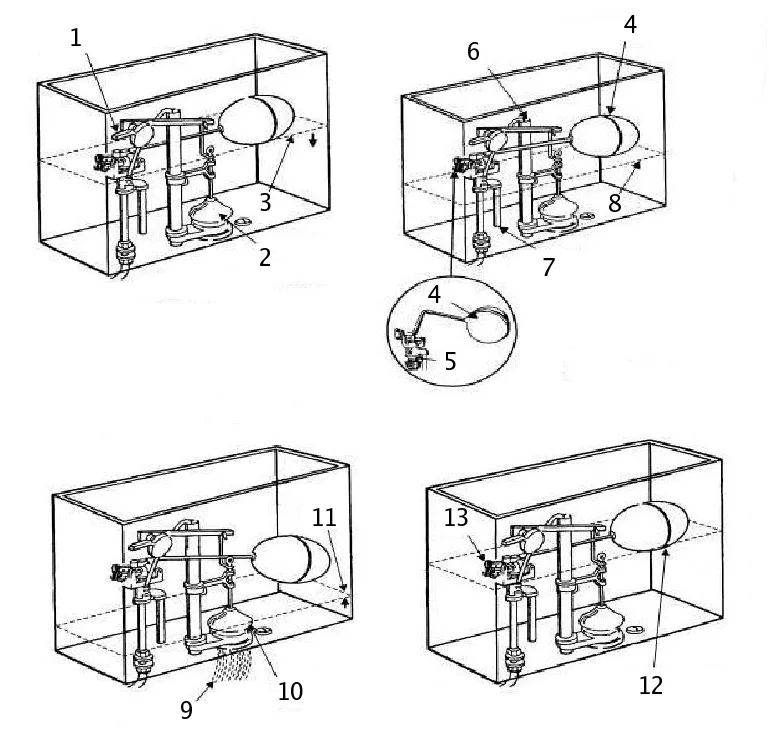
Before we dive into the installation, it’s helpful to understand how the flush handle works with the rest of your toilet’s internal components. Most modern toilets use a lever system to activate the flush.
The flush handle, typically located on the side of the tank, is connected to a chain or a rod. This chain or rod is attached to the flapper valve at the bottom of the tank. When you press the handle, it lifts the flapper valve, allowing water to rush from the tank into the toilet bowl, creating a flush.
Once the tank empties, the flapper valve reseals, and the tank begins to refill.
Knowing this basic mechanism helps you appreciate why a damaged handle or its connection to the flapper can cause flushing problems. A loose handle might not lift the flapper effectively, while a broken handle could do nothing at all.
Tools You’ll Need for the Job
Gathering your tools before you start will make the installation process smooth and efficient. You probably have most of what you need already in your toolbox.
Here’s what you’ll typically need:
- Adjustable Wrench or Pliers: For loosening and tightening the retaining nut that holds the handle in place.
- Screwdriver (Phillips or Flathead): Some handle designs might have a screw holding the arm in place inside the tank.
- Towel or Rag: To catch any drips and to clean up around the tank.
- Replacement Flush Handle Kit: Make sure you have the correct handle for your toilet model.
That’s usually it! No special plumbing tools are required. It’s a simple repair anyone can tackle.
Choosing the Right Replacement Flush Handle
This is a crucial first step. Not all flush handles are created equal, and buying the wrong one can lead to frustration.
Generally, toilet flush handles are designed to fit a standard tank configuration. However, there are a few things to consider:
- Handle Style: Handles come in various shapes, finishes (chrome, brushed nickel, brass, white), and lengths. Choose one that matches your toilet’s aesthetic or your personal preference.
- Arm Type: The arm that extends from the handle into the tank can be metal or plastic. It’s often adjustable or can be trimmed to the correct length.
- Mounting Type: Most handles attach with a nut on the inside of the tank. Ensure the new handle’s threading is compatible with your existing setup.
Tip: If you’re unsure, it’s often best to remove your old handle first and take it with you to the hardware store. This way, you can compare it directly with the new ones. Alternatively, take a picture of your toilet tank and its internal components to show a sales associate.
Step-by-Step Installation Guide
Now, let’s get down to business. Follow these steps carefully for a successful installation.
Step 1: Turn Off the Water Supply
This is paramount. You don’t want water flooding your bathroom floor.
- Locate the water shut-off valve. It’s usually on the wall behind the toilet, near the base.
- Turn the valve clockwise until it stops. This cuts off the water supply to the toilet tank.
Step 2: Drain the Toilet Tank
Completely emptying the tank makes working inside much easier.
- With the water supply off, flush the toilet. Hold the handle down until the tank is as empty as possible.
- You may need to use a sponge or a towel to soak up any remaining water at the bottom of the tank.
Step 3: Remove the Old Flush Handle
Now it’s time to take out the old unit.
- Look at the inside of the toilet tank. You’ll see a large nut (often plastic, sometimes metal) securing the flush handle to the tank.
- Use your adjustable wrench or pliers to loosen this nut by turning it counter-clockwise. You might need to hold the handle arm steady from the outside with your other hand.
- Once the nut is loose enough, you should be able to pull the old flush handle and its attached arm straight out from the outside of the tank.
Image source: Wikimedia Commons / Jim Thomas (CC BY-SA)
Step 4: Prepare the New Flush Handle
Your new handle might come in a couple of pieces or require minor adjustments.
- If your new handle arm is longer than necessary, you might need to trim it. Most replacement arms are designed to be cut with pliers or wire cutters. Measure the length of your old arm and trim the new one to match. This ensures proper connection to the flapper.
- Attach the handle to the arm if they are separate pieces. There’s usually a screw or a clip that secures them.
Step 5: Install the New Flush Handle
Time to put the new one in.
- From the outside of the tank, insert the new flush handle and its arm through the hole in the tank. The arm should extend into the tank.
- From the inside of the tank, screw the retaining nut onto the threaded shank of the handle. Tighten it by hand first.
- Use your wrench or pliers to snug the nut down. Be careful not to overtighten, as this can crack the porcelain tank. Just make it firm.
Step 6: Connect the Arm to the Flapper Chain or Rod
This is where the handle directly interacts with the flushing mechanism.
- The arm of the new handle should be positioned so it can lift the flapper.
- Find the hole or loop on the end of the flush handle’s arm.
- Connect this to the flapper’s chain or rod. If it’s a chain, you might need to use a clip or link to secure it. Ensure there’s just a little slack. Too much slack means the handle won’t lift the flapper effectively. Too little slack means the flapper might not seal properly, leading to leaks. A good starting point is to have about half an inch of slack when the flapper is fully closed.
Pro Tip: If your toilet has a flush rod instead of a chain, the connection is usually a simple hook or clip. Make sure the rod is straight and can move freely.
Step 7: Turn the Water Supply Back On
Let’s test your work.
- Slowly turn the water shut-off valve counter-clockwise. You’ll hear the tank begin to refill.
- Let the tank fill completely.
Step 8: Test the Flush
The moment of truth!
- Press the new flush handle and see if the toilet flushes properly.
- Check for any leaks around the handle nut or the tank.
- Ensure the flapper closes correctly after the flush and the toilet stops running. You can often tell if the flapper isn’t sealing by listening for a faint hissing sound.
If everything works perfectly, congratulations! You’ve successfully installed your new toilet flush handle. If not, don’t worry.
We’ll cover some common troubleshooting issues next.
Troubleshooting Common Flush Handle Issues
Sometimes, things don’t go perfectly on the first try. Here are a few common problems and how to fix them.
Toilet Still Runs After Flushing
This is usually a flapper issue, but can be related to the handle connection.
- Check Flapper Seal: Ensure the flapper is sitting squarely on the drain seat. If it’s uneven, it won’t seal.
- Too Much Slack: If the handle arm is too far from the flapper, there’s too much slack in the chain/rod. Tighten the connection slightly.
- Too Little Slack: If the handle feels stiff or the flapper doesn’t fully close, there’s not enough slack. Lengthen the chain or adjust the rod connection.
- Worn Flapper: The flapper itself might be old and degraded. This might require replacing the flapper.
Handle is Loose or Wobbly
This usually means the retaining nut inside the tank isn’t tight enough.
- Tighten the Nut: Go back inside the tank and snug up the retaining nut behind the handle. Remember not to overtighten.
- Check for Damage: Inspect the threaded shank of the handle and the nut for any cracks or damage.
Handle Doesn’t Completely Lift the Flapper
The connection between the handle arm and flapper is the primary suspect here.
- Adjust Chain/Rod Length: Ensure there’s enough length to lift the flapper fully when the handle is pressed. This is the most common fix.
- Trimmed Arm Too Short: If you had to trim the new handle arm, it might be too short. You might need to get a new handle or a longer arm if it’s adjustable.
- Obstruction: Check if anything inside the tank is blocking the handle arm’s movement.
New Handle Will Not Fit
Occasionally, you might encounter a non-standard tank.
- Specialty Toilets: Some older or designer toilets may have unique flushing mechanisms or handle designs. In these cases, you might need to find a specific replacement part from the toilet manufacturer.
- Incorrect Purchase: Double-check that you bought a handle designed for a standard toilet tank.
If you’ve tried these troubleshooting steps and are still having trouble, it might be time to consult a professional plumber. However, for most common issues, these solutions should get your toilet flushing correctly.
Maintaining Your Toilet’s Flush System
Once your new handle is installed and working, a little regular maintenance can keep it that way for a long time.
- Periodic Checks: Every few months, check the flapper for wear and tear. Look for cracks or stiffness. Also, ensure the chain or rod has the appropriate amount of slack and is not corroded.
- Clean the Tank: Debris can accumulate in the tank and interfere with the flushing mechanism. Periodically, you can remove the tank lid and gently clean the inside with a soft cloth and mild soap, being careful not to disturb the components.
- Avoid Harsh Cleaners: Never use in-tank toilet bowl cleaning tablets that contain bleach or other harsh chemicals. These can degrade the rubber components like the flapper and seals over time, leading to leaks and premature failure. For cleaning the bowl, use your regular toilet bowl cleaner applied directly to the bowl, not the tank.
- Address Leaks Promptly: If you notice a constant running sound or a slow leak, don’t ignore it. Small issues can often be fixed easily, but they can also lead to water waste and more significant problems if left unaddressed. Similar to how you’d address routine vacuum filter replacement to maintain performance, maintaining your toilet’s parts ensures efficiency.
Frequently Asked Questions About Toilet Flush Handles
Here are some common questions people have about installing and maintaining toilet flush handles.
Q: How do I know if I need a new flush handle?
A: You likely need a new flush handle if it’s loose, cracked, corroded, or doesn’t operate smoothly. If you press the handle and nothing happens, or it feels like it’s just spinning freely inside the tank, it’s a clear sign.
Q: Can I use any flush handle?
A: For most standard toilets, yes. However, it’s always best to ensure the threading and arm length are compatible. If you have a specific brand or model of toilet, checking for a compatible replacement is a good idea.
Q: How tight should the retaining nut be?
A: You want it snug but not excessively tight. Overtightening can crack the porcelain tank, which is a much more expensive problem to fix. Hand-tighten it first, then give it about a quarter to a half turn with a wrench or pliers.
Q: What if the new handle arm is too long?
A: Most replacement handles have an arm that can be trimmed. Measure the length of your old arm or the distance needed to engage the flapper, and carefully trim the new arm with pliers or cutters.
Q: My toilet is still leaking after replacing the handle. What’s wrong?
A: If you’ve replaced the handle and the toilet still runs, the problem is likely not the handle itself. It’s probably a worn-out flapper or a faulty flush valve seat. These are separate components you can also replace.
Conclusion
Replacing a toilet flush handle is a simple, accessible repair that can save you money and a good deal of frustration. By following these steps, gathering the right tools, and choosing the correct replacement part, you can confidently tackle this common household plumbing task. Remember to always turn off the water supply first and test your work thoroughly.
With a little effort, you’ll have your toilet flushing perfectly again in no time. It’s a small fix that makes a big difference in the comfort and efficiency of your home.


Similar Posts




















[…] let that phantom drip keep you up at night. This guide will walk you through diagnosing and fixing common toilet tank leaks. We’ll break down the process into simple steps, so you can tackle it with confidence, even […]