How to Install Outdoor Wall Sconces on Vinyl Siding
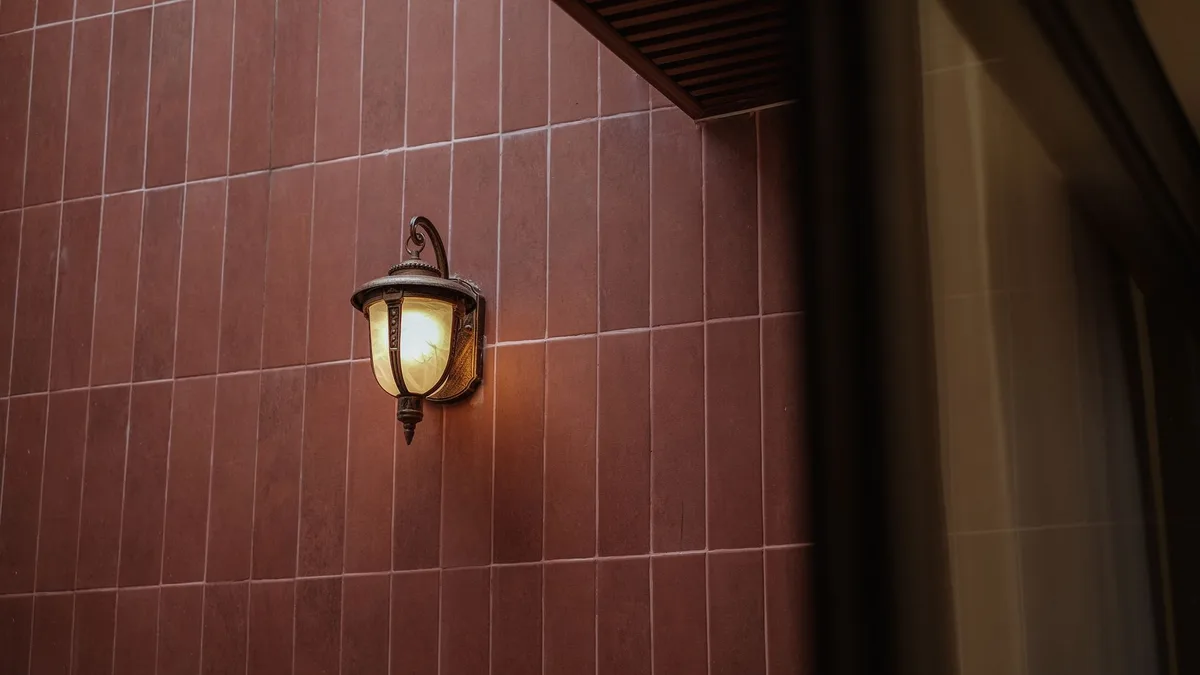
Adding outdoor wall sconces to your home’s exterior is a fantastic way to boost curb appeal, enhance security, and provide crucial illumination for pathways and entryways. But when your home is clad in vinyl siding, the prospect of drilling and mounting can feel a bit daunting. Don’t worry, it’s entirely achievable with the right approach.
We’re going to walk through exactly how to install outdoor wall sconces on vinyl siding, ensuring a secure, attractive, and long-lasting finish. This isn’t a job for guesswork; it requires precision, the right tools, and an understanding of how vinyl siding behaves.
Image source: Pexels / Pew Nguyen (Pexels License)
Vinyl siding is popular for a reason: it’s durable, low-maintenance, and comes in a huge array of colors and styles. However, it’s also a flexible material that can expand and contract with temperature changes. This inherent flexibility is the primary consideration when you’re planning to mount anything robust like a light fixture.
You can’t just screw directly through the vinyl into your wall sheathing without risking cracking, warping, or creating water intrusion points. We’ll cover the best methods to circumvent these issues, ensuring your new sconces stay put and your siding remains intact.
Understanding Vinyl Siding and Mounting Challenges
Before we grab our tools, let’s quickly touch upon what makes vinyl siding different when it comes to mounting. Unlike traditional wood or stucco, vinyl is a solid PVC plastic. It’s designed to shed water and is installed in overlapping panels that allow for expansion and contraction.
Each panel locks into the one below it, creating a weather-resistant barrier.
The key challenge with vinyl is its movement. If you rigidly attach a heavy object like a sconce directly to the siding, any expansion or contraction of the vinyl will put stress on the mounting points. This can lead to:
- Cracked Siding: The stress can easily cause the vinyl to crack around the screw holes.
- Warping: Constant pressure can deform the siding panel.
- Water Leaks: Improperly sealed mounting points can allow water to seep behind the siding, leading to rot and structural damage to your home’s underlying wall.
- Wobbly Fixtures: If the siding flexes, the sconce will become loose.
That’s why simply screwing a sconce directly into a vinyl panel isn’t the right way to go. We need a system that provides a solid, stable anchor point behind the vinyl.
Essential Tools and Materials for Installation
Gathering your supplies beforehand is crucial for a smooth installation. Many of these are standard DIY tools, but a few are specific to working with electrical fixtures and siding.
Tools You’ll Need:
- Safety Glasses: Absolutely non-negotiable. Protect your eyes from sawdust, debris, and flying fragments.
- Work Gloves: To protect your hands.
- Drill/Driver: With variable speed settings and a Phillips head bit for screws. A hammer drill might be helpful if you’re drilling into brick or masonry behind the vinyl, but it’s generally overkill for standard wood framing.
- Drill Bits: Assorted sizes for pilot holes. A masonry bit might be needed if your mounting surface is brick or concrete.
- Wire Strippers/Cutters: Essential for electrical connections.
- Screwdriver Set: Phillips and flathead, in various sizes.
- Level: To ensure your sconce is mounted straight.
- Measuring Tape: For precise placement.
- Caulking Gun: For sealing around the mounting bracket and any penetrations.
- Utility Knife: For trimming or making small adjustments to siding if needed (use with extreme caution).
- Stud Finder: To locate wall studs behind the siding for the most secure mounting.
- Pencil or Marker: For marking drill points.
- Ladder: A sturdy, stable ladder is a must for working at height. Ensure it’s positioned correctly and safely.
Materials You’ll Need:
- Outdoor Wall Sconce Fixture: Make sure it’s rated for outdoor use.
- Mounting Block or Wedge (Crucial!): This is the key to a successful installation on vinyl siding. These are typically made of PVC or composite material and are designed to be mounted directly to the wall sheathing, providing a flat, rigid surface to attach your sconce to, while extending through a precisely cut hole in the vinyl siding. Some come with pre-drilled holes.
- Exterior-Grade Screws/Bolts: Long enough to go through your mounting block and into the wall studs or sheathing. Stainless steel or galvanized are best for rust resistance.
- Exterior-Grade Silicone Caulk: Clear or color-matched to your siding.
- Wire Connectors (Wire Nuts): Appropriate for outdoor electrical connections. Ensure they are rated for exterior use.
- Exterior-Grade Electrical Outlet Box (if needed): If you don’t have an existing junction box, you’ll need one rated for outdoor use to house the electrical connections.
- Exterior-Grade Wire: If extending existing wiring or if new wiring is required.
Preparing the Installation Site
Proper preparation prevents a lot of headaches. This involves choosing the right location and ensuring you have power access.
1. Choosing the Location
- Aesthetic Placement: Think about where the light will be most effective. Near doorways, garage entries, or along a walkway are common and practical spots. Consider how the light will fall and if it will illuminate dark areas.
- Structural Support:This is vital. You must mount to a structural element of your home, not just into the vinyl siding itself. Use your stud finder to locate wall studs. If studs aren’t perfectly aligned with your desired sconce placement, you may need to install a wooden backing board or use robust toggle bolts if mounting into solid framing behind the sheathing. However, the mounting block method is generally preferred for vinyl.
- Wire Access: You’ll need to connect to a power source. This might mean tapping into an existing outdoor light circuit, an indoor junction box near the exterior wall, or running new wiring. If you’re not comfortable with electrical wiring, this is the point where you should absolutely call a qualified electrician. Incorrect wiring is a fire hazard and can be dangerous.
- Building Codes: Familiarize yourself with any local building codes that might pertain to outdoor lighting installation, especially regarding height, placement, and electrical work.
2. Turning Off the Power (Safety First!)
This cannot be stressed enough: always turn off the power to the circuit you’ll be working on before you start any electrical installation. Locate your home’s main electrical panel and flip the breaker that controls the area where you’ll be working. If you’re unsure which breaker it is, turn off the main breaker for the entire house. Test the existing light switch (if applicable) to ensure the power is off.
You can also use a non-contact voltage tester to confirm there is no power at the intended connection point.
3. Removing Existing Fixtures (If Applicable)
If you’re replacing an old sconce or light fixture, the process begins with its removal.
- Ensure the power is off.
- Carefully unscrew the old fixture from its mounting bracket.
- Disconnect the wiring using wire connectors or by unscrewing terminals.
- Remove the old mounting bracket. You might be able to reuse some of the existing holes for your new mounting block, but double-check for proper alignment and stability.
Installing the Mounting Block
This is the lynchpin of a successful install on vinyl siding. The mounting block acts as a rigid adapter, allowing you to securely fasten the sconce to the house structure while creating a neat, weather-tight seal with the vinyl siding.
1. Finding Studs and Marking Placement
- With power off, hold your chosen mounting block against the wall at the desired height.
- Use your stud finder to locate the center of a wall stud behind the vinyl siding. This is the most secure location. Mark the stud’s center line lightly with a pencil.
- Position the mounting block so its screw holes (ideally) align with the stud. If the stud isn’t perfectly centered, you might need to use a larger backing board or adjust your placement slightly. Some mounting blocks are designed to be attached to a junction box as well.
2. Cutting the Vinyl Siding (If Necessary)
This is the most delicate part of working with vinyl.
- Trace the Outline: Carefully trace the exact outline of the mounting block or the portion that will protrude through the siding. Be precise. Most mounting blocks have a template or clear instructions for this.
- Drill Starter Holes: Drill small pilot holes at the corners of your traced outline. This will give your utility knife a place to start.
- Make the Cut: Using a sharp utility knife, carefully cut along your traced lines. Go slowly and make multiple passes if necessary. The goal is a clean, tight opening that allows the mounting block to sit flush against the siding when installed. Do not force the knife or saw aggressively, as this can crack the vinyl. If the vinyl is brittle from age or cold, it’s extra important to be gentle.
- Test the Fit: Temporarily hold the mounting block up to the hole. It should fit snugly without forcing or leaving large gaps around the edges. You may need to trim slightly for a perfect fit.
3. Securing the Mounting Block
- Pre-Drill Pilot Holes: On the mounting block, use your drill to create pilot holes for the screws that will attach it to the wall. If you’re screwing into a stud, ensure these holes align with the stud’s center.
- Attach the Block: Align the mounting block with your marked stud and the clean cut in the vinyl. Use your exterior-grade screws (long enough to go through the mounting block and firmly into the stud or interior framing) to secure the block to the wall. Ensure it’s flush against the siding and perfectly level. It should feel absolutely solid. If you have any wiggle, add longer screws or consider a backing plate.
Important Note on Mounting Blocks: There are various types of mounting blocks. Some are flat, designed to screw directly into the sheathing and studs. Others are designed to attach to an existing electrical box.
Some may require you to cut a hole in the siding behind the block for wire access which then gets sealed. Always follow the specific instructions that come with your chosen mounting block.
Wiring the Outdoor Sconce
Now for the electrical connections. This is where paying attention to detail and ensuring proper weatherproofing is paramount.
1. Running Wires (If Necessary)
- If you are running new wire, you’ll typically drill a hole through the sheathing (and potentially a stud) from the inside out, or from the attic or crawl space down.
- Ensure the wire is rated for outdoor use and is properly secured according to electrical codes.
- The wire will typically pass through the mounting block or a designated conduit opening, entering the area where the sconce will be attached.
2. Connecting to Power
- Existing Junction Box: If your mounting block is designed to attach to an existing electrical box, carefully pull the house wires through the box opening.
- New Junction Box: If no box exists, you’ll need to install an outdoor-rated electrical box. Mount this securely to the structure (ideally to a stud or blocking) before attaching the mounting block. Ensure it’s positioned so the sconce can be wired to it.
- Wire Connections:
- Identify the wires: You’ll typically have a black wire (hot), a white wire (neutral), and a green or bare copper wire (ground).
- Strip the ends of the house wires and the sconce wires about ½ inch to ¾ inch.
- Connect like with like:
- Black to black (using an outdoor-rated wire nut).
- White to white (using an outdoor-rated wire nut).
- Green/copper to green/copper (using an outdoor-rated wire nut, or attaching to the ground screw on the fixture/box).
- Twist tightly: Ensure all connections are secure beneath the wire nuts. Give each connection a gentle tug to confirm it’s tight.
- Seal connections: For maximum protection, you can use a bead of silicone caulk around the wire nuts or use specialized weatherproof wire connectors that are designed for outdoor junctions. Many outdoor sconces come with their own sealed junction box or are designed to accept a cover that seals out the elements.
3. Attaching the Sconce to the Mounting Block
- Once your wiring is done and securely connected inside the junction box or concealed by the mounting block, it’s time to attach the sconce itself.
- Most sconces will have a mounting bracket that attaches to the mounting block or junction box. Follow the manufacturer’s instructions precisely.
- Feed the wires gently through the opening in the sconce’s base.
- Secure the sconce body to its bracket using the provided screws. Don’t overtighten, as this can crack the fixture or damage the mounting block.
Sealing for Weatherproofing
This step is critical for preventing water damage and ensuring the longevity of both your sconce and your siding.
1. Caulking Around the Sconce and Mounting Block
- Once the sconce is securely mounted, apply a generous, continuous bead of exterior-grade silicone caulk around the entire perimeter of the sconce where it meets the mounting block and the vinyl siding.
- Pay special attention to the top and sides. You want to create a watertight seal that prevents rain and moisture from getting behind.
- Also, apply caulk around any exterior wire penetrations or conduit connections.
- Smooth the caulk line with a wet finger or a caulk-smoothing tool for a neat appearance.
2. Checking Previous Sealant (If Replacing)
If you’re replacing an old fixture, inspect the existing caulking around the area. Remove any old, cracked, or peeling caulk with a caulk removal tool or putty knife before applying new sealant.
Testing and Final Checks
You’re almost there! It’s time to bring your new light to life.
1. Restoring Power
- Return to your electrical panel and flip the breaker back on that you previously turned off.
- If you have a switch for the sconce, turn it on.
2. Testing the Light
- Your new outdoor wall sconce should now illuminate!
- Check its operation. Does it turn on and off reliably? If it has a motion sensor or dusk-to-dawn feature, test those functions.
3. Final Inspection
- Visually inspect the installation one last time. Ensure the sconce is level and securely fastened.
- Check that the caulking looks neat and forms a continuous seal.
- Look for any signs of damage to the vinyl siding around the installation area.
Troubleshooting Common Issues
Even with careful planning, you might encounter a hiccup. Here are a few common problems and how to fix them:
Sconce Doesn’t Turn On
- Check Power: Double-check that the correct breaker is on and that you didn’t accidentally switch it back off.
- Wiring Connections: This is the most common culprit. Turn the power OFF at the breaker again and carefully re-inspect your wire connections. Are the wire nuts on securely? Are all wires making good contact? Are the connections correct (black to black, white to white, ground to ground)?
- Bulb: Have you installed the correct type and wattage of bulb? Is the bulb screwed in properly?
- Fixture Malfunction: In rare cases, the fixture itself might be faulty.
Sconce Is Loose or Wobbly
- Mounting Block Security: Turn the power OFF. Inspect how the mounting block is attached to the wall. Are the screws tight and firmly seated into studs or solid framing? You may need longer or more screws.
- Sconce Attachment: Ensure the screws attaching the sconce to its bracket (and the bracket to the mounting block) are tight.
- Vinyl Flex: If the issue is the vinyl flexing around an improperly installed mounting block, you might need to remove the block and re-install it with better support or ensure the mounting block itself is rigid enough.
Visible Gaps or Water Intrusion Risk
- Caulking: Turn the power OFF. Inspect the caulking. Apply more exterior-grade silicone caulk to any visible gaps, ensuring a complete seal.
- Mounting Block Fit: If the gap is significant and due to the mounting block not fitting the siding profile well, you might need to acquire a more appropriate mounting block or carefully trim the vinyl further (with extreme caution!).
When to Call a Professional Electrician
While many of us tackle DIY projects confidently, some aspects of electrical installation are best left to the pros. You should seriously consider calling a qualified electrician if:
- You’re uncomfortable with electrical wiring: Safety is paramount. If you’re unsure about any part of the wiring process, don’t risk it.
- You need to run new circuits or extend existing ones: This involves more complex wiring that often requires code compliance.
- Your existing wiring is old or appears damaged: Old wiring can be brittle and dangerous.
- You can’t definitively locate studs or have concerns about structural support.
- You’re dealing with complex junction boxes or control systems.
- Local codes require a licensed electrician for the work.
Maintaining Your Outdoor Sconces
Once installed, your outdoor sconces will require minimal maintenance, but a little care goes a long way:
- Regular Cleaning: Periodically wipe down the fixture with a damp cloth to remove dust, pollen, and cobwebs. Avoid abrasive cleaners that can scratch the finish.
- Check Seals Annually: Once a year, inspect the caulking around the sconce and mounting block. Reapply sealant if you notice any cracking, peeling, or gaps. This is also a good time to check for any sign of pest intrusion.
- Bulb Replacement: Keep spare bulbs on hand. When replacing a bulb, ensure the power is off at the breaker first, just to be safe.
Frequently Asked Questions about Installing Sconces on Vinyl Siding
Can I screw a light fixture directly into vinyl siding?
No, you absolutely should not screw a light fixture directly into vinyl siding. Vinyl siding is flexible and expands/contracts with temperature changes. Attaching a rigid fixture directly will put stress on the vinyl, leading to cracks, warping, and potential water leaks.
Always use a mounting block or a similar adapter that attaches to the underlying structure of your home.
What is a mounting block, and why is it essential for vinyl siding?
A mounting block (also called a siding block or mounting flange) is a rigid piece of PVC or composite material designed to be installed directly onto your home’s sheathing and studs. It extends through a precisely cut hole in your vinyl siding, providing a solid, flat surface to attach your light fixture. It acts as a weather-tight seal and prevents the vinyl from bearing the load or stress of the fixture.
How do I cut a hole in vinyl siding for a mounting block?
Carefully trace the outline of the mounting block onto the siding. Drill small starter holes at the corners. Using a sharp utility knife, carefully cut along the traced lines, making multiple shallow passes rather than trying to cut through all at once.
The goal is a snug, clean opening. Be gentle to avoid cracking the vinyl.
How long should the screws be when attaching the mounting block?
The screw length depends on the thickness of your mounting block and the depth needed to reach a solid stud or framing member behind your home’s sheathing. Typically, you’ll need screws that are at least 2.5 to 3 inches long, but you must ensure they are exterior-grade (galvanized or stainless steel) and robust enough to create a very secure attachment. Always pre-drill pilot holes into wood studs.
Do I need a special type of electrical box for outdoor sconces?
Yes. Any electrical connections made on the exterior of your home must be housed in an “all-weather” or “weatherproof” rated electrical box. These boxes are designed to protect connections from moisture and the elements.
Can I install these sconces myself, or do I need an electrician?
Basic installation of the fixture to a pre-existing, powered junction box can often be a DIY project for those comfortable with basic electrical wiring and tools. However, if you need to run new wiring, tap into existing circuits, or are unsure about any part of the electrical process, it’s always best to hire a licensed electrician to ensure the work is done safely and to code.
How do I ensure the installation is waterproof?
Properly sealing around the mounting block and the sconce is crucial. Use a high-quality exterior-grade silicone caulk to create a continuous, watertight bead around the entire perimeter where the fixture and mounting block meet the siding. Ensure any wire penetrations are also sealed.
What happens if my vinyl siding isn’t perfectly flat where I want to mount the sconce?
Some mounting blocks are designed with a slight contour to accommodate minor irregularities. However, for significant curves or damaged sections, you might need to install a flat, exterior-grade plywood backing board to the wall studs first, then mount your vinyl siding mounting block onto that. This creates a stable, flat surface.
How do I find wall studs behind vinyl siding?
An electronic stud finder is the best tool for this. Hold it against the siding and move it across the wall until it indicates a stud. For vinyl, you might need to hold the stud finder firmly and potentially make a few passes.
Remember that studs are typically spaced 16 or 24 inches apart on center.
By following these detailed steps, you can confidently install outdoor wall sconces on your vinyl siding, enhancing your home’s appearance and functionality for years to come. Remember, safety first, and don’t hesitate to call in a professional if you’re ever in doubt.


Similar Posts



















