How to Install Renters Friendly Wall Sconces
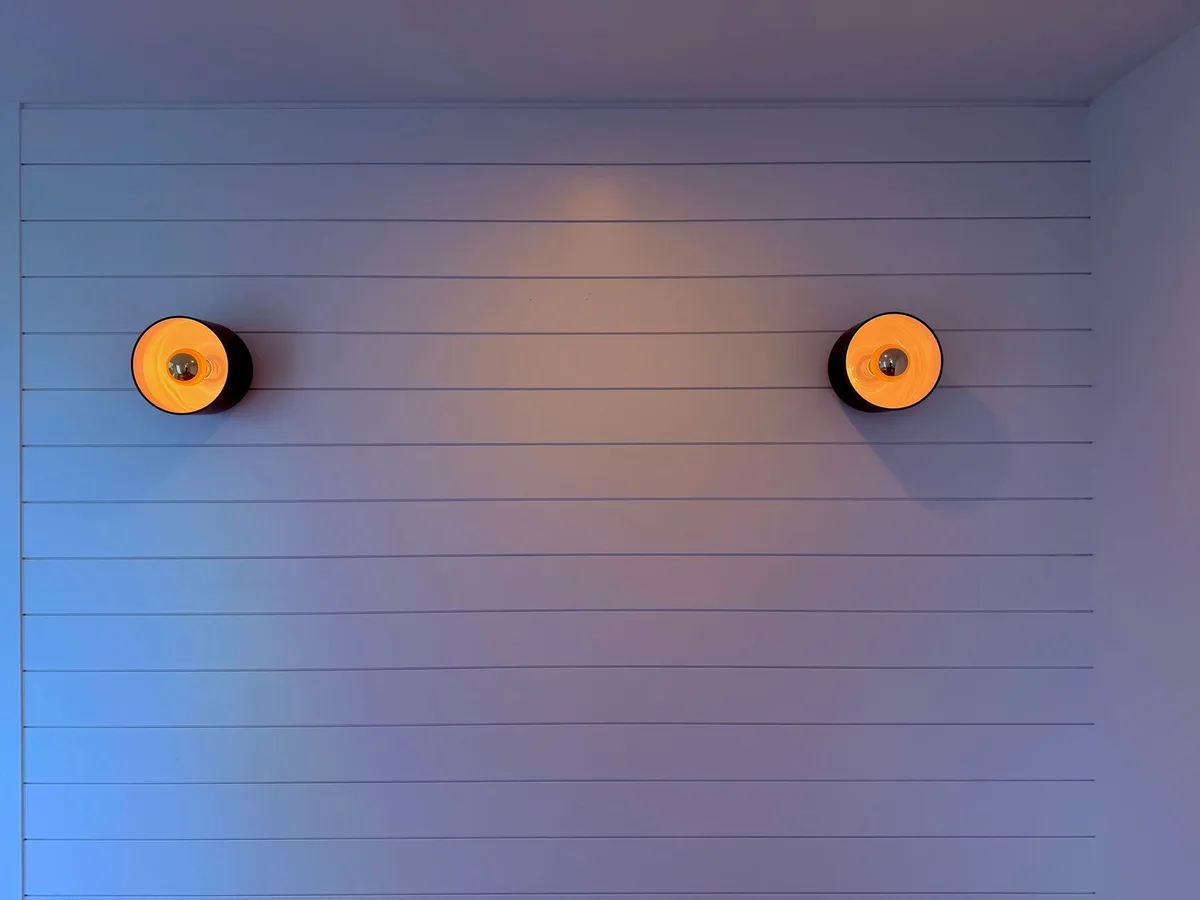
As a renter, you often face the tough decision between personalizing your space and respecting your lease agreement. Decorating can feel like a minefield when every nail hole, paint smudge, or permanent change risks your security deposit. But what if I told you there’s a way to add sophisticated lighting, think stylish wall sconces, without causing any permanent damage?
It’s not a dream; it’s about choosing the right kind of renters-friendly wall sconces and knowing a few clever installation tricks.
We’re talking about transformative lighting that can elevate any room, from a cozy living area to a chic bedroom, all while keeping your landlord happy. This guide will walk you through everything you need to know, from understanding what makes a sconce “renters-friendly” to the best installation methods and popular styles.
What Makes a Wall Sconce Renters-Friendly?
The magic of renters-friendly lighting lies in its reversibility. Essentially, it means you can install it, enjoy it, and then remove it without leaving a trace, no holes in the drywall, no paint chipping, no electrical rewiring.
Here’s what to look for:
Corded vs. Plug-In Options
This is the most crucial distinction.
- Plug-in sconces: These are your best friends. They draw power directly from a standard wall outlet. The cord can usually be managed neatly along the wall or baseboard, often with adhesive cord clips. Installation typically involves a simple mounting bracket that screws into the wall, but here’s the renters’ trick: we’ll cover how to mount these securely without permanent damage.
- Hardwired sconces: These require connecting directly to your home’s electrical wiring. This is generally NOT renters-friendly because it involves opening up walls, professional electrical work, and is almost always forbidden by lease agreements. Steer clear unless you have explicit landlord permission and are comfortable with permanent alterations.
Adhesive Mounting Systems
Many modern renters-friendly sconces are designed with innovative adhesive solutions. Look for sconces that come with heavy-duty, damage-free adhesive strips or mounting plates. These are specifically formulated to hold weight securely while being removable without damaging paint or drywall.
Always check the manufacturer’s instructions on how to apply and remove these properly to avoid any issues.
Removable Brackets and Hardware
Even if a sconce has a traditional mounting bracket, the key is how that bracket is attached. Opt for systems that use minimal, small screws that can be easily filled and touched up if absolutely necessary (though we aim to avoid this), or even better, those that utilize temporary, high-strength adhesive hooks or strips designed for the weight of the sconce.
Battery-Operated Sconces
A growing category, battery-operated sconces offer complete freedom. They require no wiring and no cords. You simply install the mounting bracket (again, using damage-free methods) and pop in batteries.
This is the ultimate no-fuss, no-damage solution. The downside is you’ll need to keep track of battery life and replacements.
Top Installation Methods for Renters: Style Without Scars
Now, let’s get down to the practicalities. How do you actually get these sconces onto your walls without risking your deposit?
Method 1: The Power of Adhesive Hooks & Strips for Plug-in Sconces
This is my go-to method for plug-in sconces that have a mounting bracket.
What you’ll need:
- Your plug-in wall sconce and its mounting bracket.
- Heavy-duty, weight-rated adhesive hooks or mounting strips (e.g., 3M Command Hooks or similar). Ensure they are rated for significantly more weight than your sconce.
- A level.
- A pencil.
- Rubbing alcohol and a clean cloth.
- Measuring tape.
Steps:
- Prepare the Wall: Clean the wall surface where you intend to mount the sconce with rubbing alcohol. This removes any dust or grease that could compromise the adhesive. Allow it to dry completely.
- Position the Bracket: Hold the sconce’s mounting bracket against the wall in its desired location. Use your level to ensure it’s perfectly straight. Mark the screw holes lightly with a pencil.
- Apply Adhesive: Instead of drilling for screws, you’ll apply the heavy-duty adhesive hooks or strips directly onto the wall at your marked positions. Follow the manufacturer’s instructions precisely for application, this usually involves pressing firmly for a set amount of time.
- Reinforce (Optional but Recommended): For extra security, especially with heavier sconces, consider using multiple adhesive hooks or strips. You can also strategically place them along the entire length/width of the mounting bracket’s contact points.
- Mount the Bracket: Once the adhesive is set (check the product’s cure time, often 24 hours), carefully attach the sconce’s mounting bracket to the wall, engaging the hooks or adhering the strips to the back of the bracket. Ensure it feels secure. Some brackets might have a channel where the hooks can slot in.
- Hang the Sconce: Attach the sconce itself to the mounted bracket according to its instructions.
- Manage the Cord: Use small, adhesive cord clips to run the power cord discreetly down the wall, along trim, or behind furniture to the nearest outlet.
Pro Tip: Always test the adhesive hooks/strips by hanging something of equal or greater weight for 24-48 hours before committing to hanging your sconce.
Method 2: Temporary Anchors for Brackets (Use with Caution & Landlord Check)
This is a slightly more involved method, best suited for sconces that absolutely require a sturdy bracket and where you might have a very understanding landlord who permits minor, easily repairable wall blemishes. Always discuss this with your landlord first.
What you’ll need:
- Your sconce and mounting bracket.
- Temporary drywall anchors (specifically designed for minimal damage as they expand with a screw that you later remove, leaving a small hole only). Look for brands known for easy removal.
- A drill and appropriate drill bit.
- A screwdriver.
- A level.
- Pencil.
- Spackle and touch-up paint (to match your wall color for when you move out).
Steps:
- Position and Mark: Hold the bracket against the wall, use your level, and mark where the screw holes should go.
- Drill Pilot Holes: Use a drill bit slightly smaller than your temporary anchors to drill pilot holes at your marked spots.
- Insert Anchors: Gently tap the temporary anchors into the pilot holes until they are flush with the wall.
- Attach Bracket: Screw the mounting bracket into the anchors. Don’t overtighten.
- Hang Sconce: Attach the sconce to the bracket.
- For Move-Out: When it’s time to leave, unscrew the bracket from the anchors. Gently pull the anchors out (most temporary ones are designed to be pulled out or broken off leaving minimal damage). Fill any tiny holes with spackle, sand smooth, and touch up with paint.
When to use this method: If you’re installing a sconce that’s a bit heavier and adhesive alone feels insufficient, and you have a cooperative landlord and a plan for a pristine repair.
Method 3: Battery-Operated Sconces – Ultimate Simplicity
If you want the easiest, most foolproof renters-friendly installation, battery-operated is the way to go.
What you’ll need:
- Your battery-operated sconce.
- Mounting hardware often included (or use Method 1 with adhesive hooks).
- Level.
- Pencil.
- Rubbing alcohol and cloth (if using adhesive).
Steps:
- Install Mounting Bracket: Most battery-operated sconces come with a simple plate or bracket that attaches to the wall. You can screw this directly into wall studs (if you can locate them and your landlord permits) or, more commonly, use heavy-duty adhesive hooks or strips as described in Method 1.
- Attach Sconce: Once the bracket is securely mounted, simply attach the sconce unit.
- Insert Batteries: Pop in your batteries according to the sconce’s instructions.
- Enjoy: Turn it on and enjoy instant ambiance!
Considerations: Battery life can range from weeks to months depending on usage and battery type. You’ll need to remove the sconce to replace them.
Popular Styles of Renters-Friendly Wall Sconces
The good news is that the demand for temporary lighting solutions has led to a fantastic array of stylish options. You don’t have to compromise on aesthetics.
1. The Modern Minimalist Plug-in Sconce
Clean lines, simple shapes, and often a metallic finish (brass, black, brushed nickel). These are perfect for a contemporary look and blend seamlessly into most decor.
- Features: Often have adjustable arms or heads, providing directional lighting.
- Best for: Reading nooks, bedside tables, framing artwork, or accent lighting in hallways.
- Installation: Typically uses a C-shaped bracket that can be easily hung on adhesive hooks. The cord is often braided for a nicer look.
Image source: Pexels / Dar ius (Pexels License)
2. The Industrial Charm Plug-in Sconce
Think exposed bulbs, metal cages, and utilitarian designs. These sconces bring a touch of loft living to any space.
- Features: Robust materials, often with vintage-style Edison bulbs.
- Best for: Kitchens, dining areas, living rooms needing a bit of edgy character.
- Installation: Similar to modern minimalist sconces; often a simple backplate mounts securely with adhesive.
3. The Glamorous Vanity Sconce (Plug-in or Battery)
If you dream of a Hollywood-style vanity or want to add a touch of sparkle to your bedroom, these are for you.
- Features: Crystals, mirrored accents, polished chrome or gold finishes, and often brighter illumination.
- Best for: Bedrooms, dressing areas, or adding a touch of luxury to a living room.
- Installation: Many are designed with slim profiles and can be mounted using strong adhesive strips. Battery-operated versions are common for easy bedside application.
4. The Art Deco Statement Sconce
Inspired by the Roaring Twenties, these sconces feature geometric patterns, frosted glass, and luxurious metals.
- Features: Elegant glass shades, often with unique shapes, and intricate metal details.
- Best for: Entryways, dining rooms, living rooms aiming for a sophisticated, vintage vibe.
- Installation: While some are hardwired, many adaptable plug-in versions exist. Look for models with simple backplates that can be mounted with adhesive.
5. The Traditional Swing-Arm Sconce
A classic for a reason. The adjustable arm offers incredible flexibility for task lighting.
- Features: A pivoting arm, often with a fabric or metal shade.
- Best for: Reading chairs, beside beds, or anywhere you need light that can be easily directed.
- Installation: Most plug-in swing-arm sconces have a mounting plate that can be affixed with heavy-duty adhesive hooks or strips.
6. The Picture Light Sconce
Designed specifically to illuminate artwork or photographs.
- Features: Usually a long, slim bar with a directional light. Available in plug-in and battery-operated versions.
- Best for: Highlighted artwork, gallery walls.
- Installation: Often comes with adhesive-backed mounting plates or simple brackets that work well with temporary adhesive solutions.
Factors to Consider Before Buying and Installing
Beyond the installation method, there are a few other crucial aspects to get right.
Sconce Weight
Always, always check the weight of the sconce. This is critical for selecting the correct adhesive or temporary mounting solution. Heavier sconces require stronger hooks, more attachment points, or a more robust temporary anchor system.
Don’t guess; check the product specifications.
Wall Surface Type
The effectiveness of adhesives and temporary anchors can vary depending on your wall’s surface.
- Painted Drywall: Generally good for adhesives, provided it’s clean and in good condition.
- Textured Walls: Textured paint or wallpaper can be trickier for adhesives. They might not create a strong enough seal. Test adhesives in an inconspicuous area first, or consider using a very smooth, rigid backing plate to mount the sconce onto, which you then attach to the wall.
- Wallpaper: Most adhesives will damage or peel wallpaper. Avoid if possible, or test on a hidden strip first.
- Wood Paneling: Usually good for screws if you can locate studs, but direct screwing might be prohibited. Adhesives can work if the surface is smooth.
Lighting Needs and Placement
Think about why you want the sconce.
- Ambient Lighting: Soft, diffused light to set a mood.
- Task Lighting: Focused light for reading, working, or applying makeup.
- Accent Lighting: To highlight specific features like artwork.
The placement should align with your needs, bedside for reading, over a console table for entry ambiance, beside a sofa for reading. Remember to measure the distance from the outlet if it’s a plug-in model to ensure the cord will reach comfortably.
Cord Management
A dangling cord can ruin even the most stylish installation. Plan your cord management strategy before you finalize placement. Adhesive cord clips are your best friend here.
You can buy them in various colors to match your wall or baseboards, or clear ones for invisibility. Route the cord discreetly along baseboards, door frames, or paint it to match the wall if it needs to cross an open space.
The “What Ifs”: Troubleshooting Common Issues
- Adhesive Not Sticking: Ensure the wall is perfectly clean and dry. Press firmly for the recommended time. If it’s a humid environment, this can affect adhesion.
- Sconce Falls Down: This is rare with proper installation but can happen. It often means the adhesive wasn’t strong enough for the weight, the wall wasn’t properly prepped, or the adhesive cured inadequately. Re-prep the wall and use a higher-rated adhesive solution.
- Damage on Move-Out: If using temporary anchors, carefully follow the removal instructions. For adhesives, gently pull the hook/strip down at an angle to leverage the stretch-release technology. If a tiny bit of paint comes off, spackle and touch up.
- Uneven Lighting: If the sconce has an adjustable arm or head, use it to direct the light where you need it most.
Renters-Friendly Sconces and Your Lease Agreement
Always, always read your lease. While “renters-friendly” installation methods aim to leave no trace, some leases are extremely strict. It’s good practice to:
- Seek Clarification: If you’re unsure about temporary mounting methods, speak to your landlord. A proactive conversation can prevent misunderstandings later.
- Document Your Installation: Take photos of the wall before you install anything. This can serve as proof of its condition.
- Plan for Reversal: Have your spackle and paint ready for move-out day, even if you’re confident your installation will leave no marks.
Frequently Asked Questions (FAQ)
Q1: Can I really install wall sconces without drilling?
Yes! With plug-in or battery-operated sconces, you absolutely can. The key is using heavy-duty adhesive hooks, strips, or specialized removable mounting systems that can support the weight of the sconce without damaging your walls.
Q2: What’s the difference between plug-in and hardwired sconces for renters?
Plug-in sconces draw power from a standard wall outlet via a cord, making them ideal for renters because they don’t require electrical work. Hardwired sconces connect directly to your home’s electrical system, which is a permanent alteration and generally forbidden for renters.
Q3: How do I hide the cord from a plug-in sconce?
Use adhesive cord clips to neatly run the cord along your baseboards or wall edges to the nearest outlet. You can also paint the cord to match your wall color for better camouflage.
Q4: Are battery-operated sconces bright enough?
Battery-operated sconces have improved significantly. Many offer bright LED options that are perfectly suitable for task lighting or ambient room lighting. However, for very large spaces or situations requiring intense brightness, plug-in options might be a better choice.
Q5: What if my walls are textured or wallpapered?
Textured walls and wallpaper can be challenging for adhesives. Always test any adhesive in an inconspicuous area first. For wallpaper, it’s generally best to avoid adhesives altogether, as they are likely to peel or damage it.
You might need to consider a more robust temporary anchor system or a sconce with a very minimal, flat mounting plate that can adhere to a small, smooth surface.
Q6: How much weight can adhesive hooks for sconces hold?
This varies widely by product. Always check the weight rating for the specific adhesive hooks or strips you purchase. For sconces, it’s advisable to use hooks rated for significantly more weight than you think you’ll need for added security.
Q7: My landlord has very strict rules about wall damage. What’s the safest option?
Battery-operated sconces that mount via high-quality, weight-rated adhesive hooks are typically the safest bet. Always double-check the specific adhesive product to ensure it’s designed for easy, damage-free removal from painted surfaces.
Q8: Can I use the sconce’s own screws with temporary anchors instead of drilling?
Some temporary anchor systems are designed to be inserted into a small pilot hole (which causes less damage than a full screw hole) and then the sconce’s original screw is used to secure it. This is a middle-ground approach, but always confirm your landlord allows even minor wall penetration.
Adding renters-friendly wall sconces is a fantastic way to inject personality and sophisticated lighting into your rental home. By understanding the types of sconces available and employing clever, damage-free installation techniques, you can achieve a beautifully lit space without jeopardizing your security deposit. Happy lighting!


Similar Posts



















