How to Organize a Bathroom Cabinet With Baskets
Let me guess. You open your bathroom cabinet and stuff falls out. You can’t find the toothpaste.
The hairbrush is tangled in something you don’t remember buying. And somewhere behind that pile of hotel shampoo bottles is the one thing you actually need.
I’ve been there. Most of us have.
Here’s the fix: baskets. Not complicated shelving systems. Not expensive custom inserts.
Just well-chosen baskets that turn chaos into order. Done right, this takes a weekend afternoon and costs under fifty bucks. Let me show you how.
Image source: Pexels / Pixabay (Pexels License)
Why Baskets Work Better Than Everything Else
We’ve tried the other methods. Stacking things neatly. The “just shove it in” approach.
Those acrylic organizers that crack after three months. None of it sticks because bathrooms are fundamentally hostile environments for organization.
Here’s what happens. Humidity warps cardboard. Toothpaste leaks.
Small bottles tip over. And the biggest problem? When you’re in a rush, nothing goes back where it belongs.
Baskets solve all of this. They contain the chaos. You toss items into the basket rather than arranging them perfectly on the shelf.
When you need something, you pull the whole basket out. No digging. No avalanche of travel-size deodorant.
The science backs this up too. The American Cleaning Institute has published research showing that organized spaces reduce cleaning time by roughly thirty percent. When everything has a designated container, you spend less time searching and more time actually getting ready.
What You’ll Need Before You Start
Don’t run out and buy baskets yet. That’s how you end up with a cabinet full of mismatched containers that still don’t work. Take fifteen minutes to do this prep work first.
Measure everything. Get the height, width, and depth of your cabinet interior. Measure the space between shelves. Write these numbers down.
You’ll reference them constantly.
Empty the cabinet completely. Every single thing comes out. Yes, even that ancient bottle of sunblock from 2019. Pile everything on the counter or bathroom floor.
Sort into categories. Make these piles:
- Daily use (toothbrush, toothpaste, deodorant)
- First aid (bandages, pain relievers, antiseptic)
- Hair care (shampoo, conditioner, styling products)
- Skincare (moisturizers, serums, treatments)
- Medications (vitamins, prescriptions, supplements)
- Backup supplies (extra toothbrushes, travel bottles, the stuff you bought in bulk)
- The trash pile (expired items, empty containers, things you genuinely hate)
Purge ruthlessly. Anything expired goes. Anything you haven’t touched in six months goes. Be honest with yourself.
If it’s not earning its shelf space, it’s just taking up room.
Now you know exactly how much stuff you have and what categories need homes. This prevents overbuying baskets. You’ll purchase only what you actually need.
Choosing the Right Baskets for Your Cabinet
Image source: Pexels / Jaycee300s (Pexels License)
This is where most people mess up. They pick pretty baskets that look great in the store but fail miserably in practice. Let’s avoid that.
Material Matters More Than You Think
Bathrooms have moisture. Fluctuating temperatures. Aerosol overspray.
Your basket material needs to survive all of it.
Woven seagrass or rattan. These look beautiful. They breathe well. But they soak up moisture like a sponge.
In a humid bathroom, they’ll develop mildew within weeks. I don’t recommend them for cabinet interiors unless your bathroom has exceptional ventilation.
Wipe-clean plastic or coated metal. These are your workhorses. They resist moisture, clean easily with a disinfectant wipe, and hold up for years. Look for ones with solid sides rather than open weave.
Open weaves let small items fall through. Solid-sided baskets contain everything.
Wire mesh with a coating. These work well for larger items like hair dryers or styling tools. The open structure allows airflow, which helps dry damp items. Just ensure the coating is intact.
Rusted wire baskets are a nightmare.
Fabric or canvas with reinforced bottoms. These work for light items like cotton balls, Q-tips, or feminine hygiene products. They’re soft, lightweight, and easy to pull out. But the fabric will eventually absorb odors and moisture.
Plan to replace them yearly.
Size and Shape Rules
Baskets should fill your cabinet space efficiently. Here are the rules I use:
Open your cabinet and look at the shelf depth. Your baskets should be at least an inch narrower than that depth. If they’re flush with the front edge, you can’t grab them easily.
For height, measure from the shelf bottom to the shelf above. Subtract an inch. That’s your maximum basket height.
You need that gap to reach in and grab things without scraping your knuckles.
Rectangular baskets beat round ones for cabinet organization. Round baskets waste corner space. Rectangular ones fit together like puzzle pieces, maximizing every inch.
Clear vs. Opaque
Clear baskets look tidy and let you see contents at a glance. But they also show every messy pile inside. If you’re naturally messy, opaque baskets hide the chaos better.
Opaque baskets with labels work best for most people. You can stash things carelessly and the cabinet still looks organized. The label tells you what’s inside without needing to peer through frustrated squinted eyes.
The Step-by-Step Organization Method
You’ve measured. You’ve purged. You’ve bought the right baskets.
Now let’s put this together.
Step 1: Zone Your Cabinet
Think about how you actually use this space, not how you wish you used it. Your cabinet has three zones:
The eye-level zone. This is the shelf at or slightly below your eyeline. It’s prime real estate. This gets the things you use every single morning and evening.
Toothbrush, toothpaste, face wash, deodorant. The essentials that keep your routine moving.
The reach zone. This sits just above or just below the eye-level shelf. It’s still easy to grab but requires a slight stretch or bend. This gets your weekly items.
Skincare products you use three or four times a week. Hair styling tools. Backup toiletries.
The squat zone. This is the very bottom shelf or the very top shelf. Items here require deliberate effort to access. This gets your monthly or emergency supplies.
Extra toilet paper. First aid kit. The large bottle of shampoo you bought at Costco.
Spare towels if they fit.
Step 2: Assign Baskets to Categories
Each category you sorted earlier gets its own basket. No exceptions. Mixing categories defeats the entire purpose.
- One basket for daily essentials
- One basket for medications and vitamins
- One basket for hair products
- One basket for skincare
- One basket for first aid
- One basket for backup supplies
If a category is small, combine it with a related category. Skincare and makeup can share a basket. First aid and medications can share one too.
Just don’t throw everything into one giant basket. That’s just organized chaos.
Step 3: Arrange Everything Inside the Baskets
This step separates “looks good” from “actually works.”
Inside each basket, use the vertical space. Small items like lip balms, travel tubes, and pill bottles should stand upright. Use small jars or tin cans as dividers if needed.
Propping items upright doubles your effective storage space.
Group similar items together within the basket. In your hair basket, put all the conditioners on one side and styling products on the other. This keeps you from dumping out the entire basket to find one thing.
Place items you use most toward the front of each basket. Things you rarely touch go toward the back. This sounds obvious, but most people just toss things in randomly.
Step 4: Load Everything Into the Cabinet
Here’s where the magic happens.
The front of the cabinet gets the baskets you use daily. The back gets the less-used baskets. This creates a natural flow.
You open the door. You grab the front basket. You get what you need.
You put the basket back. Done.
If your cabinet has adjustable shelves, move them to fit your baskets perfectly. A half inch of wasted vertical space across three shelves adds up to significant wasted storage.
Step 5: Label Everything
This step gets skipped. Don’t skip it.
Labels serve two purposes. First, they tell you where things go when you’re rushing. Second, they tell everyone else in your household where things go.
No more “where’s the bandaid?” moments.
Use a label maker if you have one. Use handwritten labels on masking tape if you don’t. The format matters less than the consistency.
Every opaque basket gets a label on the front facing out.
Print clearly. “HAIR PRODUCTS” works better than “Hair Things I Bought On Sale.” Keep labels short and functional.
Arranging Baskets for Maximum Efficiency
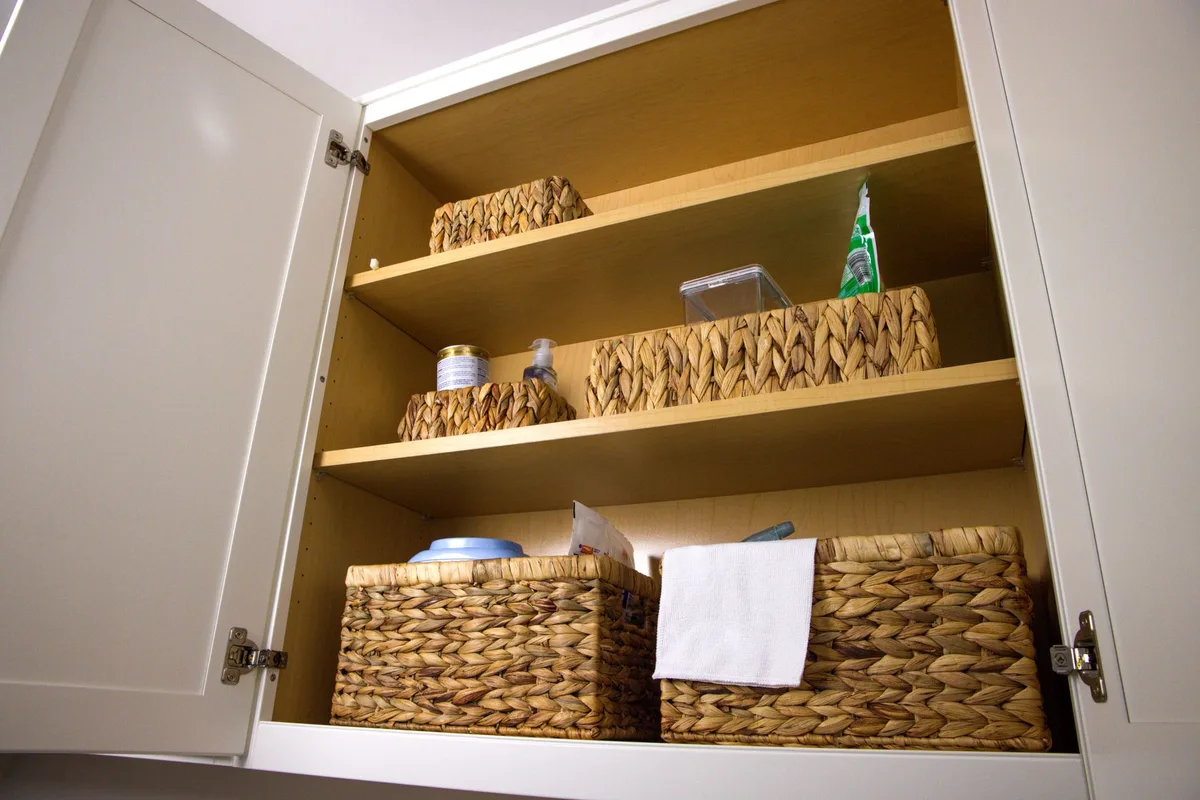
Image source: Pexels / American Cleaning Institute (Pexels License)
Let’s get specific about placement. The right arrangement makes a cabinet feel twice as large.
The Bottom Shelf Strategy
Bottom shelves in bathroom cabinets are wastelands. Things get shoved in and forgotten. But with baskets, the bottom shelf becomes prime overflow storage.
Use one large basket here for bulky items. Hair dryers. Curling irons.
Electric razors with charging bases. The big stuff that doesn’t fit neatly on upper shelves goes here.
If you have a deep bottom shelf, use two medium baskets side by side rather than one giant basket. This lets you pull out only what you need without disturbing everything else.
The Door Storage Secret
Cabinet doors are wasted space in most bathrooms. Stick adhesive hooks or a small over-door organizer on the inside of the door. Use this for items you grab constantly.
Hang your hairbrush. Clip your nail clippers to a hook. Stash a small basket with daily-use items like hair ties and bobby pins.
Every inch counts.
Just don’t overload the door. Heavy items will loosen the adhesive. Keep it light.
Keep it useful.
The Heirarchy Rule Inside Each Basket
Within every basket, tallest items go in the back. Medium items in the middle. Smallest items up front.
This creates a stadium seating effect where you can see everything at a glance.
If your basket holds multiple types of items, use small containers as dividers. Empty sample jars work great. So do small glass votives.
They keep things from sliding around and mixing together.
Maintenance That Actually Sticks
The best-organized cabinet becomes a wreck within weeks without maintenance. Here’s how to keep yours working.
The weekly thirty-second reset. When you finish your morning routine, spend thirty seconds making sure everything went back in the right basket. That’s it. This tiny habit prevents the slow slide into chaos.
The monthly five-minute audit. Once a month, pull each basket out. Check for items that belong elsewhere. Throw away anything empty or expired.
Wipe down the basket with a disinfectant wipe. Put it back.
The quarterly deep clean. Every three months, empty the entire cabinet. Wipe down shelves. Clean each basket thoroughly.
Reorganize anything that drifted. This takes fifteen minutes and keeps your system running perfectly.
I promise you, these maintenance habits take less time than the “digging through a messy cabinet every morning” approach. And they’re infinitely less frustrating.
Common Mistakes and How to Avoid Them
I’ve made every mistake in the book so you don’t have to.
Mistake #1: Buying baskets before measuring. This is the number one error. People fall in love with a basket at the store, bring it home, and discover it’s two inches too wide. Measure first.
Write down the dimensions. Stick to them.
Mistake #2: Using too many small baskets. A cabinet full of tiny baskets looks cute but functions terribly. Each basket holds three items. You end up with twelve baskets for a small cabinet.
Use fewer, larger baskets that actually contain your categories.
Mistake #3: Not accounting for handle height. Baskets with tall handles look elegant. They also prevent you from fitting anything on the shelf above. Measure handle height separately from basket height.
Handles should not extend above the top of the basket.
Mistake #4: Mixing open and closed storage. Decide upfront whether your cabinet will use opaque baskets or clear ones. Mixing them creates visual chaos. It also makes the clear baskets look messy by comparison.
Mistake #5: Forgetting about airflow. If you store damp items like washcloths or razors in closed baskets, they’ll mildew. Use containers with ventilation for anything that might be wet. A small wire basket or a mesh pouch works perfectly.
Adapting This System for Different Cabinet Types
Not every bathroom cabinet looks the same. Here’s how to adjust.
For shallow medicine cabinets. These typically measure four to six inches deep. Standard baskets won’t fit. Use slim wire storage caddies instead.
They’re designed for tight spaces and hold everyday essentials without wasted depth.
For deep under-sink cabinets. These dark caverns need a different approach. Use pull-out baskets or drawer inserts. These let you access everything without crawling halfway into the cabinet.
Install them on simple slider rails for an easy upgrade.
For wall-mounted open shelves. Open shelving demands more visual polish. Use matching baskets with clean lines. Everything visible stays organized.
The uniformity of the baskets creates a cohesive look even with mismatched contents.
For rental bathrooms. You can’t modify shelves or install permanent fixtures. Use freestanding basket organizers that sit on existing shelves. Wire mesh or plastic stacking systems work well.
They’re fully removable with no damage.
Real Results From Real People
I’ve helped dozens of friends organize their bathroom cabinets with this system. The feedback is remarkably consistent.
Sarah, a mom of three, went from a fifteen-minute morning search for everyone’s toothbrushes to a thirty-second grab-and-go system. She labeled each family member’s basket. Now even the kids put things away correctly.
Mark, a bachelor who never bothered organizing anything, admitted his bathroom cabinet looked like a pharmacy exploded. After one afternoon with baskets, he found things he forgot he owned. He’s been maintaining the system for eight months.
The common thread? Everyone thought their bathroom was too small, too oddly shaped, or had too much stuff to organize. Everyone was wrong.
The baskets adapt. The system scales. It works for any cabinet size.
When to Upgrade Your Baskets
Your initial basket purchase doesn’t have to be permanent. As your needs change, your system should adapt.
Upgrade when baskets start cracking or warping. Cheap plastic baskets last about a year in humid bathrooms. Invest in better quality when you replace them.
Upgrade when your storage needs change. Maybe you started using more skincare products. Maybe you downsized your hair product collection.
Your basket configuration should reflect your current reality, not last year’s habits.
Upgrade when you find baskets that work better. A good system evolves. If you discover baskets with better handles, better airflow, or better visibility, switch.
The system is the foundation. The baskets are just tools.
The Bottom Line
Organizing a bathroom cabinet with baskets isn’t complicated. It doesn’t require expensive products or professional help. It just requires a clear plan and the right containers.
Measure your space. Purge ruthlessly. Choose moisture-resistant baskets that fit perfectly.
Assign one basket per category. Label everything. Maintain the system weekly.
That’s it. That’s the entire method.
Your bathroom cabinet can become a place of calm instead of chaos. You can find your toothbrush on the first try every morning. You can stop buying duplicates of things you already own but can’t find.
All it takes is one afternoon and a few well-chosen baskets.
Go measure your cabinet. The rest is easy.


Similar Posts



















