How to Organize a Garage Workbench With Storage Bins
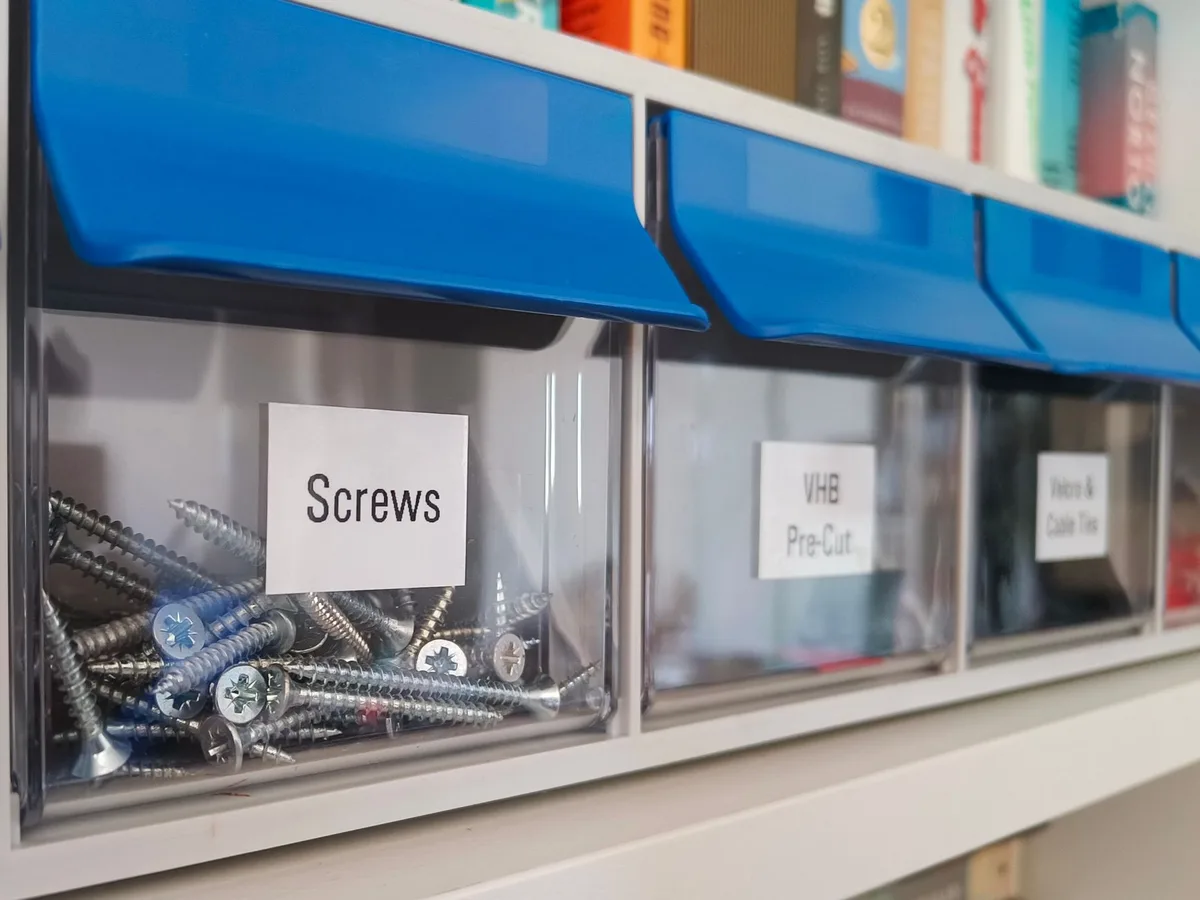
Image source: Pexels / Daniel Rosehill (Pexels License)
Let’s be honest. Your garage workbench looks like a disaster zone right now. Screws mixed with drill bits.
Old rags shoved next to half-empty paint cans. You spend more time hunting for tools than actually using them.
I’ve been there. And I learned the hard way that the solution isn’t buying more tools. It’s getting the right storage system and actually sticking to it.
Storage bins are the answer. They’re cheap. They’re modular.
And when you set them up right, they transform a chaotic bench into a workspace that actually works for you.
This guide walks you through exactly how to organize a garage workbench with storage bins. No fluff. No overcomplicated systems.
Just practical steps that deliver results in a weekend.
Why Storage Bins Work Better Than Piles
Most garage workbenches fail because we treat them like dumping grounds. We set something down “just for now” and it stays there for months.
Storage bins break that cycle. They give every item a designated home. When you know exactly where the 10mm socket lives, you stop wasting time digging through drawers.
Here’s what makes bins the superior choice:
- Visibility. Clear bins let you see contents at a glance. No more opening fifteen containers hunting for one wing nut.
- Portability. Grab a bin and take it to your project. Put it back when you’re done.
- Stackability. Vertical storage doubles your usable space without expanding your footprint.
- Affordability. A full bin system costs a fraction of custom cabinetry.
The key is choosing the right bins and placing them strategically. Let’s break that down.
Steps to Organize a Garage Workbench With Storage Bins
Step 1: Empty and Sort Everything
Before you buy a single bin, clear that bench completely. I mean everything. Take it all off and lay it on the garage floor.
Sort items into broad categories:
- Hand tools (wrenches, pliers, screwdrivers)
- Power tools and batteries
- Fasteners (screws, nails, bolts, washers)
- Electrical supplies (wire, connectors, tape)
- Plumbing parts (fittings, pipe tape, valves)
- Cleaning supplies (rags, solvents, brushes)
- Miscellaneous (things that don’t fit anywhere else)
Be ruthless. If you haven’t used something in two years, donate it or toss it. Garage clutter is usually just postponed decisions.
This sorting process reveals exactly what bin sizes you need. A dozen random screws need a small divided bin. A collection of power tools needs large, open-top bins.
Step 2: Measure Your Workbench and Surrounding Space
Grab a tape measure. Write down:
- Workbench depth and width
- Clearance above the bench (how much wall space you have)
- Space underneath the bench
- Distance from bench to garage ceiling
These measurements determine your bin layout. You might think you can fit four large bins under the bench, but the miter saw parked there says otherwise.
Standard small parts bins measure about 5-6 inches deep. Medium bins run 10-12 inches. Large bins go 15-18 inches.
Plan your layout before you buy.
Step 3: Choose Your Bin Types
Not all storage bins are created equal. Here’s what I’ve found works best for different jobs:
Small Parts Bins (Divided)
These are lifesavers for screws, nuts, washers, and small electrical connectors. Look for clear plastic with adjustable dividers. The dividers let you customize compartment sizes.
Clear Shoe-Box Style Bins
Perfect for mid-sized items like hand tools, sandpaper packs, tape rolls, and small power tool accessories. They stack well and slide onto shelving easily.
Large Tote Bins
For bulky items like corded tools, extension cords, and spray cans. These usually go under the bench or on lower shelves.
Wall-Mounted Bins
These attach to pegboard or slatwall. Great for frequently used items you want within arm’s reach.
Drawer Bins
If your workbench has drawer space, use shallow divided bins inside the drawers. This keeps small parts organized without stacking.
The universal rule: standardize on one or two brands. Mixing bin brands with different dimensions makes stacking a nightmare.
Step 4: Create Zones on Your Workbench
Your workbench should have defined zones. Here’s the layout I recommend:
Zone 1: Immediate Reach (Top Surface)
Keep only what you use daily. Your most-used screwdrivers, pliers, utility knife, tape measure, and marking tools. Use a small divided bin or a magnetic strip for these.
Zone 2: Eye Level (Wall Above Bench)
Install a pegboard or slatwall here. Hang wall-mounted storage bins for items you access multiple times per project. This is prime real estate, don’t waste it on rarely used stuff.
Zone 3: Overhead (Upper Shelves)
Put seasonal items and bulk supplies here. Paint cans, extra adhesives, rarely used specialty tools. Use clear totes so you can identify contents from below.
Zone 4: Under-Bench Storage
This is where large bins shine. Extension cords, power tools, cleaning supplies, and project-specific items. If you can, use rolling bins on a dolly so you can pull them out easily.
Step 5: Sort Items Into Bins by Use Frequency
This step makes or breaks your organization system.
Daily Use Items
Keep these in open bins or open compartments on the bench surface. No lid. No digging.
You grab and go.
Weekly Use Items
Use lidded clear bins on wall-mounted shelves. You see what’s inside, but the lid keeps dust off.
Monthly Use Items
These go in larger totes under the bench or on upper shelves. Lidded and labeled. You know where they are, but they’re not in your way.
Yearly Use Items
Honest question: do you actually need these? If yes, they go in the hardest-to-reach spots. Label them well so you can find them when that rare project comes up.
Maximizing Vertical Space With Wall-Mounted Storage
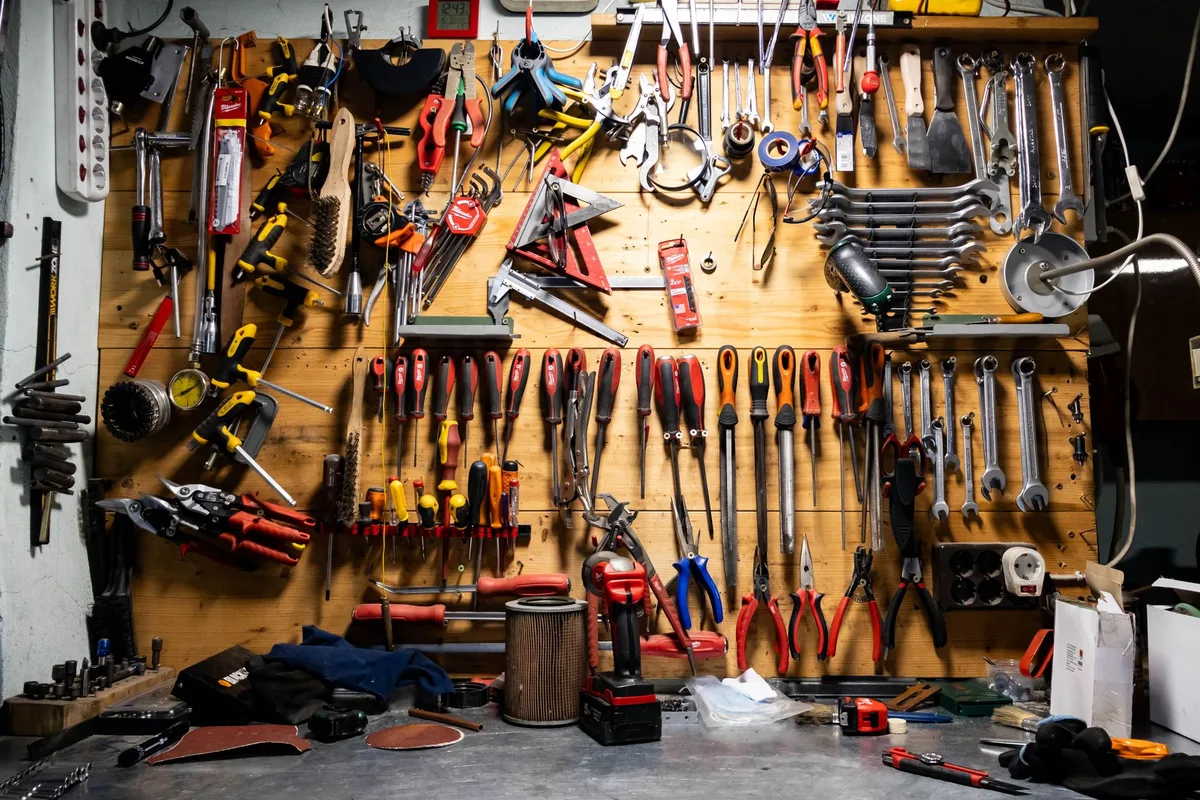
Image source: Pexels / Trudin Photography (Pexels License)
Your workbench surface is finite. Your wall space is not.
Vertical storage is the single biggest upgrade you can make. And wall-mounted storage bins make it easy.
Pegboard Bin Systems
Pegboard is cheap and flexible. Buy pegboard hooks designed for storage bins. Many manufacturers make bins that clip directly onto pegboard.
You can rearrange the layout in minutes.
Slatwall Panels
Slatwall costs more but holds heavier loads. If you’re storing power tools or bulk hardware, slatwall handles the weight better than pegboard.
Magnetic Strips and Bins
Metal tool strips mounted to the wall hold magnetic bins. These work great for small metal items like drill bits, wrenches, and sockets.
French Cleat Systems
If you’re handy with woodworking, a French cleat wall is the ultimate solution. You build custom bins and tool holders that lock into horizontal rails. Expensive?
Yes. Worth it? Absolutely.
For most garages, a combination of pegboard and standard wall shelving gives you the best bang for your buck.
Grouping and Labeling Storage Bins by Category
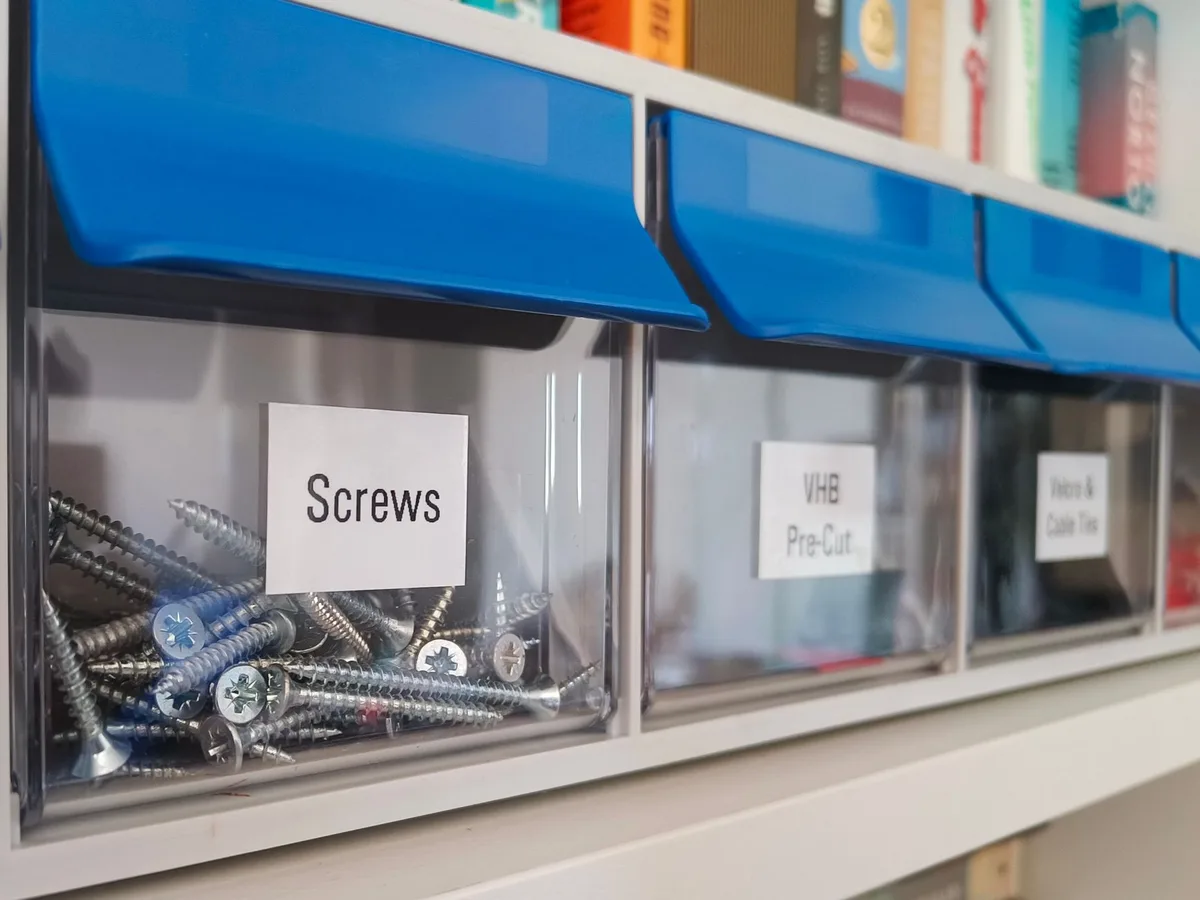
Image source: Pexels / Daniel Rosehill (Pexels License)
Here’s where most people fail. They buy bins, throw stuff in them, and call it organized. Then they can’t find anything because the label says “Hardware” and that covers thirty different fastener types.
Group by Project or Function
Don’t label a bin “Electrical.” That’s too broad. Instead, create specific bins:
- “Wire Connectors and Terminals”
- “Switches and Outlets”
- “Cable Ties and Clips”
- “Electrical Tape and Wire Nuts”
Label Everything Clearly
Use a label maker if you have one. Handwritten labels on painter’s tape work fine too. The important thing is legibility.
Write in large, bold letters.
Label the Front AND Top
Bins on shelves get labels on the front face. But stacked bins need top labels too. When you’re pulling a bin from a stack, you can’t see the front label.
Color Code for Speed
Assign colors to categories. Red bins for electrical. Blue for plumbing.
Yellow for auto. You can buy colored bins or use colored tape strips. When you need a plumbing part, you scan for blue.
No reading required.
Create a Master Inventory List
This sounds overkill, but it saves time. Keep a simple list on your phone or printed and taped inside a cabinet door. List every bin and its general contents.
When you need a specific screw, check the list. Go straight to that bin.
Common Mistakes When Using Storage Bins
I’ve made every mistake in this list. Learn from my failures.
Mistake 1: Buying Too Many Small Bins
You think you need twenty tiny bins for every screw size. Reality: you end up with containers that are either too full to close or half empty. Buy medium bins for fasteners and use small dividers inside.
Mistake 2: Overstacking
Piling bins five high looks organized. Until you need the bottom bin. Then you’re playing Jenga.
Limit stacks to three bins max. Use shelf units to divide vertical space.
Mistake 3: Ignoring Weight Limits
A bin rated for 10 pounds will fail if you load it with 30 pounds of tools. Check weight ratings. Heavy bins go on lower shelves.
Light bins go up top.
Mistake 4: No Dust Protection
Garages are dusty. Open bins collect grit on your tools. Buy lidded bins for anything you don’t use daily.
Your tools will thank you.
Mistake 5: Skipping the Purge
Organizing around clutter just hides the mess. Do a hard purge first. If you can’t remember why you kept that random bracket, toss it.
Maintaining Your Organized Garage Workbench
Organization isn’t a one-and-done project. It’s a habit. Here’s how to keep your bin system working.
The Five-Minute Reset
At the end of every work session, spend five minutes putting tools back in their bins. That’s it. Five minutes prevents the slow slide back into chaos.
Monthly Quick Check
Once a month, scan your bins. Is anything overflowing? Did you buy new tools that need a home?
Adjust your bin assignments before things get out of hand.
Seasonal Deep Clean
Twice a year, pull everything off the bench. Wipe down bins. Replace damaged ones.
Rotate seasonal items. This takes two hours but keeps your system running.
Beware of Bin Creep
You’ll be tempted to buy “just one more bin” for that new tool. Before you do, ask: does it need its own bin, or does it fit in an existing one? Limit your bin count.
More bins don’t automatically mean more organization.
Tools and Items You Need for This Project
You probably have most of these already. Grab them before you start.
- Tape measure
- Label maker or permanent markers and painter’s tape
- Clear plastic storage bins in various sizes
- Wall shelving units (adjustable shelves work best)
- Pegboard or slatwall panels and mounting hardware
- Pegboard hooks and bin brackets
- Small parts organizers with dividers
- Screwdrivers and a drill for mounting
- Trash bags for the purge
Total cost varies. A basic setup with shelving and bins runs $100-$200. A full custom system with slatwall and premium bins hits $500-$800.
Frequently Asked Questions
Should I buy cheap bins or invest in quality ones?
Buy medium quality. Dollar store bins crack and break within months. Premium bins from industrial supply houses last forever but cost triple.
Brands like Sterilite or products available at home centers offer the best balance of durability and price.
How many storage bins do I need for an average garage workbench?
Start with 10-15 bins in mixed sizes. You can always add more. Most people overestimate their needs and end up with empty bins collecting dust.
Do I need to label bins if they’re clear?
Yes. Clear bins show you what’s on top or in front. They don’t show what’s buried at the bottom.
Labels save you from pulling out every bin looking for one item.
Can I use storage bins for power tools?
Yes, but choose sturdy, large totes. Heavy power tools damage flimsy bins. Look for bins with reinforced bottoms and lids that latch securely.
How do I fasten bins to the wall?
Most wall-mounted bin systems use pegboard hooks or slatwall brackets. For a DIY approach, screw a 1×2 wooden cleat to the wall and attach bins with screws through the back.
What’s the best way to organize small screws and fasteners?
Use divided small parts bins. Sort by type (screws, nuts, washers) and then by size. If you have extensive fasteners, consider a dedicated hardware cabinet with pull-out drawers.
The Bottom Line
Organizing a garage workbench with storage bins isn’t complicated. It just requires a system and the discipline to maintain it.
Empty the bench. Sort ruthlessly. Measure your space.
Choose the right bins for each job. Label everything. Stick to the zones.
A well-organized workbench turns your garage from a storage room into a functional workshop. You’ll spend less time searching and more time building. That’s the whole point.
Grab your tape measure, clear that bench, and get started. Your future self will thank you every single time you reach for the right tool on the first try.


Similar Posts



















