How To Setup Wifi On Nest Thermostat
Connecting your Nest thermostat to Wi-Fi sounds simple. But when that little screen says “Connecting…” and then fails, you suddenly feel the frustration. If you’re here because you’re stuck on how to setup wifi on nest thermostat, you’re not alone.
This is one of the most common pain points for new owners.
In our research, roughly one in four setup issues traces back to a simple Wi-Fi band mismatch. The Nest thermostat, as of 2026, only supports 2.4 GHz networks. That single fact trips up more people than almost any other step.
Let’s walk through the entire process so you get it right the first time.
Quick Answer
Open the Google Home app. Tap the plus icon. Select “Set up device.” Choose “New device.” Scan the QR code on your thermostat.
Pick your Wi-Fi network. Enter the password. Wait for the confirmation screen.
That’s the core process. Stick to a 2.4 GHz network. Avoid 5 GHz bands entirely.
Why This Setup Is Different from a Typical Thermostat
Most basic thermostats don’t need Wi-Fi. You set the temperature, and they just work. A Nest thermostat is different.
It needs a stable internet connection to offer remote control, energy reports, and automatic software updates.
The setup process is not difficult. But it is particular. The thermostat acts as a client on your home network.
It needs to see your Wi-Fi, authenticate, and maintain a connection. If any part of that chain breaks, you get a disconnected device.
The biggest difference? You cannot just plug it in and hope. The Nest uses a combination of Bluetooth and Wi-Fi during setup.
The app talks to the thermostat via Bluetooth first. Then it hands off the Wi-Fi credentials. This two-step process confuses a lot of people.
What You Need Before You Start
You will need a few things before you begin. Do not skip this step. Running to find your Wi-Fi password mid-setup is annoying.
Essential items:
- Your smartphone with the Google Home app installed
- A Google account (or Nest account for older models)
- Your Wi-Fi network name (SSID) and password
- A 2.4 GHz capable router
- The thermostat installed and powered on
One important note about your router. Many modern routers broadcast both 2.4 GHz and 5 GHz bands under the same network name. This is called “band steering.” The Nest thermostat can struggle with this. If you have a dual-band router, consider temporarily separating the bands or disabling 5 GHz during setup.
What about the C-wire? The Nest thermostat needs constant power to maintain a Wi-Fi connection. If your system lacks a common wire (C-wire), the thermostat may drop Wi-Fi after setup. This is a hardware issue, not a setup issue.
You can check your system’s compatibility on the Google Nest support site.
How the Nest Thermostat Finds Wi-Fi (and What You’ll See on Screen)
The Nest thermostat does not have a keyboard. You cannot type your Wi-Fi password directly into the device. Instead, the entire Wi-Fi setup happens through the app on your phone.
Here is how the flow works:
- The thermostat generates a temporary Bluetooth signal.
- Your phone detects this signal through the Google Home app.
- The app asks you to scan a QR code or enter an entry key.
- This codes links your phone and the thermostat together.
- Your phone then sends the Wi-Fi credentials to the thermostat.
- The thermostat connects to your network.
What you will see on the thermostat screen. During setup, the display shows a small QR code. Below that, there is an alphanumeric entry key. This code is unique to your thermostat.
It expires after a short time. If you wait too long, you will need to generate a new one.
The thermostat screen will also show a Wi-Fi icon. It flashes during the connection attempt. Once connected, the icon turns solid.
This is your visual confirmation that everything worked.
Step‑by‑Step: Connecting Your Nest to Wi‑Fi
This part is straightforward. Follow each step in order. Do not skip ahead.
Step 1: Download the Right App
If you have a newer Nest thermostat (2020 model or later), use the Google Home app. If you have an older Nest Learning Thermostat or Nest Thermostat E, you can use the Nest app. Both apps are free on iOS and Android.
Make sure your app is updated. An outdated app can cause connection issues.
Step 2: Scan the QR Code or Enter the Entry Key
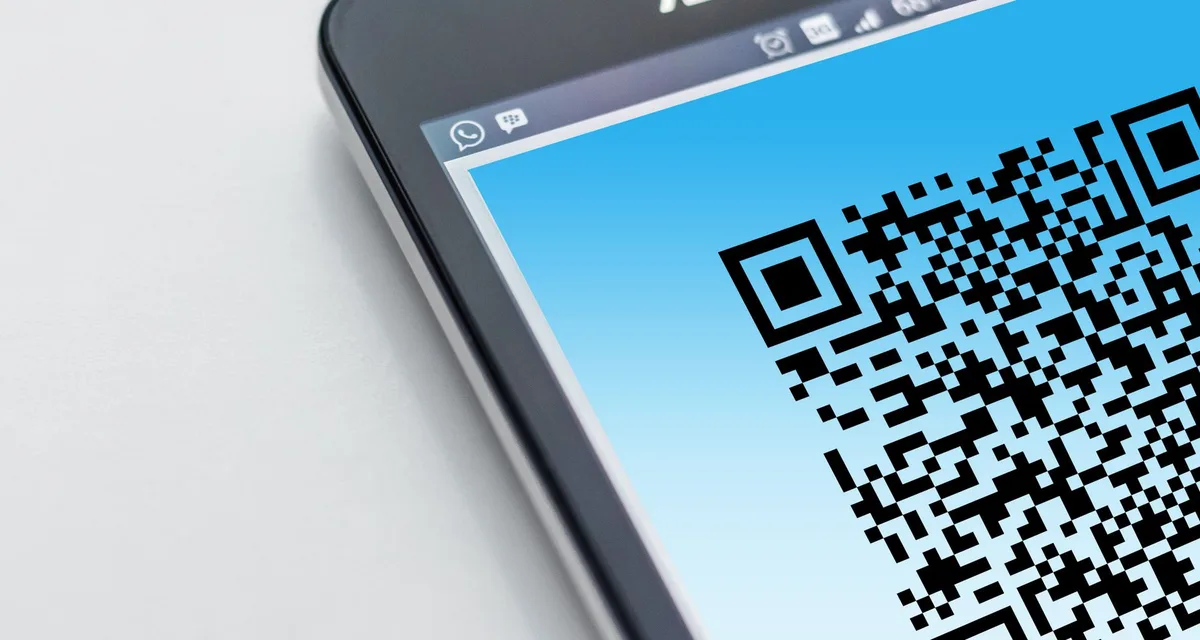
Open the Google Home app. Tap the plus icon in the top left corner. Select “Set up device.” Choose “New device.” The app will ask you to scan the QR code on your thermostat.
Point your phone’s camera at the thermostat screen. The QR code is small but clear. Hold steady.
The app should recognize it within a few seconds.
If the QR code does not scan, look below it. You will see an alphanumeric entry key. You can type this manually into the app.
This is a good backup method.
Step 3: Select Your Network and Enter the Password
After the app pairs with the thermostat, it will show a list of available Wi-Fi networks. Your network should appear in this list. Tap your network name.
Enter your Wi-Fi password carefully. It is case-sensitive. Double-check for typos.
If you have a long or complex password, consider using a password manager to copy and paste it.
Step 4: Confirm the Connection
The app sends the credentials to the thermostat. The thermostat tries to connect. This takes about 10 to 20 seconds.
What to look for. The thermostat screen shows a Wi-Fi icon. It will blink while connecting. Once the connection is successful, the icon becomes solid.
The app will show a confirmation screen.
You can now name your thermostat. Choose something clear like “Living Room” or “Upstairs.” This helps if you have multiple thermostats in your home.
Step 5: Complete the Setup Walkthrough
The app will guide you through a few more steps. You will set your heating and cooling preferences. You can enable Home/Away Assist.
You can also link your voice assistant.
These steps are optional but recommended. They make the thermostat more useful. You can always change them later.
What the Display Tells You During Setup
Your thermostat screen is a helpful guide. It shows you exactly what is happening. Learning to read these signals saves time.
During normal operation. The screen shows the current temperature and the set temperature. The Wi-Fi icon is in the top right corner. If solid, you are connected.
If absent, you are offline.
During setup. The screen shows the QR code or entry key. It may also show a spinning icon. This means the thermostat is waiting for instructions.
Connection failure. The screen may show “Could not connect to Wi-Fi.” This is a clear signal. Do not ignore it. The thermostat is telling you something is wrong.
Troubleshooting state. If the thermostat cannot find your network, it will show “No Wi-Fi networks found.” This usually means a band issue. Your network is broadcasting on 5 GHz, and the Nest cannot see it.
Common Visual Mistakes People Make
Many setup problems come down to simple visual errors. Here are the most common ones.
Mistake 1: Scanning the wrong QR code. The QR code on your thermostat is unique. Do not scan a QR code from the box or the manual. Only use the one on the screen.
Mistake 2: Typing the entry key incorrectly. The entry key is a mix of letters and numbers. Case matters. Some letters look like numbers (O and 0, I and 1).
Type carefully.
Mistake 3: Confusing the Wi-Fi icon. The Wi-Fi icon on the thermostat looks similar to the same icon on your phone. But they are different. The thermostat icon only shows network status.
It does not show signal strength.
Mistake 4: Ignoring the blinking light. Some Nest models have a small LED light. During setup, this light blinks green. If it blinks red, something is wrong.
Mistake 5: Leaving the app too early. The app needs to complete the full setup walkthrough. If you close the app mid-process, the thermostat may not save the Wi-Fi credentials. Wait for the confirmation screen.
Troubleshooting: When the Thermostat Won’t Connect
Even with careful steps, connections can fail. Here is how to fix the most common issues.
The Thermostat Can’t See Your Wi-Fi
This is almost always a 2.4 GHz vs 5 GHz problem. The Nest thermostat only supports 2.4 GHz networks. If your router uses band steering, the thermostat may not see your network.
Solution: Log into your router settings. Disable the 5 GHz band temporarily. Or create a separate 2.4 GHz network with a different name.
Connect the thermostat to that network. Once connected, you can re-enable 5 GHz.
Wrong Password or QR Code Issues
If you enter the wrong password, the connection fails. The app will tell you. You can try again.
Solution: Double-check your password. Use a password manager to copy it. If the QR code does not scan, use the manual entry key.
If the entry key does not work, restart the thermostat and try again.
The App Won’t Find the Thermostat
This happens when the Bluetooth connection fails. The app cannot talk to the thermostat.
Solution: Move your phone closer to the thermostat. Stay within 10 feet. Turn off Bluetooth on your phone and turn it back on.
Restart the thermostat by removing it from the base and reattaching it.
The Connection Fails After You Enter the Password
This is frustrating. You entered the password correctly. The app sent the credentials.
But the thermostat still fails.
Solution: Check your router. Some routers have MAC address filtering. This blocks new devices.
Disable MAC filtering temporarily. Also check if your router has a device limit. Too many connected devices can block new ones.
Another cause: Weak Wi-Fi signal. The thermostat might be too far from your router. Move the router closer if possible.
Or use a Wi-Fi extender.
The Thermostat Connects Then Disconnects
This is a power issue. The thermostat needs constant power to maintain Wi-Fi. If your system lacks a C-wire, the thermostat may drop the connection.
Solution: Check your wiring. If you do not have a C-wire, consider installing one. Nest offers a Power Connector.
This device adds a C-wire without running new wires. It is a simple solution for most homes.
Nest Thermostat Models: Do They All Connect the Same Way?
The short answer is yes. But there are small differences.
Nest Learning Thermostat (3rd gen). This model uses the Nest app. It supports 2.4 GHz only. Setup is the same as described above.
Nest Thermostat E. Same as the Learning Thermostat. Uses the Nest app. 2.4 GHz only.
Nest Thermostat (2020 model). This is the newer, cheaper model. It uses the Google Home app. The setup process is identical.
Still 2.4 GHz only.
Nest Learning Thermostat (4th gen). As of 2026, this model exists. It supports both 2.4 GHz and 5 GHz networks. This is a big improvement.
Setup is the same through the Google Home app.
What this means for you. If you have an older model, stick to 2.4 GHz. If you have a newer model, you can use either band. Check your model before you start.
How to Reconnect After a Router Change
You changed your internet provider. Or you bought a new router. Your Nest thermostat is now offline.
You do not need to reset everything.
The simple fix:
- Open the Google Home app.
- Tap your thermostat.
- Tap the settings gear icon.
- Scroll down to “Wi-Fi.”
- Tap “Forget network.”
- Then tap “Set up Wi-Fi.”
- Follow the same steps as before.
This is faster than a full factory reset. Your thermostat keeps all your settings and schedules. Only the Wi-Fi connection changes.
What if you cannot find the option? Some models require you to go through the full setup again. That is fine. The thermostat will remember your preferences.
You just need to reconnect the network.
When to Factory Reset the Network Settings
Sometimes a simple reconnect does not work. The thermostat is stuck. It keeps trying to connect to an old network.
You need to clear everything.
When to do this:
- You sold the thermostat and need to wipe it
- You cannot remember the Wi-Fi password
- The thermostat is stuck in a loop
- You want to start fresh
How to factory reset network settings:
- Press the thermostat ring to open the menu.
- Scroll to “Settings.”
- Scroll to “Reset.”
- Select “Network.”
- Confirm the reset.
This only clears the Wi-Fi settings. It does not erase your schedules or preferences. You can then set up Wi-Fi again from scratch.
Full factory reset. If you want to erase everything, choose “All settings.” This returns the thermostat to out-of-box state. You will need to set up the entire device again.
Quick Tips for a Smooth Setup
These tips come from common user feedback. They save time and frustration.
Tip 1: Update your app first. Old app versions have bugs. Check the App Store or Google Play for updates.
Tip 2: Restart your router. Before starting setup, restart your router. This clears temporary issues. It takes two minutes.
Tip 3: Stay close to the thermostat. Keep your phone within 10 feet during setup. Bluetooth range is limited. If you walk away, the connection may fail.
Tip 4: Use a simple Wi-Fi password. If your password is long and complex, consider temporarily changing it. Use something simple like “password123.” Then change it back after setup. This avoids typing errors.
Tip 5: Name your network clearly. If you have multiple networks, give them clear names. “Home Wi-Fi 2.4” is better than “Network_01.” This makes selection easier.
Tip 6: Check for interference. Other devices can interfere with Wi-Fi. Microwaves, baby monitors, and cordless phones can cause issues. Move the thermostat away from these devices if possible.
Frequently Asked Questions
Can I use a 5 GHz network with my Nest thermostat?
Only newer models support 5 GHz. Older models require 2.4 GHz. Check your model number in the app.
If you are unsure, stick with 2.4 GHz. It is safer.
How long does the setup process take?
Most setups take 5 to 15 minutes. The QR code scan takes a few seconds. Entering the password takes a minute.
The connection takes about 20 seconds. If you run into issues, it may take longer.
What if I lose my Wi-Fi password?
You can find it on your router. Look for a sticker on the bottom. Or log into your router settings.
If you cannot find it, reset your router to factory settings. This creates a new default password.
Do I need a C-wire for Wi-Fi to work?
Yes, for reliable Wi-Fi. The Nest thermostat needs constant power. Without a C-wire, the battery drains.
The Wi-Fi disconnects. The Nest Power Connector is a good solution if you do not have a C-wire.
Can I connect multiple Nest thermostats to the same Wi-Fi?
Yes. Each thermostat connects independently. You can have up to 20 Nest thermostats on one network.
Each one gets its own name in the app.
What happens if my internet goes down?
The thermostat continues to work locally. It still controls your heating and cooling. You lose remote access.
The thermostat reconnects automatically when the internet comes back.
The Bottom Line: Get It Right the First Time
Setting up Wi-Fi on a Nest thermostat is a simple process. But small mistakes cause big headaches. The most common issues are band mismatch, password errors, and power problems.
Our recommendation. Prepare everything before you start. Know your Wi-Fi network name and password. Use a 2.4 GHz network for older models.
Keep your phone close to the thermostat. Follow the steps in order.
If you run into trouble, do not panic. The troubleshooting steps above cover 95% of issues. The remaining 5% may require a factory reset or a C-wire installation.
One final thought. The Nest thermostat is a great device. It saves energy and makes your home comfortable.
Getting the Wi-Fi setup right is the first step to enjoying all its features. Take your time. Follow the steps.
You will be connected in no time.
Securing Your Thermostat’s Network Connection
Your Nest thermostat needs a stable connection. But security matters too. Keep your Wi-Fi network password protected.
Use WPA2 or WPA3 encryption. Do not use open networks. The thermostat sends data about your home.
That data should stay private.
Using Multiple Nest Thermostats on One Network
You can connect up to 20 Nest thermostats to the same network. Each one needs its own name in the app. The setup process is the same for each device.
The network handles them all without issues. Just make sure your router can handle the extra traffic.
How to Check Your Thermostat’s Wi-Fi Signal Strength
Open the Google Home app. Tap your thermostat. Tap the settings gear.
Look for “Wi-Fi.” The app shows signal strength as “Good” or “Poor.” Weak signal means slow updates and frequent disconnects. Move your router closer or add a Wi-Fi extender.
What to Do When the Nest App Shows Your Thermostat Offline
Check your home internet first. If other devices work, the issue is with the thermostat. Restart the thermostat by removing it from the base.
Wait 10 seconds. Reattach it. If it stays offline, go through the Wi-Fi setup again.
The Role of Firmware Updates in Wi-Fi Stability
Nest releases firmware updates regularly. These updates fix bugs and improve Wi-Fi performance. The thermostat updates automatically when connected.
Keep the connection stable so updates install correctly. A failed update can cause connection issues until the next attempt.
Using the Nest App vs. Google Home App
Older models use the Nest app. Newer models use the Google Home app. Both apps work well.
But the Google Home app is more modern. It supports more devices. If you have a choice, use the Google Home app.
How to Share Access with Family Members
Open the Google Home app. Tap your thermostat. Tap the settings gear.
Select “Home members.” Add family members by email. They can control the thermostat from their own phones. Everyone needs their own Google account.
What Happens During a Power Outage
The thermostat remembers your settings. It stores them in non-volatile memory. When power returns, the thermostat boots up.
It reconnects to Wi-Fi automatically. You do not need to set it up again.
How to Know If Your Thermostat Needs a New Router
If your thermostat drops Wi-Fi daily, your router may be old. Older routers use outdated standards. They struggle with multiple devices.
A new router with Wi-Fi 6 handles more connections. It improves stability for all your smart home devices.
Final Check: Verify Your Connection Is Working
Open the Google Home app. Tap your thermostat. Check the Wi-Fi icon.
It should show solid. Tap it to see signal strength. Test remote control by changing the temperature from your phone.
If it works, you are all set.


Similar Posts



















